How to Use Power Data Recovery to Recover Lost Data
- How to Prevent Lost Data from Being Overwritten by New Data
- How to Use MiniTool Power Data Recovery
- Load Scan Result
Content:
How to Prevent Lost Data from Being Overwritten by New Data
Once lost files are overwritten, it will be impossible to recover them even if users employ hardware technology. To protect lost files from being overwritten, we should pay attention to the following aspects:
1.Stop writing any data to computer once we are aware of data loss.
2.If data loss appears on system partition, shut down computer, dismount the hard disk, plug it to another computer, and do data recovery on this computer. That is because temporary files or Windows/software updates may be generated when we are running a OS.
3.Power Data Recovery had better not be downloaded and installed to the partition where data loss emerges.
How to Use MiniTool Power Data Recovery
Step 1: Launch the Program and Choose an Appropriate Functional Module
Like using any other third party program, users need to download and install the free data recovery software to computer at first. Then, launch the program to get its main window below:
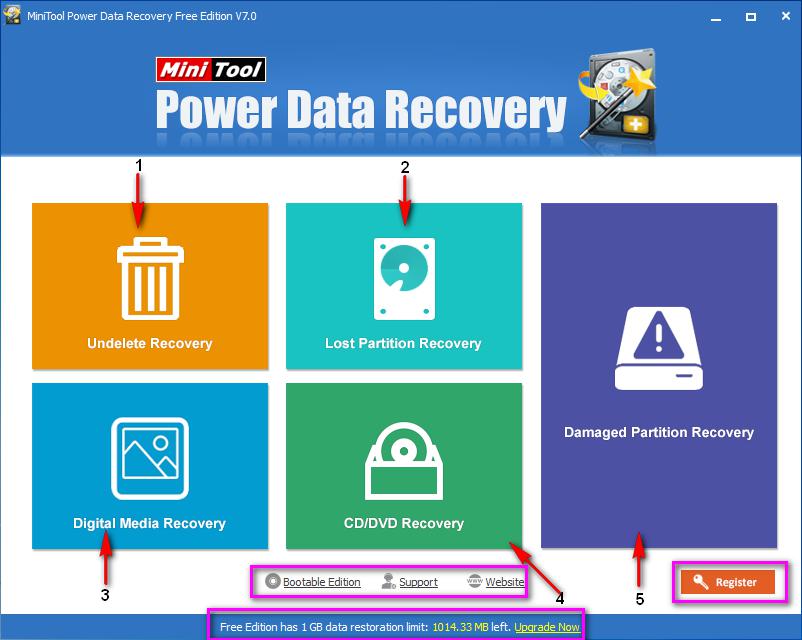
In the middle there are 5 functional modules in total, namely “Undelete Recovery”, “Lost Partition Recovery”, “Digital Media Recovery”, “CD/DVD Recovery”, and “Damaged Partition Recovery”. Different modules aim at restoring lost data under different situations from different storage devices:
1.“Undelete Recovery”: specially recover deleted files and folders no matter it is deleted by users themselves or viruses.
2.“Lost Partition Recovery”: recover data from the partition which is deleted by accident or lost due to installing Windows OS.
3.“Digital Media Recovery”: if you want to recover digital media files like photos, audio files, and video files, choosing this module is a wise choice, for it will filter all non-media files.
4.“CD/DVD Recovery”: recover deleted files on CD/DVD or recover files from formatted and erased CD/DVD.
5.“Damaged Partition Recovery”: this is the most powerful module in Power Data Recovery, for it can help recover data from existing partition for any condition. For example, it is capable of retrieving data from formatted partition, raw partition, and partition Windows asks to format it.
The former 4 modules focus on hard disk and removable devices while the last one targets optical disc only. Users need to choose the most appropriate module according to actual demands.
At the bottom of the main interface you can click 5 places to get help:
Bootable Edition: this guides you to the website where MiniTool Power Data Recovery Boot Disk can be downloaded or bought. Of course, you will be shown how to make such a bootable disk via Bootable Media Builder.
Support: click here and the website showing Power Data Recovery FAQ, case studies, and so on will pup up.
Website: tap on this functional button and you can go to the official website of Power Data Recovery.
Register: click this functional button to get the window below (if you have registered, there is no such option):
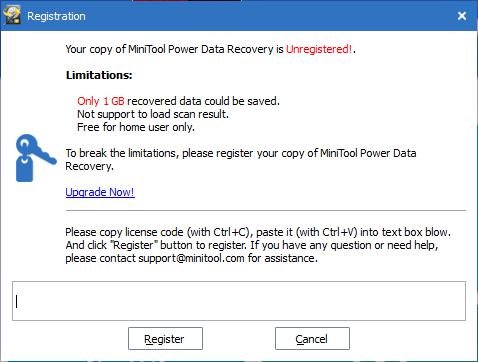
Here limitations of the free edition are shown, and you are able to register Power Data Recovery directly if you have a license key.
Upgrade Free Edition: if you are using the free edition, this message will appear. It shows recovery limit of the free edition as well as the left file capacity users can recover. In addition, if you want to upgrade the program, they can click “Upgrade Now” button to get the website where information about MiniTool Power Data Recovery Personal License is introduced.
Step 2: Select the Target Device to Scan
After choosing a module, users need to select and scan the partition or disk where data loss appears. Take “Damaged Partition Recovery” module for example.
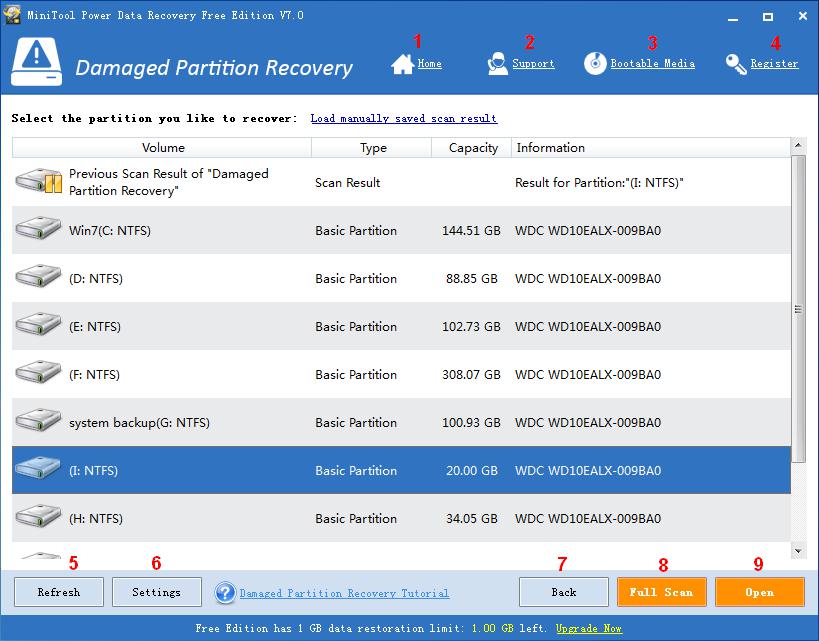
All partitions are listed here, and users need to select the one which is suffering data loss, and then scan the selected device. There are 5 functional buttons available and 1 edition explanation at the bottom of the damaged partition recovery interface:
1.Home: click this button and we can go back to the main interface of Power Data Recovery at any time.
2.Support: click here and the website showing Power Data Recovery FAQ, case studies, and so on will pup up.
3.Bootable Media: the website introducing MiniTool Power Data Recovery Boot Disk will emerge.
4.Register: Register Power Data Recovery.
5.Refresh: if you haven’t seen the needed device in this interface, please click “Refresh” button to refresh devices. When you plug a new device, clicking this button will make the device appear in the partition list.
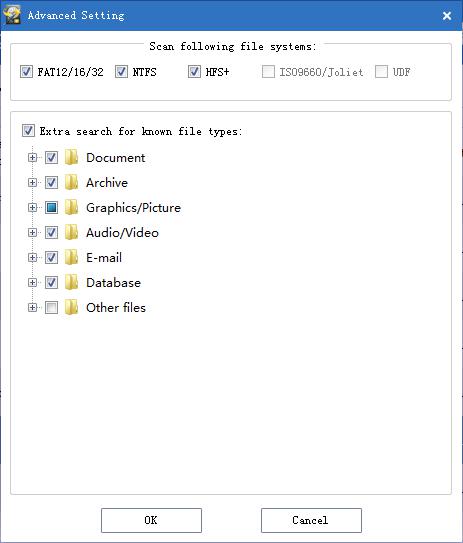
6.Settings: with this feature, users can make the program scan needed files only by file system and file types. For example, if we just want to recover pictures or photos, we can check the option “Graphics/Pictures”.
7.Back: by clicking this button, we will go back to the main interface where 5 functional modules are shown.
8.Full Scan: if users apply this feature, Power Data Recovery will scan the entire device sector by sector to furthest find desired data, and it will take more time.

1). Total Files Found: there is a dynamic value showing how many files have been found.
2). Remaining Time: there is a changeable time showing how long the scanning will last.
3). Progress Bar: it tells us how much the scanning is completed.
4). Information for files and file system: this shows file system of the device, file records found, and so forth.
5). Cancel: by clicking this button you can end the scanning at any time.
After the full scan is finished without cancel, our program will tell you how many partitions are found in the selected device.
9.Open: it helps quickly scan and open the selected device. Compared with “Full Scan”, it saves a lot of time but may not find your needed files or recovered files cannot be opened correctly. First of all, you can try using this feature to see whether desired files are found and correct. If not, go back to this interface and choose “Full Scan” to make a deep scanning.
Step 3: Preview and Recover Needed Files
After successful scan, all found files will be shown:
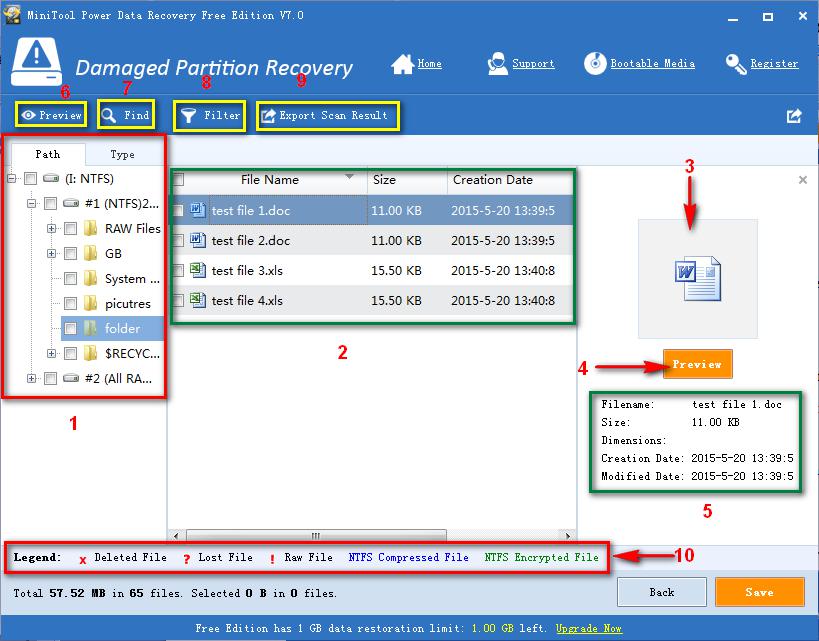
And users need to look for desired files from all these results. However, if you want to find needed files quickly, it is very necessary to know the layout of scanning results.
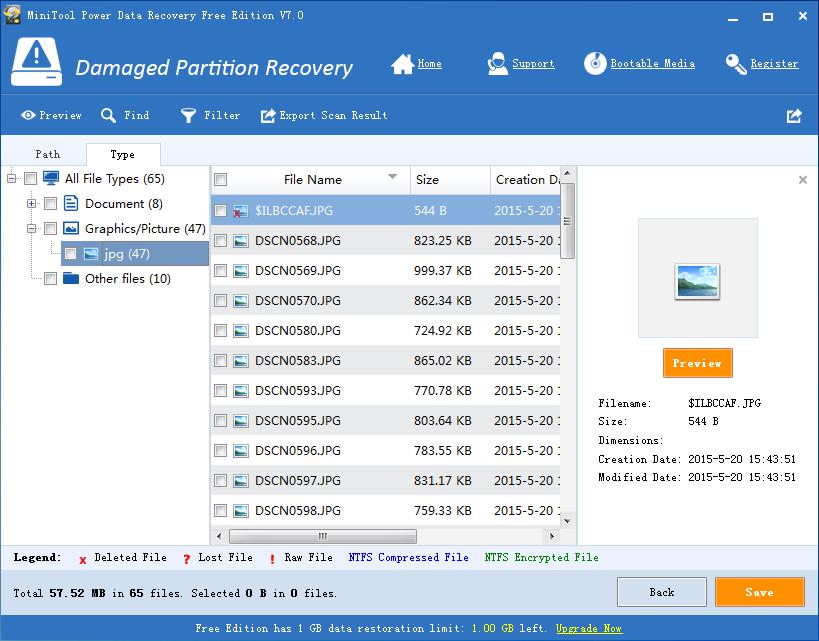
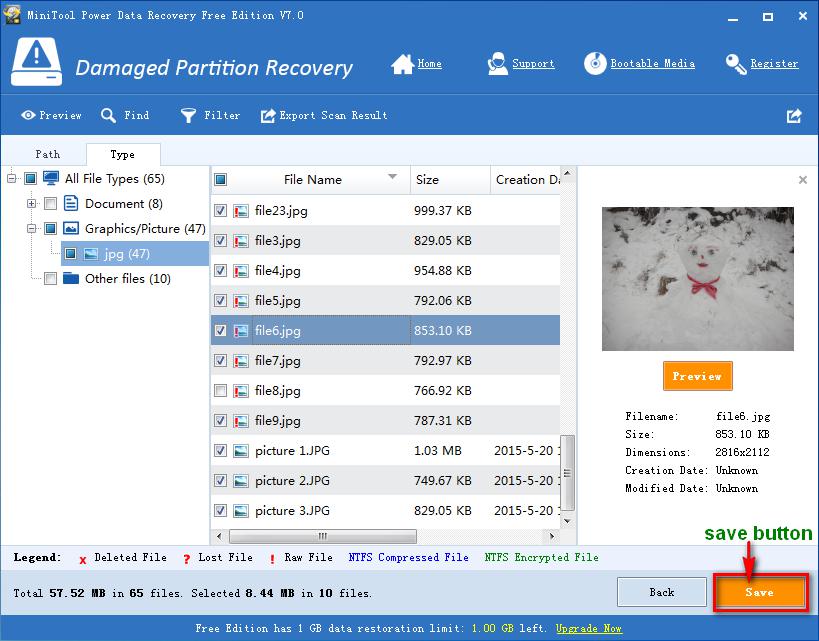
1.Save Path: it shows save path for all found files and folders, and users can find needed files quickly if they know where the lost files are stored. In addition, all found files are classified by type, which makes it easier to find desired files when users do not know where the lost files are saved but know file type. For example, as long as we select jpg, all photos with jpg format will be shown in the middle:
2.File List: after we select a directory in Path list, all files under this directory will emerge in the middle of the interface, with file name, creating date, modification date, etc.
3.Thumbnail for the selected file: as long as we select a file in the middle, there will be a thumbnail at the right side.
4.Preview: it allows users to preview some types of files, like photos.
5.Attributes for the selected file: apart from thumbnail, attributes such as file name and file size for the selected file will emerge on the right, too.
Moreover, there are some other useful features on the top:
6.Preview: the same as 4.
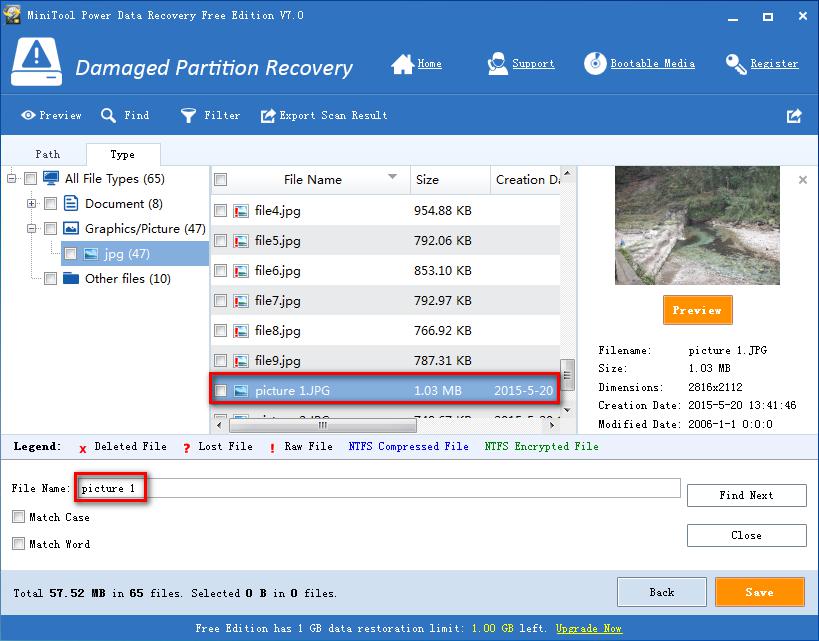
7.Find File: this feature makes it possible to find a specified file directly as long as users remember the file name. For example, if we know the lost file is named with picture 1, we can type picture 1 and then click “Find Next” to locate the file directly:
8.Advanced Filter: filter needless data by file name, file size, creating time, and so on.
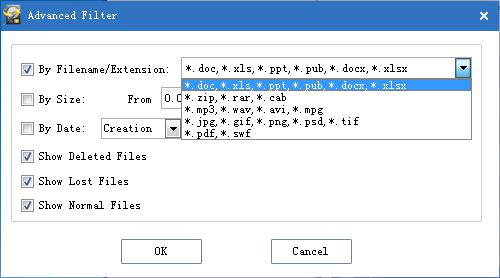
This feature is very useful when the name of found files has been changed (if the device’s file system has been damaged or file system cannot locate files, all files will be without correct file name). For instance, if we only want to recover word documents, we can choose “*.doc, *.xls, *ppt” to filter out *.zip, *.wav, *.jpg, and other types of files.
9.Export Scan Result: after scan, we can export all scanning results to a specified place, which makes it possible to load previous results without rescanning.
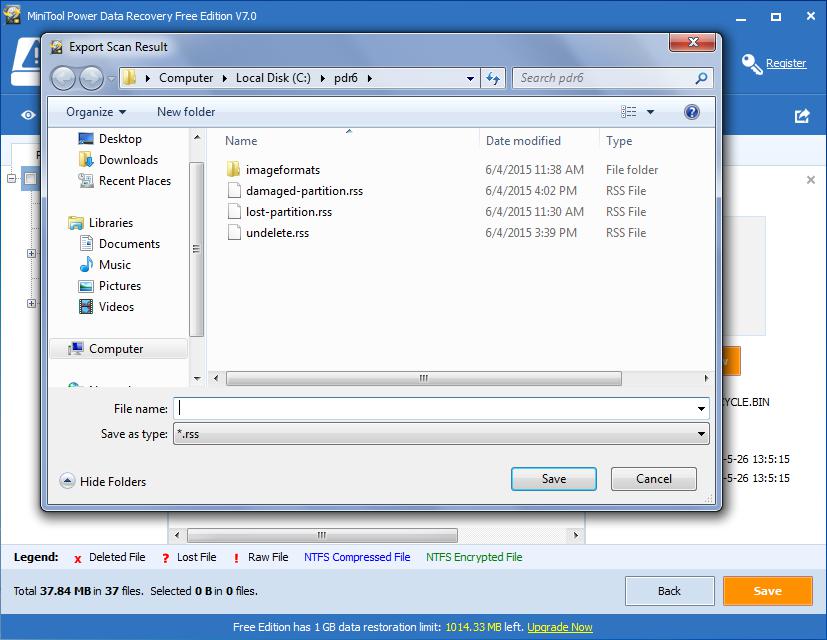
Note: there is no such option under the “CD/DVD Recovery” module. In addition, please do not export results to the location where data loss appears, because it may overwrite lost data.
According to all these features users can find desired files with ease. Once files which need recovering are found, please check and then save them to a specified location by clicking “Save” button which is at the lower right corner:
At last, specify a location to save all recovered files and click “OK”.
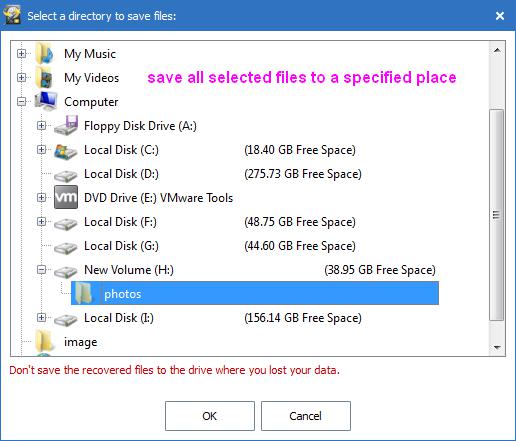
Tip: do not save recovered data to the device where data loss appears, for it may overwrite lost data.
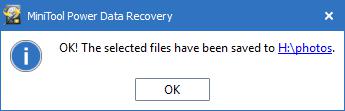
Once the following message appears, we succeed in recovering lost files:
Load Scan Result
MiniTool Power Data Recovery provides 2 options to load previous scanning results if you have used Power Data Recovery to scan a device:1.Load manually saved scan result: we have said we can export scan result to a specified place. If we have made such an export, now we are able to load saved results by clicking this feature.
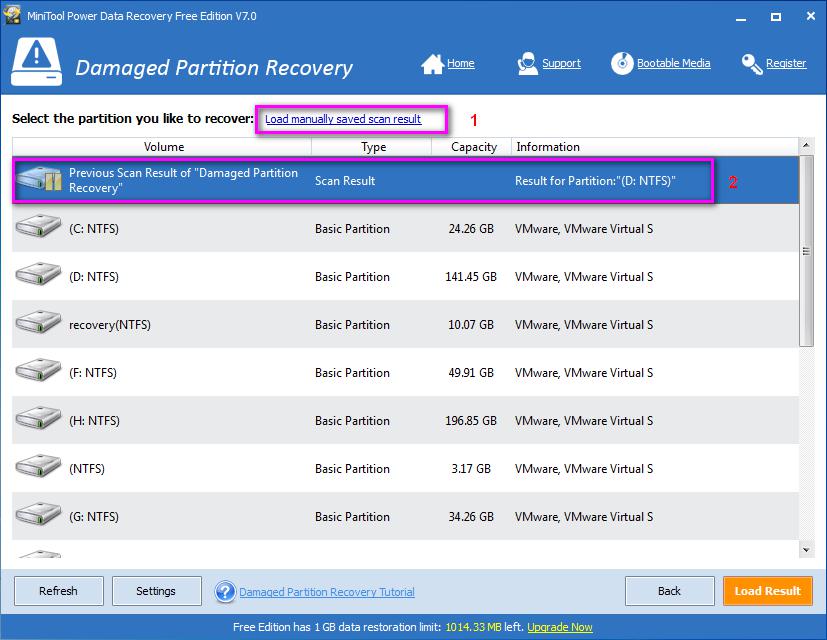
2.“Previous Scan Result of…”: it saves the latest scanning results. For example, if we scan partition D last time, scanning results for partition D can be loaded automatically as long as we click “Load Result” button at the right bottom.
Now users would know how to recover lost data by using MiniTool Power Data Recovery.