Problem: Windows 10 Won’t Recognize CD Drive
CD (full name Compact Disc) is an optical medium for storing digital data, mainly music, software, and other types of data. It is divided into several types, including CD-ROM, CD-R, and CD-RW, according to the number of times it can be erased and rewritten. Common file systems for CDs, such as ISO 9660, UDF, etc., have strong compatibility with Windows systems, so you can connect CDs to Windows computers to seamlessly access and manage files.
However, for various reasons, Windows 10 computer won’t recognize CD drive correctly. This manifests in various situations, such as:
- The CD drive is not visible in File Explorer, Device Manager, or Disk Management.
- The CD disappears when trying to access it, or an error message such as asking you to reinsert the disc appears.
- The optical drive keeps trying to read the disc or the disc is repeatedly connected and disconnected from your computer.
Why does this problem occur?
Part 1. Why CD Drive Won’t Recognized on Windows 10
There are several reasons why your computer does not recognize the CD drive, ranging from simple connection issues to registry errors:
- The optical drive is not connected properly to the computer, which may be caused by improper insertion of the CD, a damaged cable, or a faulty computer interface.
- The optical drive is damaged, such as the CD-ROM tray showing obvious signs of physical damage or making unusual noises when connected to the computer. Or, there is a compatibility problem between the optical drive and the computer.
- The CD driver is incorrect or damaged, especially if a yellow exclamation point or other error message appears next to the disc in Device Manager.
- The file system on the CD is damaged or the file system is incompatible with the current Windows operating system.
- The disc has scratches, stains, or other physical damage.
- Some keys or values in the computer registry conflict with the CD drive.
- …

Part 2. Universal Solutions for Displaying the CD Disc
Now that you know the common reasons why your CD drive won’t show up in Windows 10, you can try the following methods to make the CD visible so you can access and use your files.
Way 1. Check Connection Issues
When encountering disk or CD disc display problems, you should first eliminate connection problems. Here are some basic troubleshooting steps.
Check if the CD shows up in the BIOS:
- Boot your computer, and during the computer startup process, press the designated BIOS entry key, such as Del, F2, F10, Esc, etc., depending on the computer brand to enter BIOS.
- Use the arrow keys on your keyboard to navigate to the storage or device related tab.
- Check whether your CD drive is displayed in the device list. If yes, it may indicate that the problem is related to the Windows system, the disc driver, the BIOS settings, and so on. If the CD is not displayed in BIOS, you should check the hardware failures.
Check for hardware failures:
- Check the optical drive for obvious damage. If so, try a different optical drive to see if the CD can be recognized.
- Make sure the CD has no obvious scratches or other physical damage. If so, you may need to send it to a repair center to repair it. Additionally, if the disc is stained, try cleaning it with a special disc cleaner or a soft cloth.
- Change a computer. Insert the disc into another computer and see if the disc can be recognized. If it does, the problem is probably with the original computer and not the disc itself.
If the problem “Windows 10 won’t recognize CD drive” is with the hardware, you may need to repair the disc. In contrast, if the problem is software-related, try using the following methods to make the CD display.
Way 2. Update/Reinstall the Disc Driver
Updating or reinstalling the disc driver is a basic troubleshooting approach, which can fix incompatibility problems between the disc and your computer. Now, follow the steps below to update/reinstall the driver.
Update the driver:
Step 1. Right-click the Start button from the taskbar, and choose Device Manager. Also, you can use other ways like the search box or the Run command line to open Device Manager.
Step 2. Expand the DVD/CD-ROM drives category by clicking the arrow symbol on the left.
Step 3. Find the target CD drive according to the device name, right-click on it, and choose Update driver.

Step 4. You will be prompted to let Windows search for the appropriate driver or use the driver you downloaded. Just choose the one that suits your case and complete the update process.
Reinstall the driver:
Step 1. Open Device Manager, and expand the DVD/CD-ROM drives section.
Step 2. Right-click the target CD and choose Uninstall device.
Step 3. When prompted to confirm that you want to remove the device, click OK.
Step 4. Once it’s done, restart your computer, and the correct driver will be automatically installed.
Way 3. Reinstall IDE ATA/ATAPI Drivers
In addition to the disc driver, it is necessary to remove and reinstall the IDE ATA/ATAPI drivers.
- Open Device Manager, and click View > Show hidden devices.
- Expand the IDE ATA/ATAPI category.
- If your computer uses the older PATA interface, then ATA Channel 0 and ATA Channel 1 may appear. If your computer uses the modern SATA interface, you may see SATA or IDE related options. Right-click each of them and choose Uninstall device.
- Reboot your computer and check if the CD is recognized and accessible.
Way 4. Modify the Registry
UpperFilters and LowerFilters are two registry entries in Windows computers that are mainly used to process information before or after it reaches the hard disk or CD-ROM drive. If they are corrupted, Windows may not recognize your CD. This is especially true if the current computer has never recognized the CD. Follow the instructions below to modify the registry.
Step 1. Press the Windows + R key combination on your keyboard to open Run.
Step 2. Type regedit in the text box and press Enter. When prompted by UAC, select Yes to continue.
Step 3. In the top address bar, copy and paste the following location and press Enter:
Computer\HKEY_LOCAL_MACHINE\SYSTEM\CurrentControlSet\Control\Class\{4d36e965-e325-11ce-bfc1-08002be10318}
Step 4. In the right panel, right-click the UpperFilters string value and choose Delete.

Step 5. Right-click the LowerFilters string value and choose Delete.
Step 6. Exit Registry Editor, and restart the computer to check if the problem is resolved.
Way 5. Create a Registry Subkey
The EnumDevice1 registry key is used to list all connected devices on the computer. Therefore, creating and enabling this registry key may help troubleshoot device recognition issues. Follow the steps below to create this key.
Step 1. Open Registry Editor.
Step 2. Navigate to this location:
Computer\HKEY_LOCAL_MACHINE\SYSTEM\CurrentControlSet\Services\atapi
Step 3. In the right panel, right-click atapi and choose New > Key. Then type Controller0 and press Enter.
Step 4. Right-click Controller0 and choose New > DWORD (32-bit) Value. Next, type EnumDevice1 and press Enter.
Step 5. Double-click EnumDevice1. In the new window, type 1 in the Value data box, and then hit OK.
Step 6. Restart the computer and verify whether the CD can be detected.
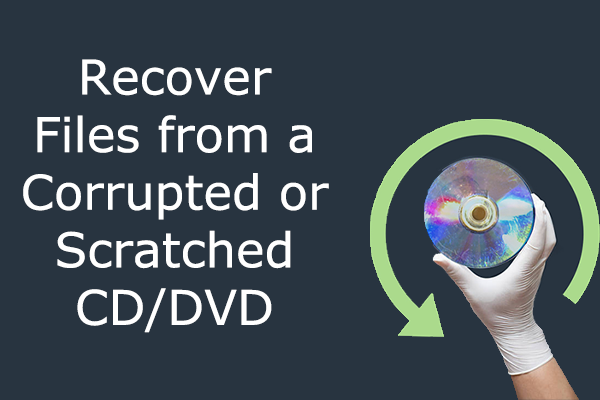
Part 3. Recover Files From Problematic CD Drive
If the above methods do not succeed in making your CD recognized and read normally in File Explorer or Disk Management, then your data may not be accessible. In this case, how to regain access to your files on the CD drive? You can use MiniTool Power Data Recovery, the best free CD/DVD data recovery software, to recover data. Whether you want to retrieve inaccessible data on CD-R, CD-ROM, or existing or deleted files on CD-RW, this free data recovery tool can help you.
MiniTool Power Data Recovery is perfectly compatible with different types of CDs, including CD-R, CD-RW, and CD-ROM. Using advanced algorithms, the software is able to quickly scan CDs and restore all kinds of files, such as music, software, photos, videos, documents, etc. from CDs and other types of file storage media.
In addition, it is designed with a read-only function to ensure that no edits are made to the original data during the secure data recovery process, ensuring the integrity and security of your files. Now, download MiniTool Power Data Recovery Free and install it on your computer to recover 1 GB of files for free.
MiniTool Power Data Recovery FreeClick to Download100%Clean & Safe
Step 1. Run MiniTool Power Data Recovery to enter its main interface.
Step 2. When you see the following window, go to the Devices tab where all discs and disks connected to your computer are displayed. Find the CD drive from which you need to recover files, move the mouse cursor to it, and click the Scan button to start scanning.

Step 3. After the scan is completed, you will have two options to browse the found files and locate the needed ones.
- Path: This is where the detected files are displayed by default. Under this tab, your files are categorized by original folder structure if the file structure is not damaged. You can expand each folder under this section to find the needed files or entire folders. Tick the needed items when you locate them to avoid needing to browse the files again later.
- Type: In this section, the found files are classified by file type and specific file format. If you need to recover certain types of files, this tab may be of great help. Go to this tab, and expand All File Types followed by certain file types and file formats to locate the desired items.

The Filter and Search features provide you with more precise file filtering. The former allows you to set multiple filter conditions, including file type, file modification date, file size, and file category, to reduce the file results. The latter allows you to perform precise searches using partial or complete file names.
Make use of these features to narrow down the file list and save time.

Step 4. Double-click on each target file to preview it for confirmation. Most types of files can be previewed without restriction.
Step 5. Make sure you have ticked all the files you want to recover, and then click the Save button in the lower right corner. When you are asked to select a directory to store the recovered files, just do as it told and click OK.

Once the 1 GB of free file recovery capacity is used up, the remaining files (if any) will require you to upgrade the software to continue recovering them.
This is all the information about how to recover files from a problematic CD drive. If the CD drive cannot be repaired, you may consider purchasing a new one to store files.
Part 4. Useful Tips to Protect CD Drive
In this part, we will introduce some common and easy-to-follow CD protection tips to safeguard your CD drive against damage.
- Purchase a special CD case to store CDs to prevent dust on the drive or scratches from sharp objects.
- When handling a CD, avoid touching the surface of it with your fingers. You can use a clean and soft cloth to separate it, or just touch the edge of the CD.
- Do not place CDs in a hot or humid environment.
- Do not use a damaged optical drive so as to reduce the risk of disc damage.
- Try to reduce the frequency of inserting and removing the disc from the optical drive or computer to avoid scratches or file system damage.
- When buying a new CD, try to choose famous brands that usually have higher quality and better data reading and writing performance.
Final Thoughts
Why Windows 10 won’t recognize CD drive and how to fix it? The detailed information has been explained above. Also, the exact steps to recover files from a problematic CD drive have been described. It is believed that you can make your CD drive re-recognized or at least rescue your files after applying the ways above.
Should you encounter any issues or have any questions about MiniTool Power Data Recovery, please do not hesitate to send an email to the technique support team via [email protected].
About The Author

Position: Columnist
Shirley holds a bachelor’s degree in English and has been an editor at the MiniTool Team for many years. She specializes in IT-related content, with a focus on data recovery, file backup, disk management, and other technical topics. She is committed to delivering clear, accurate, and practical solutions to help users resolve common computer issues.
User Comments :