If you deleted videos from a USB drive and want to get them back, you are not alone. Here is a user experiencing the same problem:
“Can I bring back my videos from my USB flash disk? So, I deleted all videos from this one folder in my USB like 6 months ago. The same folder is there, but empty. Is there a way to restore the files? Do I need special software for this, or is there a way to recover them without installing anything?”reddit.com
Many users think the files deleted from a USB drive are gone forever, but this is not actually true. What happens after you delete a file from a USB drive? Keep reading to get more information.
Where Do Deleted USB Files Go
When you delete a file from your USB drive:
- It does not go to the Recycle Bin (Windows) or Trash (Mac).
- The operating system removes the file’s entry from the file system’s index, but the actual data remains on the USB drive.
- The original disk space where the deleted file was stored will be marked as free. New files you save to the USB can overwrite that free space, making deleted file recovery harder or impossible.
- Special case – USB SSD. For external SSDs connected via USB, if TRIM is enabled, deleted files may be permanently erased, making recovery much more difficult or even impossible.
After understanding where deleted files on a USB drive go, let’s see how to recover deleted videos from a USB drive on Windows and Mac.

How to Recover Deleted Videos From a USB Drive on Windows
USB drive video recovery is possible using simple ways, such as Ctrl + Z, checking backups, or using data recovery software. Let’s check them one by one.
Method 1. Use Ctrl + Z (Undo Recent Deletion)
The Ctrl + Z keyboard shortcut allows you to quickly undo recent deletions on Windows. This feature is useful for restoring files if the deletion just happened.
So, once you notice that your videos have been deleted, navigate to the same location and press Ctrl + Z to restore them.
Note that the Ctrl + Z shortcut has these limitations:
- It works only immediately after file deletion. If any other actions are performed, it may no longer work.
- It cannot recover files after restarting your computer or ejecting the USB drive.
If your videos are not restored after pressing Ctrl + Z, the undo period may have passed. In that case, try the next method.
Method 2. Check Backups
Restoring deleted videos from a backup is the most reliable way.
Whether you previously copied your files to another USB drive, your computer, or cloud services such as OneDrive, Google Drive, or Dropbox, you can easily restore them.
Simply copy the files back to your USB drive or download them from the cloud.
What if you do not have a backup? In this case, you need to use professional and free data recovery software.
Method 3. Use MiniTool Power Data Recovery
MiniTool Power Data Recovery is the most recommended tool to recover deleted videos from a flash drive on Windows.
Here is an overview of its main features and advantages:
- Recovers deleted or lost files from USB flash drives, hard drives, SSDs, CDs/DVDs, and other storage devices.
- Supports multiple file types, including videos, documents, photos, archives, and more.
- Works great for accidental deletion, disk formatting, file system errors, etc.
- Allows preview of various types of files, including videos, before recovery.
- Supports recovering 1 GB of files for free.
- Offers a clear and intuitive interface.
As you can see, this MiniTool file restore tool can help undelete videos from a flash drive effectively.
Now, download the software and follow the instructions below to scan your USB drive, preview the videos, and save them.
MiniTool Power Data Recovery FreeClick to Download100%Clean & Safe
Step 1. Scan Your USB Drive.
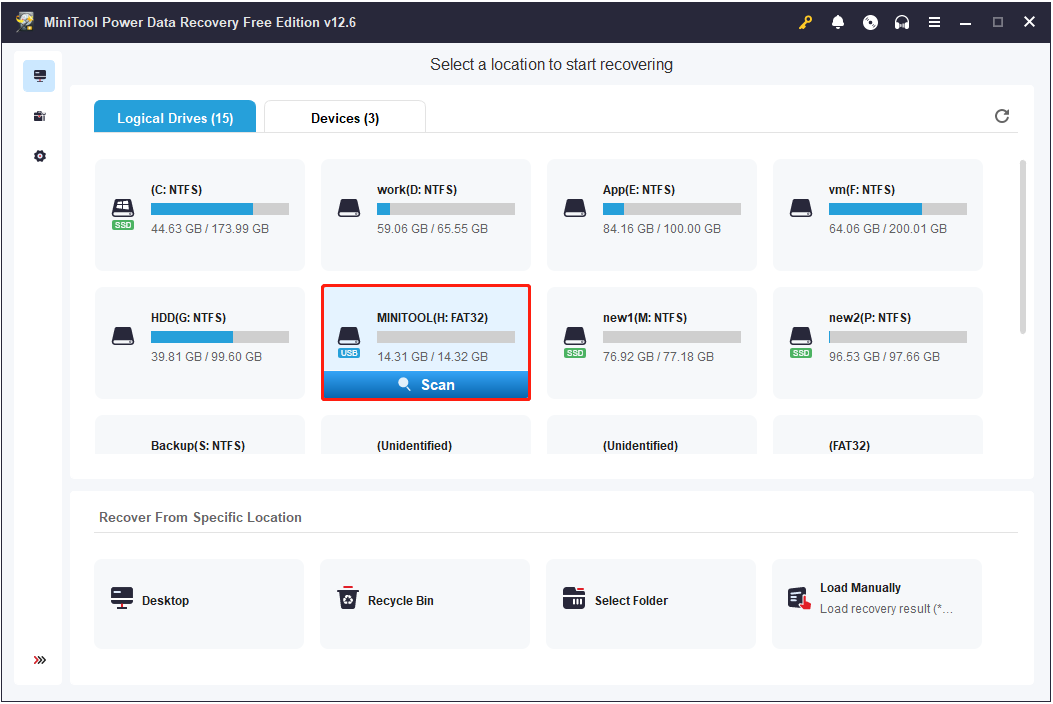
Run MiniTool Power Data Recovery to enter the main interface.
Here, you will see all partitions of connected disks on your computer. Move your cursor to the target USB drive (marked with a USB icon) and click Scan to start scanning for files.
Step 2. Find and Preview Videos.
Once the scan is complete, switch to the Type tab and expand the Audio & Video category. All detected video files will be listed by video format. Browse the desired format and select the videos you want to recover.
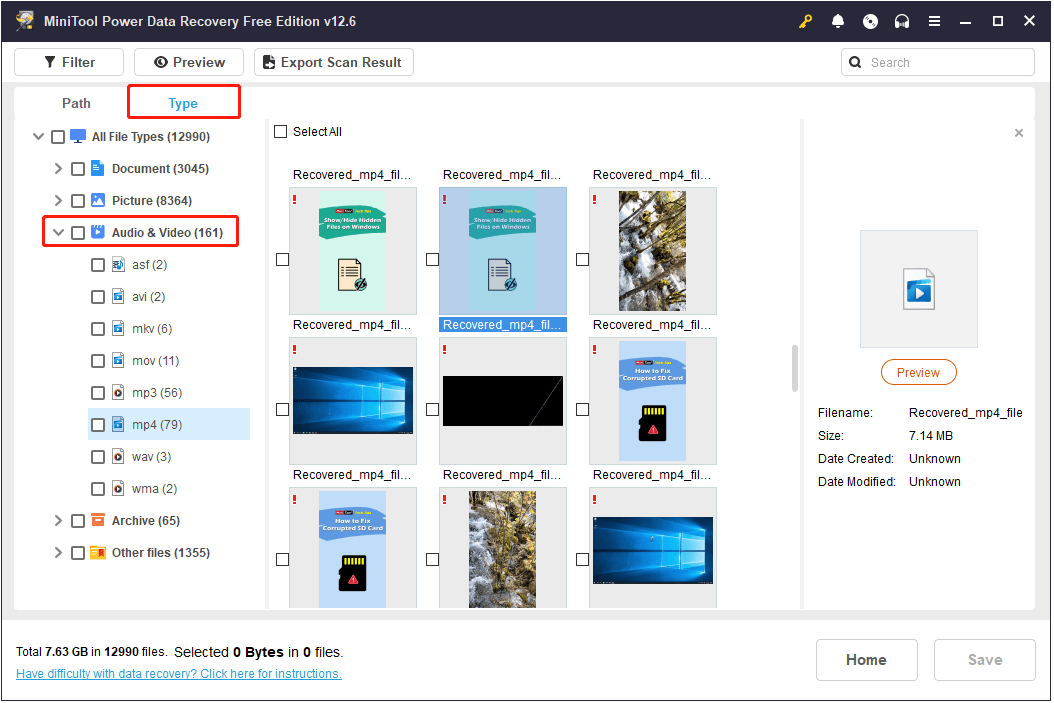
If you remember the file name, enter it (or a keyword) in the search box and press Enter to locate it quickly.

You can also preview files before recovery. Double-click a video to open the preview window and confirm it is the correct one.
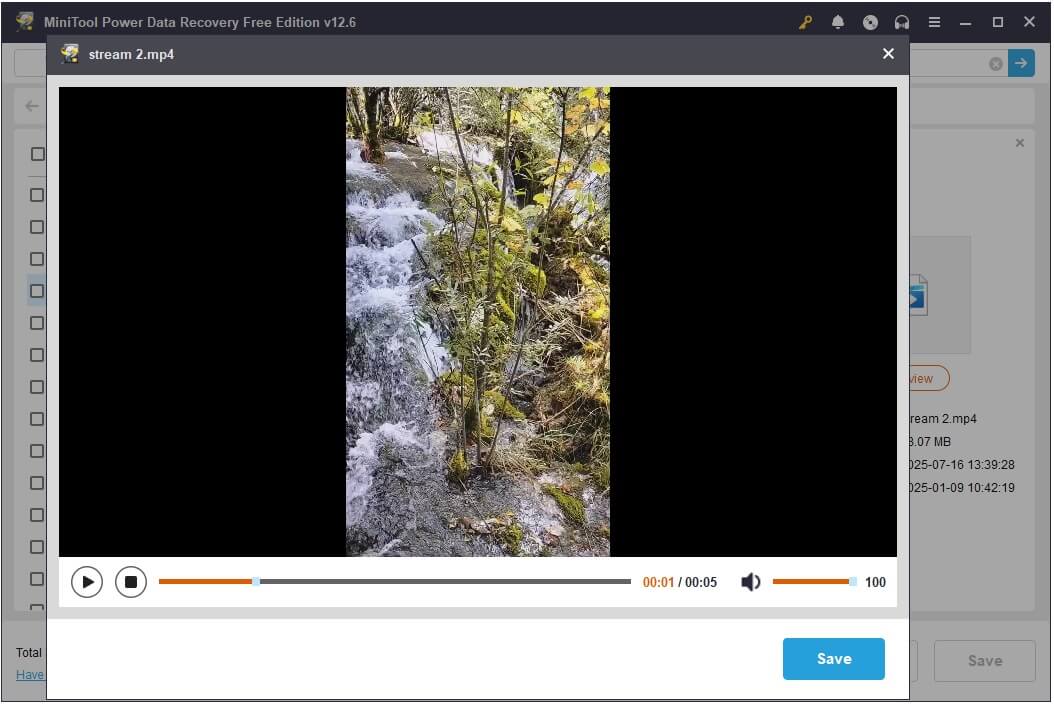
Step 3. Save Desired Videos.
In the preview window, click Save to recover the current video.
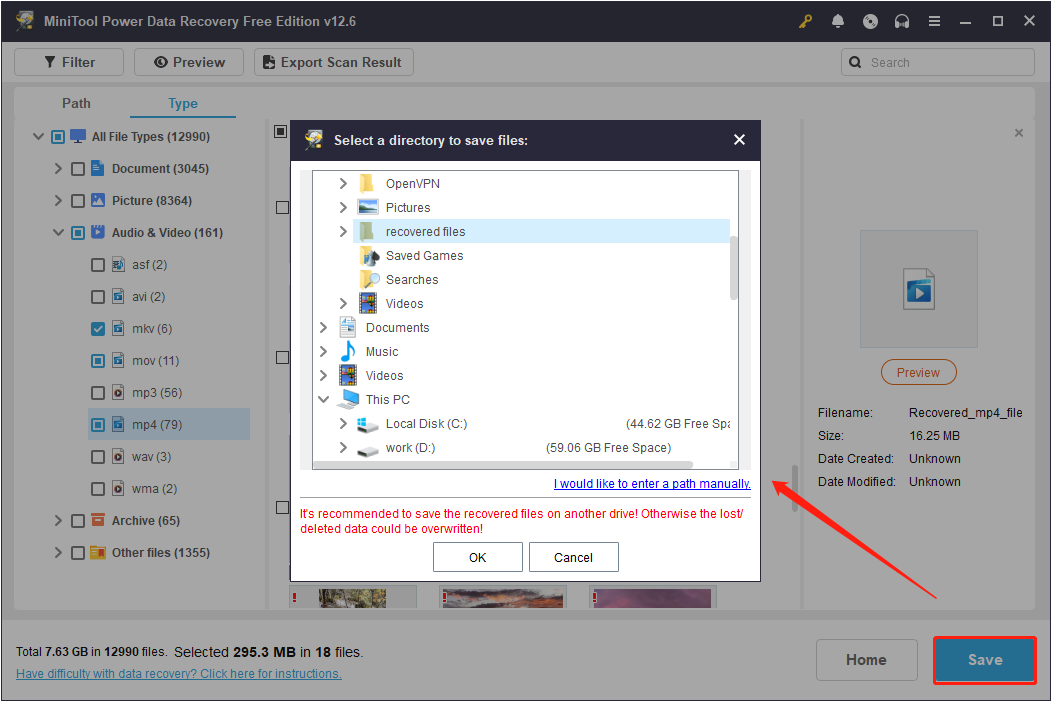
Alternatively, preview multiple videos, tick each one you want to recover, then click Save and choose a different location to store them at once.
As said before, the free edition of this Windows data recovery software only supports recovering 1 GB of data at no cost. If you run out of this capacity, you will need to upgrade the software to a Professional edition.
Once done, you can view and use the recovered videos.
How to Recover Deleted Videos From a USB Drive on Mac
If you are using a Mac, you can use the Command + Z shortcut to revert the last deletion, restore videos from backups, or use specialized video recovery software for Mac.
Method 1. Use Command + Z (Undo Recent Deletion)
If you just deleted videos from your USB drive, press Command + Z to cancel the deletion. Like Ctrl + Z on Windows, this shortcut only reverses the most recent action.
If the file does not reappear after pressing Command + Z, proceed to the next method.
Method 2. Restore From Backups
If you use Time Machine to back up your videos or have copied your videos to iCloud, Google Drive, or another backup location, you can restore them from there.
For cloud or manual backups, simply copy or download the videos back to your USB drive.
For Time Machine, navigate to the folder where your videos were originally located, and launch Time Machine. Then use the timeline to browse through backups, select the target backup file, and click Restore.
For more information, check out this official guide: Restore items backed up with Time Machine on Mac.
If there is no backup file available, use Stellar Data Recovery for Mac to restore videos from your USB drive.
Method 3. Use Stellar Data Recovery for Mac
Stellar Data Recovery for Mac is a professional Mac tool for recovering deleted videos and other files.
It has the following features:
- Recovers videos, photos, documents, and other types of files from USB drives, SSDs, HDDs, memory cards, and other storage devices.
- Supports recovery from APFS, HFS+, FAT, and exFAT file systems.
- Allows preview of videos and other files before recovery to ensure accuracy.
- Offers a free trial to scan recoverable files. But you need to upgrade the software to save the recovered files.
Now, download this Mac file restore tool and use it to recover your videos.
Data Recovery for MacClick to Download100%Clean & Safe
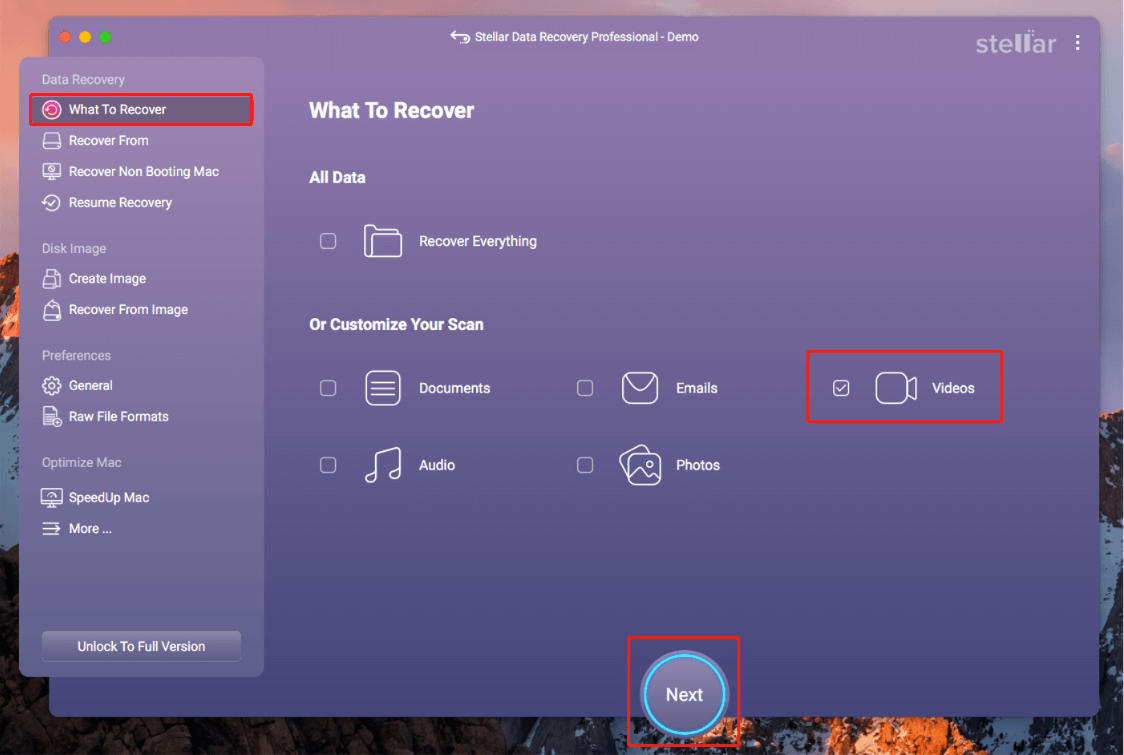
Step 1. Launch the software to go to the home page. In the What To Recover section, select the Video option only, and click Next to continue.
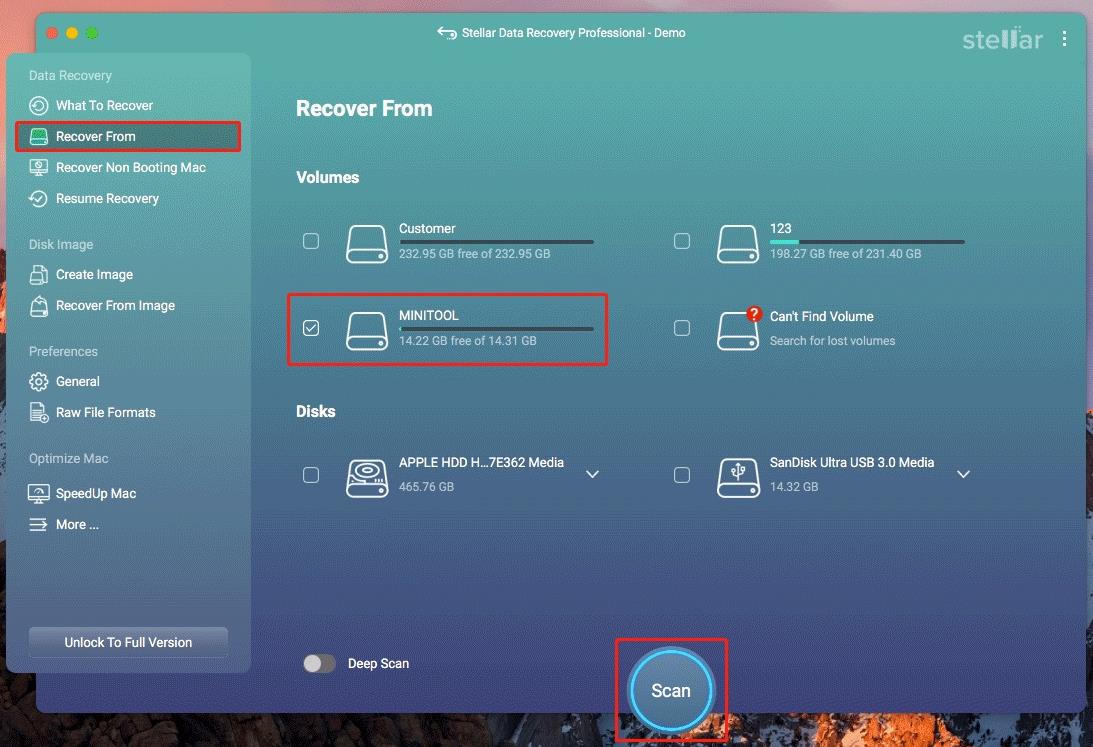
Step 2. In the Recover From section, select the USB drive volume and click Scan to begin the scan.
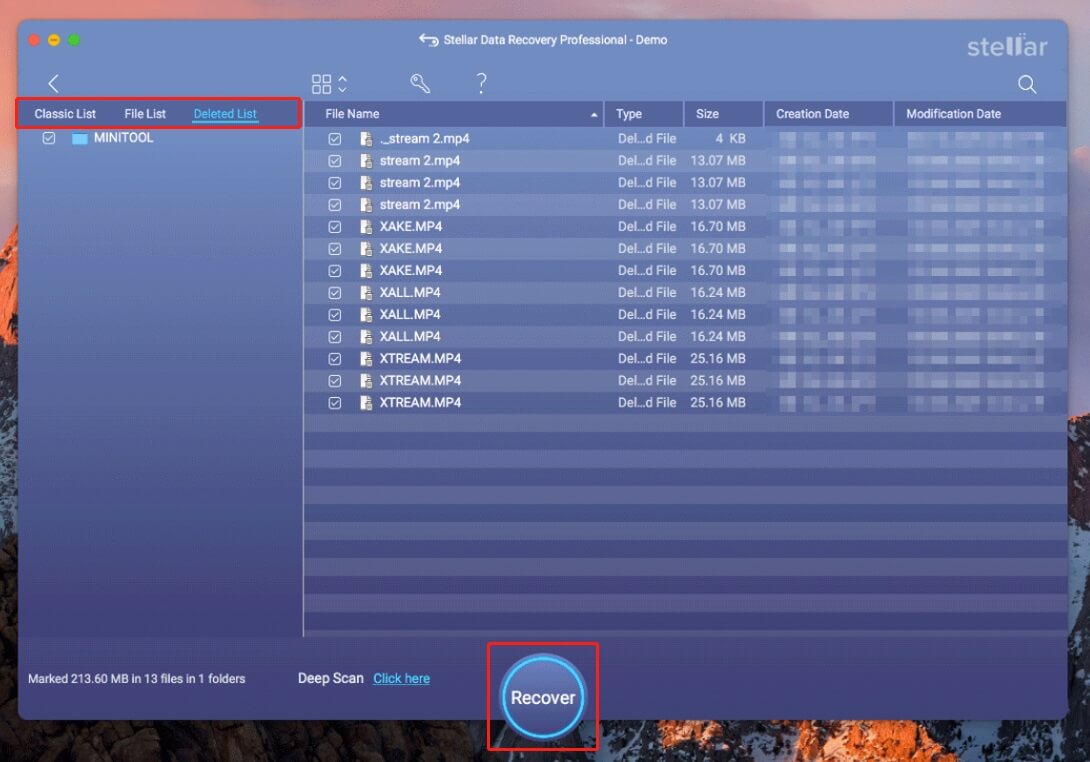
Step 3. Once the scan is finished, browse through the found files under Classic List, File List, or Deleted List.
You can double-click on each video to preview its content.
Finally, tick all the videos you want to restore and hit the Recover button.
Note that you will be asked to activate the software to save the ticked files. Follow the instructions on the software interface to do that.
This is all about how to recover deleted videos from a USB drive on Windows and Mac.
How to Prevent USB Files From Being Accidentally Deleted on Windows
Files on USB drives are often deleted due to human error or antivirus software mistakenly detecting them.
In the following content, I will show you how to lock your USB drive, adjust antivirus software settings, and enable deletion warnings to prevent such situations.
Tip 1. Enable BitLocker on Your USB Drive
Encrypting your USB drive with BitLocker protects your files from unauthorized access and accidental deletion.
Here is how to enable BitLocker on your USB drive:
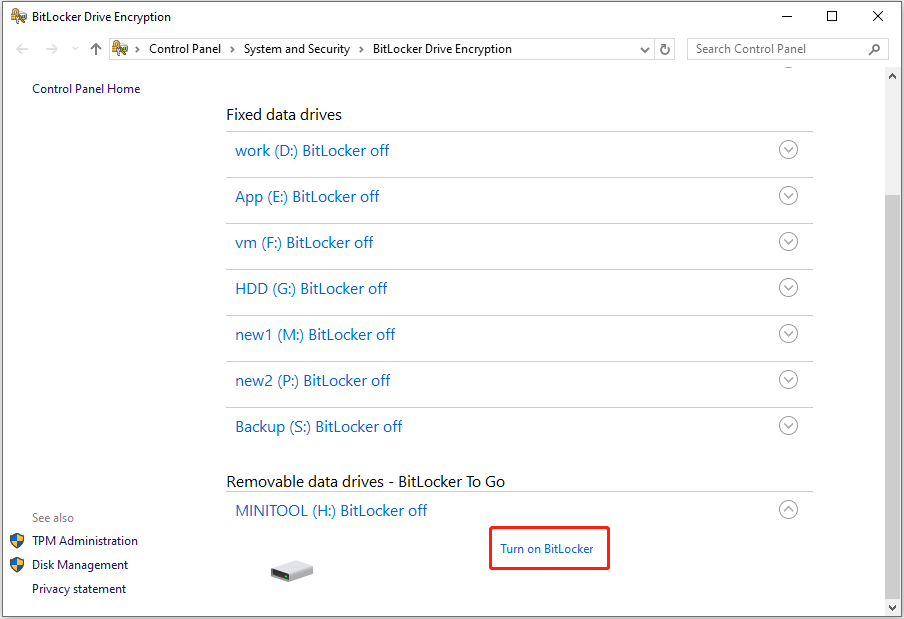
Step 1. Type Manage BitLocker in the Windows search box, and then open it.
Step 2. Find your USB drive under the Removable data drives – BitLocker To Go section. Then click Turn on BitLocker next to it.
Step 3. Select whether you want to unlock the drive using a password or a smart card. If you choose a password, enter and confirm it. After that, click Next to continue.
Step 4. Choose how you want to save the recovery key and click Next.
Step 5. Choose how much of your drive to encrypt and hit Next.
Step 6. Select which encryption mode to use and click Next.
Step 7. Hit Start encrypting and wait for the process to complete.
Step 8. Restart your computer to ensure that the change is applied.
After enabling BitLocker on your USB drive, users cannot modify or delete files on that drive without the password.
Tip 2. Add Your USB Folders to Windows Defender Exclusions
Sometimes antivirus programs can block or delete files by mistake. Adding your USB folders to Windows Defender exclusions prevents this from happening.
Here is how to add Windows Defender exclusions:
Step 1. Press Windows + I to open Settings.
Step 2. Navigate to Update & Security > Windows Security > Virus & threat protection.
Step 3. Under Virus & threat protection settings, click on Manage settings.
Step 4. Scroll down to the Exclusions section and click on Add or remove exclusions.
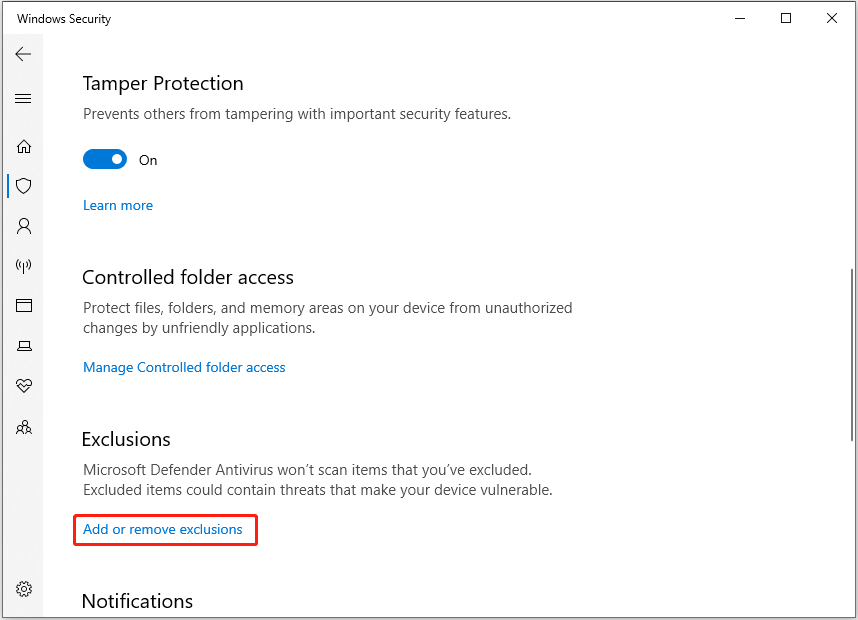
Step 5. Click on Add an exclusion and choose Folder. Then select the target folder on the USB drive.
Then, Windows Defender will skip scanning excluded folders, so these files won’t be quarantined or deleted by mistake. Make sure to only exclude files you trust.
Tip 3. Enable Delete Confirmation Dialog
Turning on the delete confirmation dialog gives you a warning before any file is deleted. This simple step helps avoid accidental deletions.
Here is how to enable this feature:
Step 1. Right-click the Recycle Bin icon and choose Properties.
Step 2. In the new window, tick the option of Display deletion confirmation dialog.
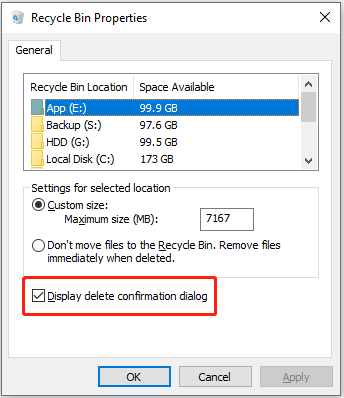
Step 3. Click Apply > OK to save this change.
Once it is set up, whenever you delete a file from your USB drive, you will be given a prompt asking you to confirm the deletion.
Another Tip – Back Up USB Drive Files
Even though backing up does not directly prevent files from being deleted, it ensures that you can quickly restore them if they are deleted.
You can copy important files to another drive or upload them to cloud storage whenever you make file updates.
If you prefer, you can also use professional backup software to back up USB files. MiniTool ShadowMaker is a green data backup tool designed for Windows users. It can help back up files, folders, and the whole USB drive to another location for free.
MiniTool ShadowMaker TrialClick to Download100%Clean & Safe
Wrapping Things Up
How to recover deleted files from a USB without or with software? Whether you are using Windows or Mac, the quickest way to undo a recent deletion is using Ctrl + Z (Windows) or Command + Z (Mac).
If that does not work, check whether you have a backup. If yes, simply restore the files from there. If not, use data recovery software to scan your USB drive and recover your files.
Also, it is important to take some precautionary actions to prevent your USB drive files from being deleted.
If you need any help or have any questions when using MiniTool software, please send an email to the support team at [email protected].
About The Author

Position: Columnist
Shirley holds a bachelor’s degree in English and has been an editor at the MiniTool Team for many years. She specializes in IT-related content, with a focus on data recovery, file backup, disk management, and other technical topics. She is committed to delivering clear, accurate, and practical solutions to help users resolve common computer issues.
User Comments :