Have you ever encountered an issue where your SSD or hard drive keeps disappearing on Windows? This problem can prevent you from accessing and using the data on the disk. Read this post and get some solutions to fix it without losing data with the help of data recovery software.
I have Windows 10 Pro 22H2 Build 19045.2251 with the last updates. In the last few weeks, I have noticed that my second hard drive keeps disappearing randomly once several days and sometimes twice a day! When it disappeared, I wasn’t doing anything specific, mostly web browsing with Firefox. What can I do?superuser.com
The hard drive/SSD randomly disappears, which is a tricky thing. It may be due to improper connection, or there may be problems with the hard drive and the computer. The following content provides a detailed overview of the cause of this problem and the related solutions.
Why SSD/Hard Drive Keeps Disappearing on Windows
Before solving the problem, you need to understand why SSD/hard drive keeps disappearing on Windows 10/11. Here I explain some reasons in detail to you.
- Hardware failure: The components inside the internal/external drive may wear out during long-term use, or even be damaged by a sudden power outage or external impact, causing the drive to lose contact with the system and disappear frequently.
- Connection problem: If the USB interface is aging, loose, or damaged, it will cause poor contact between the computer and the hard disk, resulting in frequent disappearance.
- Operating system failure: During the startup process of the operating system, the disk may not be loaded correctly due to file corruption or virus attack, resulting in it not being displayed in the system.
- File system error: When the file system on the disk is erroneous or damaged, the operating system cannot read the data, causing it to disappear.
- Disk driver problem: The driver plays a crucial role in connecting the disk and the operating system. If the driver has compatibility issues, update failures, or is damaged, the system may not recognize the disk, causing it to disappear.
How to Fix SSD/Hard Drive Keeps Disappearing
After knowing the causes of this problem, you can try to fix the “hard drive disappeared on Windows 10” issue. Here are several effective ways you can refer to.
Fix 1: Check the Hard Drive Connection
Improper connection or poor contact will cause the computer to fail to recognize the disk or the disk to disappear frequently. When these problems occur, you should first check whether the disk is connected correctly. Change a new interface or connect it to another computer. If it works, the main cause is the connection issue; if the “hard drive keeps disappearing” issue still exists, keep reading to try more advanced ways.
Fix 2: Run Hardware and Devices Troubleshooter
You can try to fix the problem by running the Windows Hardware and Devices troubleshooter. It is a built-in tool designed to help users diagnose and fix common hardware issues in the Windows operating system. Here are the steps to scan your hardware and devices for problems.
Step 1: Right-click on the Start button and choose Run to open the Run dialog.
Step 2: Type msdt.exe -id DeviceDiagnostic in the box and press Enter.
Step 3: Click on Next to start the detecting process.
Step 4: When it ends, click on Apply this fix to fix the problem.
Fix 3: Rescan Disk in Disk Management
The function of Rescan Disk is to rescan the disk device to identify new disk partitions or devices. When you find that the hard drive/SSD disappeared from Disk Management, you can perform the Rescan Disk operation to ensure that the device or partition can be correctly identified. Refer to the following operations.
Step 1: Right-click on the Start button and choose Disk Management.
Step 2: Click on the Action tab and choose Rescan Disks.
Wait for the process to be completed to see if the drive shows here.
Fix 4: Change the Drive Letter
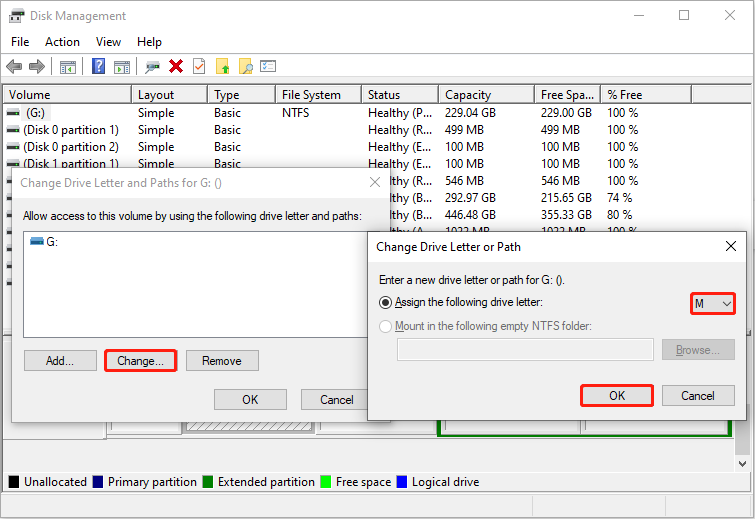
This problem may also occur if the drive letter does not match the system requirements. In this case, you can change the drive letter to ensure that the computer can correctly identify and access the required disk. Work with the steps below to fix the “hard drive keeps disappearing” issue.
Step 1: Open the Disk Management and find the problematic disk.
Step 2: Right-click on the disk and choose Change Drive Letter and Paths….
Step 3: Click on Change, choose a different letter from the list, and hit OK.
Fix 5: Update or Reinstall Disk Driver
Device drivers play a vital role in the smooth operation of your computer. An outdated driver can lead to hardware failure or poor performance, resulting in a hard drive missing on Windows. Updating or reinstalling your drivers ensures that your disk functions properly, which helps fix the “hard drive keeps disappearing” issue. The specific operations are as follows.
Step 1: Right-click on the Start button and choose Device Manager.
Step 2: Click on the small arrow in front of Disk drives to expand it.
Step 3: Right-click on your disk and select Update driver.
Step 4: In the pop-up window, select Search automatically for drivers.
Follow the on-screen instructions to finish the rest process. After installing, check if the issue is fixed. If not, try reinstalling the driver.
Step 1: Repeat step 1 and 2 above.
Step 2: Right-click on your disk and choose Uninstall device.
Step 3: Restart your computer and the Windows will install the driver automatically.

Fix 6: Check the Disk Error
CHKDSK (Check Disk) is a system tool on the Windows operating system that is used to scan the drive for file system errors. Running CHKDSK helps identify and fix errors on the drive, which can resolve issues such as frequent disappearance of SSDs or hard drives.
Step 1: Type Command Prompt in the Windows search box, right-click on the best match, and choose Run as administrator.
Step 2: Click on Yes in the UAC window to continue.
Step 3: Type chkdsk /f/r in the window and press Enter to check and fix the errors.
Fix 7: Perform Partition/Data Recovery
Here is a video for SSD data recovery:
There is another situation where a hard drive or SSD appears to disappear – the disk becomes unallocated. This can happen if you accidentally perform the Delete Volume operation in Disk Management, or if the disk partition is lost for unknown reasons. The lost partition will be marked as Unallocated Space and will not appear in Windows Explorer.
In this case, you have two options. The first is to recover only the data on the lost partition and then rebuild the partition. The second is to recover the entire lost partition, including the lost files on it. No matter which method you prefer, here are the detailed steps for you.
Part 1. Recover data from lost partition
MiniTool Power Data Recovery is recommended for recovering data from lost partitions, mainly because of its powerful data recovery capabilities and wide applicability. Here are the advantages of this recovery tool.
- Powerful data recovery capabilities: The software can deeply scan storage devices, and recover files from lost partitions. It supports multiple file systems, such as NTFS, FAT32, exFAT, etc., and can handle various complex data loss scenarios.
- Wide applicability: The software supports a variety of storage devices, including hard disk drives (HDD), solid-state drives (SSD), USB flash drives, SD cards, etc.
- Security guarantee: During the data recovery process, the software only performs read-only operations on the storage device and will not cause any damage to the original data, ensuring the security of the data recovery process.
The interface design of this software is intuitive and clear, and the operation process is concise and clear. Even beginners in the field of data recovery can quickly master the operation skills and easily complete data recovery. It supports recovering 1 GB of files without any cent. Download and install this free file recovery software to start restoring data.
MiniTool Power Data Recovery FreeClick to Download100%Clean & Safe
Step 1: When the installation is completed, double-click on the MiniTool Power Data Recovery icon to launch it. After loading the disk information, you will enter the main interface. Under the Logical Drives tab, all disk partitions including existing partitions, deleted partitions, and unallocated space are displayed. Find your lost partition, move the cursor on it, and click on Scan to scan for data.

Step 2: When the scan process ends, all files are listed by their paths under the Path tab. It will take some time to find wanted files from this path list. However, some other features can help you locate files more quickly.
Firstly, the Type feature allows you to find files according to different types. Switch to the Type tab, where you will see a list of file types and file formats under All File Types. Select the one that matches your desired files, and the corresponding files will be displayed.

Secondly, the Filter feature is capable of classifying files based on file type, file size, file modified date, and file category. Click on the Filter button on the top-left corner and choose the criteria you want. All the files will be filtered here.
Thirdly, the Search feature helps you find files in a targeted manner. Type the keywords of the file name or the file extension in the box and press Enter. All the unnecessary files will be filtered out.

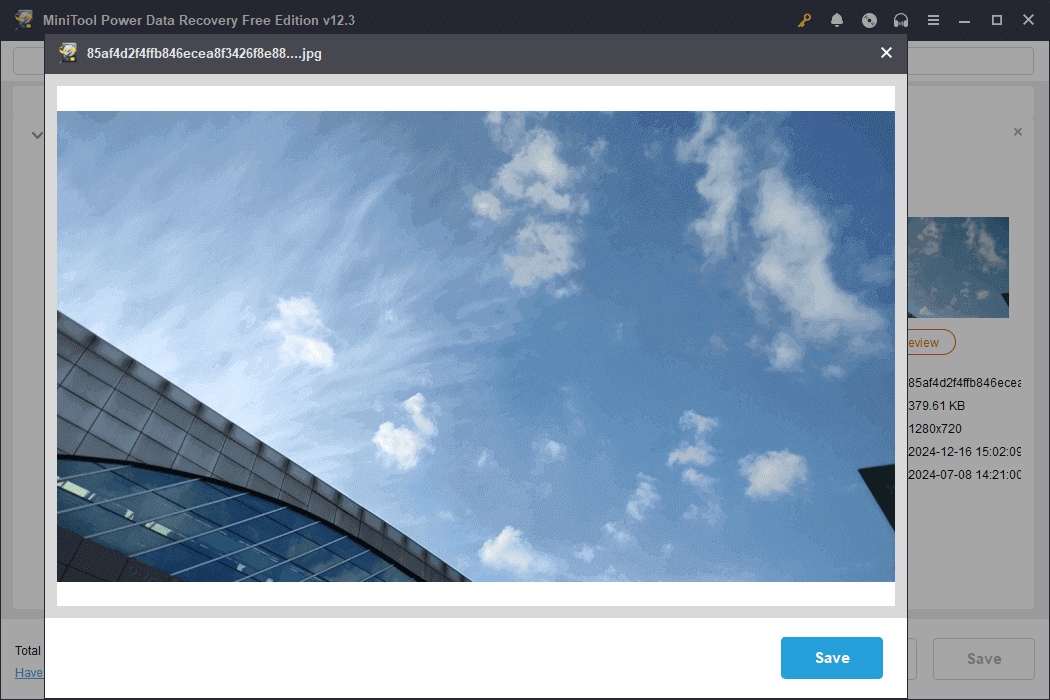
Just as mentioned before, this software can recover 1 GB of files for free. If you recover the wrong files, the free recovery capacity will be wasted. To avoid recovering mistaken files, you can use the Preview feature to check the file before saving. Select the file and click on the Preview button.
Step 3: After confirming the file, tick all files you want to recover and click on the Save button. In the pop-up window, choose a new location to store files and click on OK to start saving.

After recovering the data, you have to recreate a new partition so that the disk can be used again.

Part 2. Recover lost partition
Alternatively, you can recover the whole lost partition directly. Here I recommend MiniTool Partition Wizard for you. When you delete a partition, you don’t delete the data in the partition, but only delete the record in the partition table. Therefore, the data itself is not damaged, but the operating system cannot recognize it. MiniTool Partition Wizard scans the disk, finds the undeleted data, and rewrites it into the partition table so that the operating system can recognize these partitions again. Here are the steps to recover the lost partition.
Step 1: Click on the following button to download and install the MiniTool Partition Wizard software.
MiniTool Partition Wizard FreeClick to Download100%Clean & Safe
Step 2: Launch the software and click on the Partition Recovery section.
Step 3: Click on Next to choose the disk from which you need to recover lost partitions and hit Next.
Step 4: There are three scan ranges: Full Disk, Unallocated Space, and Specified Range. You should choose one according to your needs and click on Next.

Step 5: You need to choose Quick Scan or Full Scan and hit Next to start scanning.

Step 6: When the scan ends, tick all the existing and lost partitions, and then click on Finish.

Step 7: Use the Change Drive Letter feature from the left menu bar to assign drive letters to the recovered partitions so that they can appear in File Explorer.
Step 8: Click Apply in the bottom left corner.
Back up Hard Drive to Prevent Data Loss
Although data recovery software can help you recover files safely and completely, it still takes some time and effort. Therefore, one thing you could do is to back up files regularly. If you have a backup, when you lose data again, you can still access and use them in the backup. MiniTool ShadowMaker helps you back up your hard drive within a few steps.
Step 1: Click on the green button to download and install the MiniTool ShadowMaker software on your computer.
MiniTool ShadowMaker TrialClick to Download100%Clean & Safe
Step 2: Launch it and click on Keep Trial to enter the main interface.
Step 3: Go to the Backup tab and click on the SOURCE section to choose the partitions or files you want to back up.
Step 4: Click on the DESTINATION section to choose a storage location to store the data.
Step 5: Click on Back Up Now to start the process.
Final Words
When you discover that the SSD/hard drive keeps disappearing on Windows, these methods listed in this article can help you a lot. If the hard disk becomes unallocated, data recovery and partition recovery are particularly important. You can use MiniTool Power Data Recovery and MiniTool Partition Wizard to achieve your goals. Making a backup via MiniTool ShadowMaker is also useful in our daily life.
If you encounter any issues while using MiniTool products, feel free to send messages to us at [email protected].
About The Author

Position: Columnist
Chelsea graduated from university with a major in English. She has a strong interest in English writing. It is this passion for writing that led her to become an English editor. Her articles mainly foucus on data recovery and other computer industry news. As an energetic and outgoing girl, Chelsea enjoys listening to music, singing, riding bikes, and eating in her spare time.
User Comments :