SD card is a widely used storage device prized for its small size and high compatibility. Sometimes when you connect it to a computer, a prompt window saying “X:\ is not accessible” may show up. This article focuses on “SD card is not accessible Windows 10/11”, teaching you to recover data from it by using MiniTool Power Data Recovery and fix the card.
Hello, I’m running Windows 10. My drivers are up to date, I’m pretty sure. When I put my Kingston 1GB SD card in my laptop, in “My Computer” the icon pops up and then quickly goes away. I click it before it goes away and it says “F:\ is not accessible.” “Access is denied.” I was wondering if I could get some help, Thanks!answers.microsoft.com
SD card (Secure Digital Card) is a new generation of storage device based on semiconductor flash memory. It is widely used in portable devices such as digital cameras, multimedia players, smart phones, etc., and has become an indispensable storage component in these devices. In addition, SD card also performs well in high-performance demand scenarios such as high-definition video recording and large-scale game running due to large capacity, high performance, and security.
The main features of SD card include:
- Large capacity: SD card provides a variety of capacity options, from the initial tens of megabytes to hundreds of gigabytes, to meet the needs of different users.
- High performance: SD card uses advanced storage technology with high-speed reading and writing capabilities, so it can quickly transfer data to other devices.
- High security: SD card has a built-in copyright protection management function that supports digital rights management (DRM) technology, which can protect data security.
- Good compatibility: SD card follows a unified specification standard and has good compatibility, which can easily exchange data between different devices.
But have you ever encountered a situation where an SD card detected but not accessible when you connect the SD card to the computer? How to fix it? Keep reading to learn the possible causes and how to fix this error.

Part 1: Why Your SD Card Is Not Accessible
When you get an error saying your SD card is full or not accessible, you may want to know why it happens. Here are some possible causes you can refer to.
- The SD card suffered physical damage. Your SD card may have sustained some physical damage, causing the electronics inside the device to be incomplete.
- The file system of the SD card is corrupted. A damaged file system on the card can lead to inaccessibility.
- There are viruses on the card. Viruses can damage your card and data, causing many problems including inaccessibility.
- There are bad sectors on the SD card. Bad sectors can affect the information integrity of the SD card, making it impossible to access the data in those areas.
- The SD card is formatted incorrectly. The SD card may be formatted with a file system that your device cannot read and access.
- The ownership has changed. Sometimes some SD cards may be pre-configured to restrict permissions from unauthorized computers.
When this error happens, you need to recover data from the inaccessible SD card first and then take some tactics to solve it.
Part 2: Recover Data From an Inaccessible SD Card
To prevent permanent and irreversible data loss, you are supposed to recover data from this inaccessible SD card first when this error occurs. Using a data recovery tool is the best choice for you. Are you thinking about which tool to use? Here I recommend MiniTool Power Data Recovery to you.
The free file recovery software allows you to scan your inaccessible SD card deeply. Therefore, all data including existing, lost, or deleted data will be scanned out.
This recovery tool is also capable of recovering deleted or lost files from other storage devices. For example, it works great on formatted USB flash drive recovery, unrecognized external hard drive recovery, etc. Apart from that advantage, it functions well on accidental deletion recovery, virus attack recovery, etc. Compatible with Windows 11/10/8/8.1, so most users do not need to update or downgrade the system.
It supports restoring 1 GB of files without any cent. Download and install it on your computer to do a recovery.
MiniTool Power Data Recovery FreeClick to Download100%Clean & Safe
Step 1: Launch the software and scan the inaccessible SD card
Double-click on the MiniTool Power Data Recovery icon and click on Yes in the UAC window to continue. After loading the disk information, all the partitions will be displayed under the Logical Drives tab. Find your SD card, move the cursor over it, and click on Scan to scan for data.

Step 2: Find the required files using various features
The scan process will take some time. You need to be patient until it ends. After that, all files will be shown according to their paths. In the Path tab, it generally includes Existing Files, Deleted Files, and Lost Files. It may take some time to find the files you want from here. As a comprehensive recovery tool, it provides several effective features to help you locate files faster.
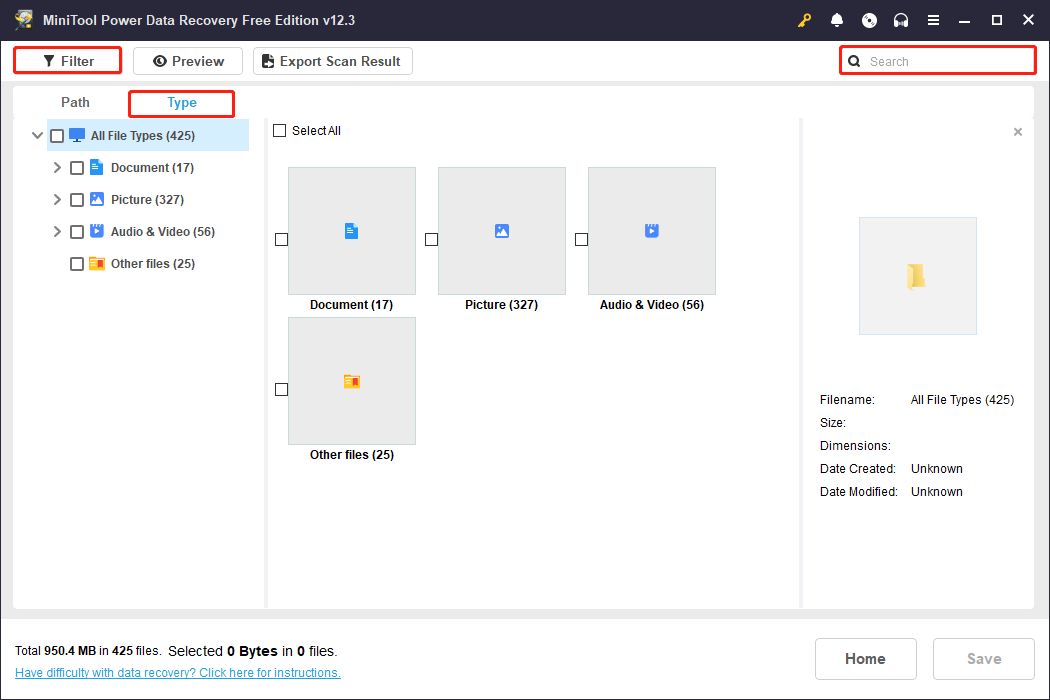
- Firstly, the Type feature next to the Path tab classifies the files according to different types including documents, pictures, audio, videos, and more. To find a specific type of files you need, you are expected to switch to the Type tab and focus on that type.
- Secondly, you can see the Filter button in the top left corner. This feature has the ability to classify files by file type, file size, file category, and modified date. To filter the listed files, you need to click the Filter button and select one or more filter criteria to filter out the files that do not meet these criteria.
- Thirdly, there is a Search feature in the upper-right corner, which is capable of performing a precise search. To find the required files, you need to type the keywords of the file name or extension in the search box and press Enter.
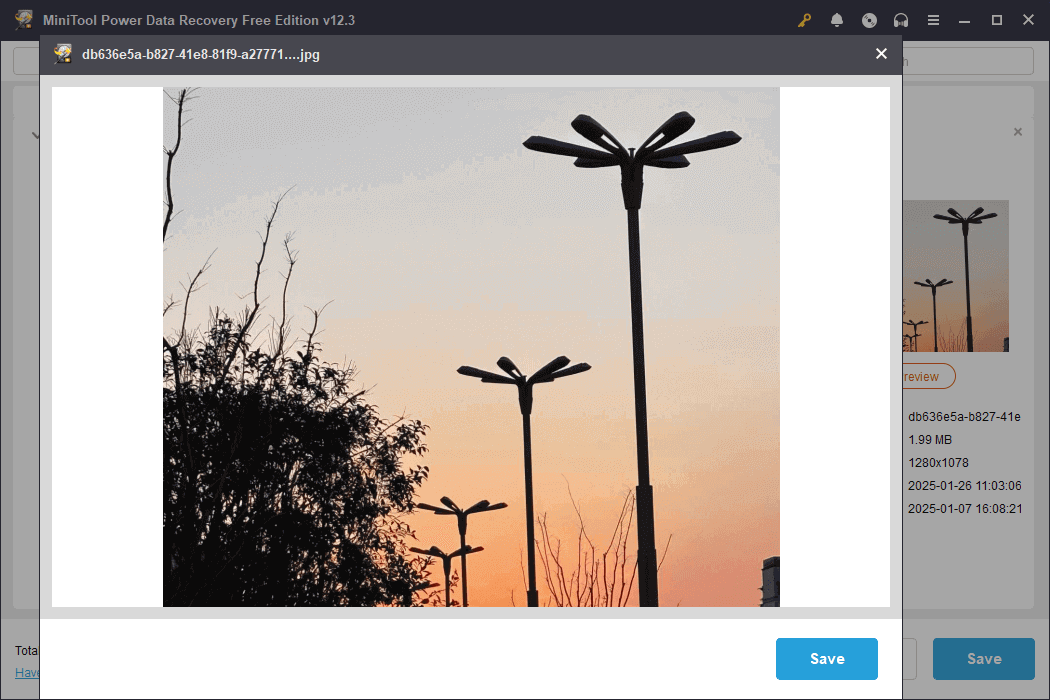
How can you know if the selected file is the correct one? Here you can use the Preview feature. Click on the Preview button or double-click on the file to check it. Unlimited previews are allowed for most files, but a few file types need to be smaller than 100 MB.
Step 3: Save the selected files to a new location
After ticking all the files you want to recover, click on the Save button. In the pop-up prompt, choose a new location to store the recovered files and click on OK to start saving.

When the process is over, there will be a window writing the size of the recovered files and the free remaining recovery capacity. As mentioned before, the free edition has 1GB of free recovery capacity. When it is used up, you can upgrade to a full edition from the MiniTool Store.
Part 3: Fix SD Card Not Accessible Error
Restoring data is the first step when your SD card is inaccessible. After retrieving data, you can start to solve this problem using the following workarounds.
Fix 1: Change the Drive Letter
Changing drive letters can customize the way a specific storage device is accessed, especially when dealing with multiple drives, it can accommodate older programs that rely on specific drive letters to assign file locations. You can try this method to fix the problem of SD card access denied. To do so:
Step 1: Type Disk Management in the Windows search box and press Enter.
Step 2: Right-click on the disk and choose Change Drive Letter and Paths.
Step 3: In the pop-up window, click on Change.
Step 4: Expand the drop-down list next to Assign the following drive letter to choose a letter and click on OK.

Step 5: In the warning window, click on Yes to confirm the change.
MiniTool Partition Wizard FreeClick to Download100%Clean & Safe
Fix 2: Run the CHKDSK Command
Running the CHKDSK command to scan your SD card can help identify and repair corrupted file systems, bad sectors, etc., thereby resolving the “SD card is not accessible” issue. All things you need to do are:
Step 1: Type Command Prompt in the Windows search box and right-click on the best match to choose Run as administrator.
Step 2: When prompted by the UAC reminder window, click on Yes to continue.
Step 3: Type chkdsk F: /r on the window and press Enter. Replace F: with the drive letter assigned to your SD card.
Fix 3: Use the Error Checking Tool
Microsoft’s Error-Checking utility is capable of scanning your hard drive, USB drive, or SD card for bad sectors, scanning for file system errors to see if certain files or folders are misplaced, and correcting errors. So, you can use this utility to find and correct your SD card errors, fixing the access problem. Here are the steps.
Step 1: Press the Win + E keys to open the File Explorer.
Step 2: On the left pane, right-click on your SD card under This PC and choose Properties.
Step 3: Switch to the Tools tab and click on the Check button.

Step 4: In the pop-up window, select Scan and repair drive to start checking.
When the scan ends, follow the wizard to complete the rest steps.
Fix 4: Adjust Local Group Policy
The system’s security settings can be modified through group policy to resolve permission issues or policy restrictions, thereby allowing normal access to the SD card. Here is a way.
Step 1: Press the Windows + R keys to open the Run dialog.
Step 2: Type gpedit.msc and press Enter to open Windows Local Group Policy Editor.
Step 3: Double-click on Computer Configuration > Administrative Template > System > Removable Storage Access.
Step 4: Double-click on Removable Disks: Deny execute access, Removable Disks: Deny read access, and Removable Disks: Deny write access one by one and select Disabled for them.
Step 5: Click on Apply > OK to make the change take effect.

Fix 5: Take Ownership and Permissions
Taking ownership and permissions in Windows and other systems allows you to fully control a file or folder, enabling you to modify, delete, or change access permissions for that item. It is beneficial for fixing the error.
Step 1: Open the File Explorer and right-click on your SD card to choose Properties.
Step 2: Switch to the Security tab and click on the Advanced button at the bottom.
Step 3: Click on Change in the Owner row on the top.
Step 4: In the pop-up window, click on Advanced > Find now, choose your username, and click on OK.
Step 5: In the Select User or Group window, click on OK.
Step 6: Click on the Apply button in the Advanced Security Settings window. Choose OK in the Windows Security window.
Step 7: In the current window, hit the Add button and choose Select a principal.
Step 8: Repeat the step 4 and step 5.
Step 9: Under basic permission, tick the checkbox for Full control. Click on OK to apply the change.
Fix 6: Format the SD Card
Formatting the SD card can fix the problem of not being able to read or access data properly due to file system errors. Here is how to do that via File Explorer.
Step 1: Right-click on the Start button and choose File Explorer to open it.
Step 2: Under This PC, right-click on your SD card and select Format.
Step 3: Choose the file system and allocation unit size, enter a volume label, tick Quick Format, and then click on Start.
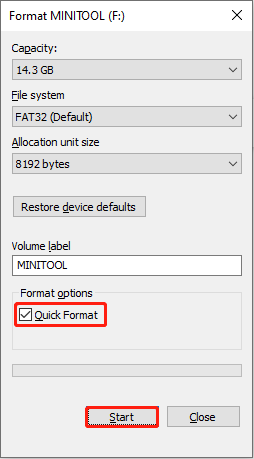
Step 4: When you see the warning message saying formatting will erase all data on the disk, click on OK to start formatting.
Wrapping Things Up
When you encounter that the SD card is not accessible, you can use methods such as changing the drive letter, using the Error Checking tool, formatting the SD card, and more to fix it. However, before that, you are required to recover data from an inaccessible SD card to avoid data loss. MiniTool Power Data Recovery can fully retrieve your data and protect it from being damaged during the repair process.
MiniTool Power Data Recovery FreeClick to Download100%Clean & Safe
If there is confusion when using the MiniTool products, welcome to contact us via [email protected].
About The Author

Position: Columnist
Chelsea graduated from university with a major in English. She has a strong interest in English writing. It is this passion for writing that led her to become an English editor. Her articles mainly foucus on data recovery and other computer industry news. As an energetic and outgoing girl, Chelsea enjoys listening to music, singing, riding bikes, and eating in her spare time.
User Comments :