Is your Micro SD card preventing you from deleting or modifying files? You are probably dealing with the common yet vexing problem of write protection, similar to the circumstance the user is facing below.
User Case:
“Hello everyone! I’m having trouble with my Micro SanDisk card—it’s showing as write-protected, and I can’t add or delete files. I’ve checked for any physical lock switches, but no luck. Any advice on how to remove this write protection? Thanks in advance for any help!”forums.sandisk.com
What a terrible situation it is!
Before diving into the workarounds about how to remove write protection on Micro SD card, you may wonder: What is write protection, and why is my Micro SD card locked? Keep reading to get more details.
What Does “The Disk Is Write Protected” Mean?
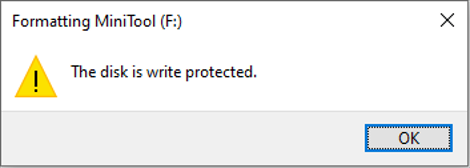
The “The disk is write protected” message indicates a state of write protection that stops modification and deletion of data on your SD card or other storage devices.
When your Micro SD card is write-protected, it is set to read-only mode, preventing you from writing new data to it, removing files from it, or formatting it.
Write protection can be quite beneficial for protecting important files, but it may become inconvenient when you want to transfer or modify data.
Why Is the Micro SD Card Write-Protected?
Micro SD cards can be restricted from writing for various reasons. Here are some typical reasons why Micro SD cards might be write-protected:
- Infection by malware or viruses.
- Corrupted files or file system.
- The card is configured in read-only mode.
- Incorrect registry settings.
- Operating system restrictions.
- A corrupted or physically damaged SD card.
So, how to remove write protection on Micro SD card? Continue reading to learn how to fix it.
How to Remove Write Protection on Micro SD Card in Windows?
Quick Solutions for Removing Write Protection on Micro SD Card:
- Disconnect and reconnect the SD card.
- Change the USB port and try a different SD card adapter.
- Connect the SD card to another computer.
If the Micro SD card remains write-protected, proceed with the solutions listed below.
Method 1. Toggle the Lock Switch
Most Micro SD cards do not have a physical lock switch. However, if you are using an SD card adapter, it usually has a lock switch. If the switch is set to Locked, the card will appear write-protected.
In this case, simply slide the switch to the Unlocked position to remove write protection. Make sure the switch is fully unlocked.
If the adapter is physically unlocked but the card still appears as write-protected, continue with the following solutions.
Method 2. Check the Micro SD Card Properties
You can resolve the write protection issue on a Micro SD card through the Properties menu. It’s a simple and fast fix that only requires a few clicks to turn off the read-only setting.
To unlock the write protection on your Micro SD card via Properties, follow these steps:
Step 1. Press Win + E to open the File Explorer.
Step 2. Go to This PC and locate your Micro SD card.
Step 3. Right-click on your SD card and select Properties.
Step 4. Navigate to the Security tab.
Step 5. Choose your username or simply select Everyone from the options and click on Edit to modify permissions.
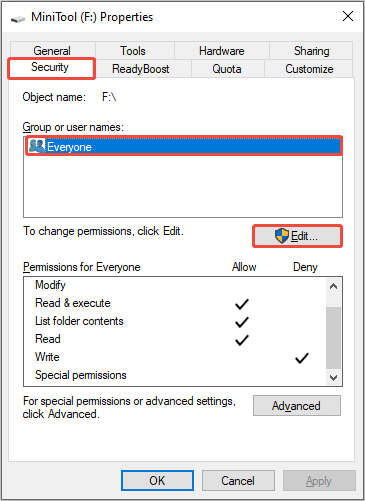
Step 6. In the pop-up window, check the box “Allow” next to Write and click Apply > OK.

Now, check whether you can use the Micro SD card normally.
Method 3. Remove Write Protection in DiskPart
DiskPart is a robust command-line utility in Windows that allows you to manage disks and partitions. This tool can also help remove write protection on a Micro SD card. Here’s how to do it:
Step 1. Connect your Micro SD card to the computer.
Step 2. Press Win + R to open the Run dialog box, type diskpart, and press Enter.
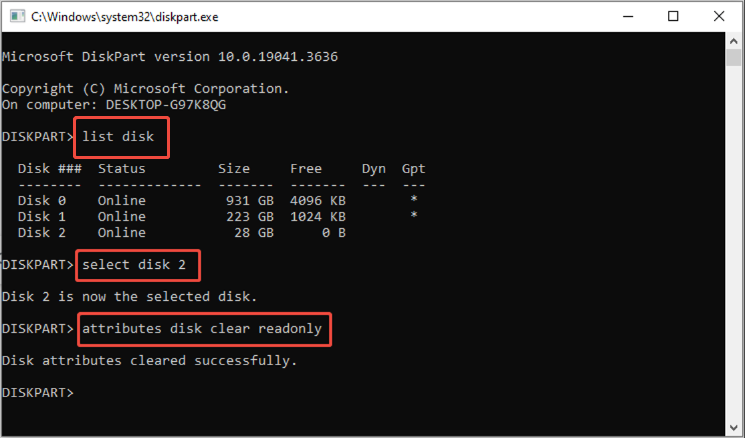
Step 3. Type list disk and press Enter.
Step 4. Type select disk X and press Enter (X is the number of your write-protected Micro SD card).
Step 5. Type attributes disk clear readonly and press Enter.
After running all the commands, go to your Micro SD card and verify if you can modify the data.
Method 4. Use the Registry Editor
Still facing the write-protection issue? You can try modifying the Windows registry to turn off write protection at the system level.
To avoid any errors while editing the registry, carefully follow these steps:
Step 1. Press Win + R to open the Run dialog box, type regedit, and press Enter to access the Registry Editor.
Step 2. Navigate to the following path: HKEY_LOCAL_MACHINE\SYSTEM\CurrentControlSet\Control.
Step 3. Look for a folder named StorageDevicePolicies. If it isn’t there, right-click on the Control folder and select New > Key, and name it StorageDevicePolicies.
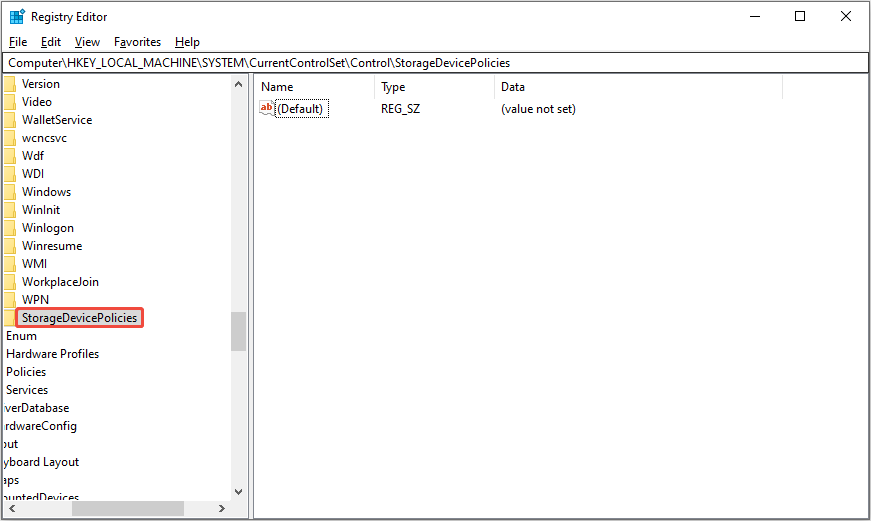
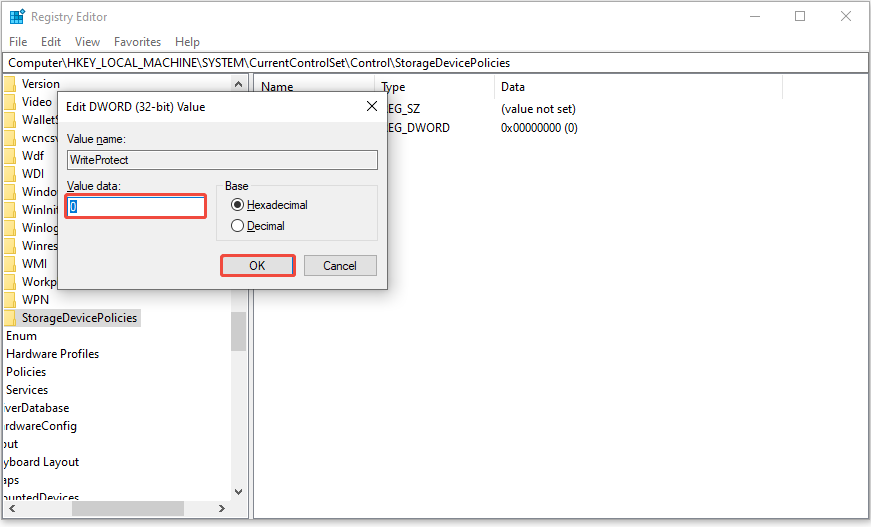
Step 4. Within that folder, double-click the entry named WriteProtect. If you don’t see it, right-click the space and choose New > DWORD (32-bit) Value, and name it WriteProtect.
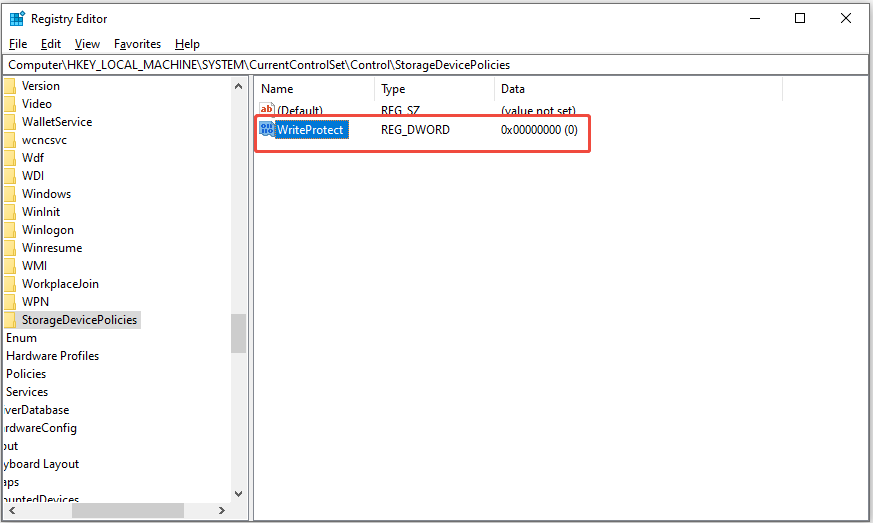
Step 5. Change the Value data to 0 and click OK.
Step 6. Exit the Registry Editor and restart your computer.
After restarting, check whether the issue is gone.
Method 5. Scan and Remove Virus or Malware
In rare cases, malware can modify system settings or change attributes on storage drives like Micro SD cards, thereby locking them effectively.
Follow the steps to learn how to remove virus from SD card via Windows Settings:
Step 1. Press Win + I to open Settings, and then navigate to the Update & Security section.
Step 2. Click on Windows Security.
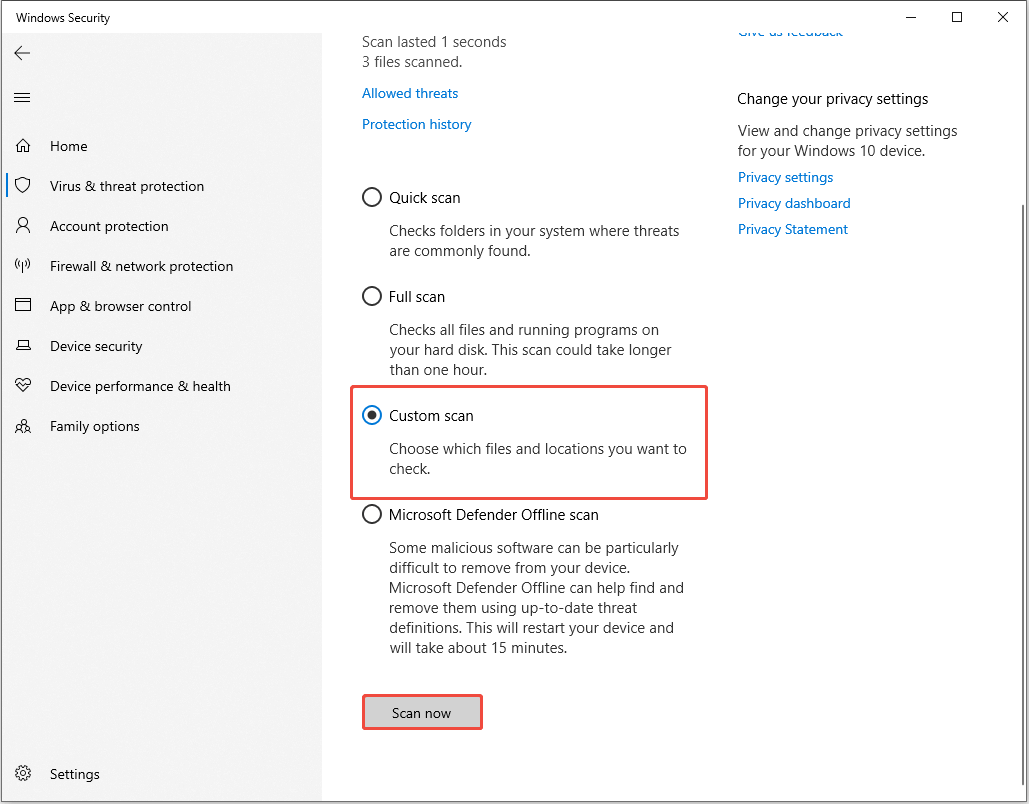
Step 3. Click Virus & threat protection.
Step 4. Select Scan options.
Step 5. Tick the Custom scan option and click the Scan now button to continue.
Step 6. In the prompted window, choose your Micro SD card and click Select Folder.
Step 7. Then you can view the scan process. You just need to wait patiently until the process ends. After that, follow the on-screen instructions to finish the SD card virus removal operation.
Method 6. Format the Micro SD Card
If none of the previously mentioned solutions work, formatting the Micro SD card could be the final option. Formatting may resolve any underlying issues and eliminate write protection.
MiniTool ShadowMaker TrialClick to Download100%Clean & Safe
Option 1. Format the Micro SD card in File Explorer.
Here are the steps to format the Micro SD card in the File Explorer:
Step 1. Insert the Micro SD card into your computer.
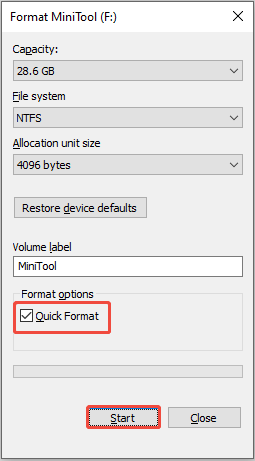
Step 2. Press Win + E to open File Explorer. Right-click on the Micro SD card and select Format.
Step 3. Select the desired file system (such as FAT32 or exFAT), tick the Quick Format option, and click Start.
Option 2. Format the Micro SD card using third-party software.
If File Explorer fails to format the card properly, turn to MiniTool Partition Wizard for a more reliable option.
MiniTool Partition Wizard is a professional and safe partition manager that offers a wide range of features related to disk/partition management.
It breaks the limitation of Windows built-in tools and allows you to easily format a Micro SD card into NTFS, FAT32, exFAT, and other formats.
The Format Partition feature is available in the Free Edition of MiniTool Partition Wizard. Now, you can download it and have a try.
MiniTool Partition Wizard FreeClick to Download100%Clean & Safe
Follow the breakdown to format your Micro SD card using MiniTool Partition Wizard:
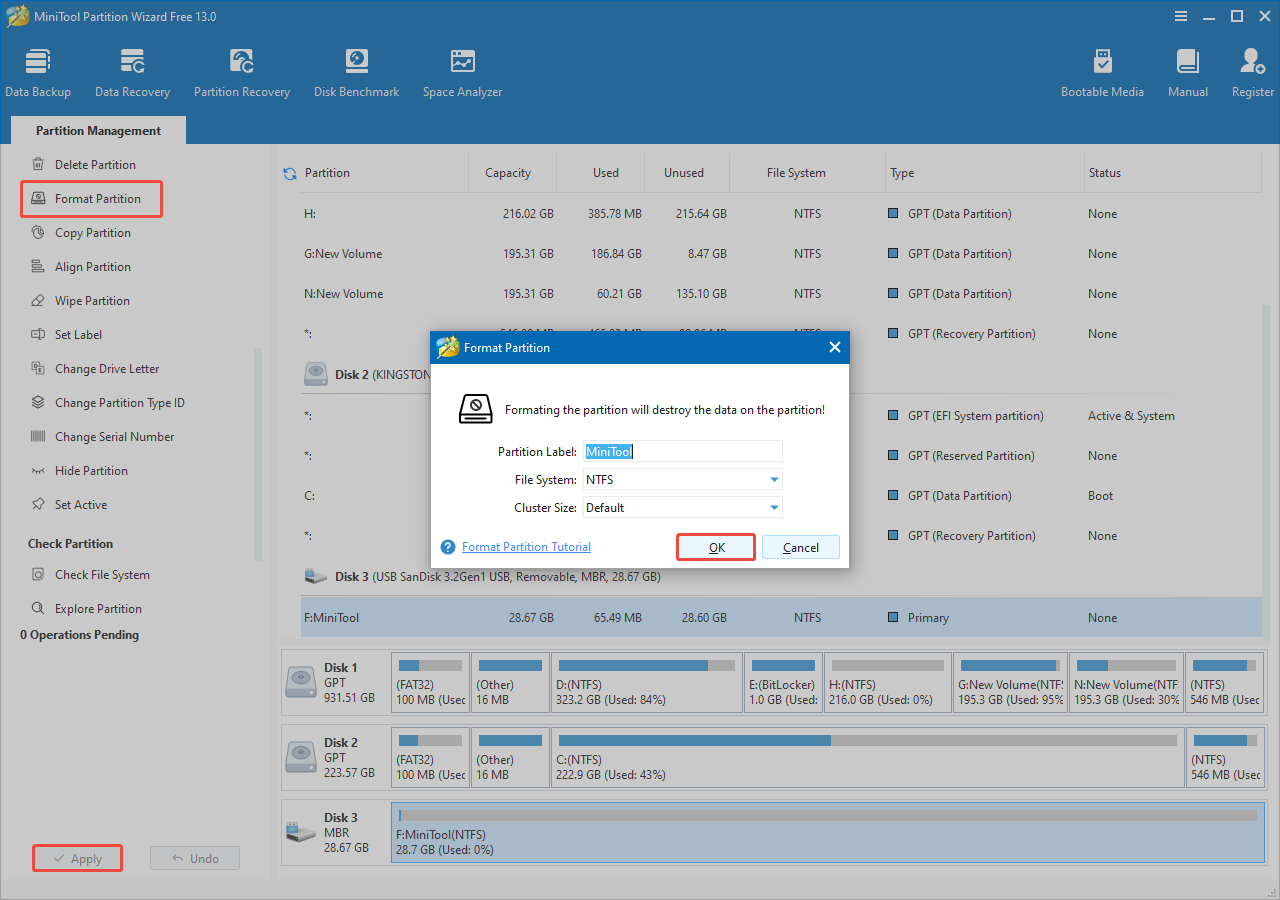
Step 1. Open this tool. On the main interface of this partition magic, select the Micro SD card’s partition, then scroll down the left menu bar to choose the Format Partition button.
Step 2. In the pop-up window, set the Partition Label, File System, and Cluster Size. Then click on OK to continue.
Step 3. Click on Apply to confirm the changes.
After formatting, your card will be empty and ready for new files.
What if Your Micro SD Card Is Corrupted After Successfully Removing Write Protection?
If you’ve tried all the methods above and your Micro SD card is still write-protected, the card itself has likely sustained corruption. This situation can occur if:
- There is a hardware malfunction triggering automatic write protection as a precaution.
- The SD card has reached the end of its read/write lifespan.
- The file system is corrupted.
- Etc.
In these instances, the SD card enters a state of permanent write protection.
For a corrupted file system on the Micro SD card, opt for repairing it by running CHKDSK.
Solution: Repair the Corrupted Micro SD Card With CHKDSK
The CHKDSK utility is a built-in Windows tool that scans and repairs file system errors and bad sectors on a hard drive, preventing data corruption and system slowdowns.
How to run CHKDSK:
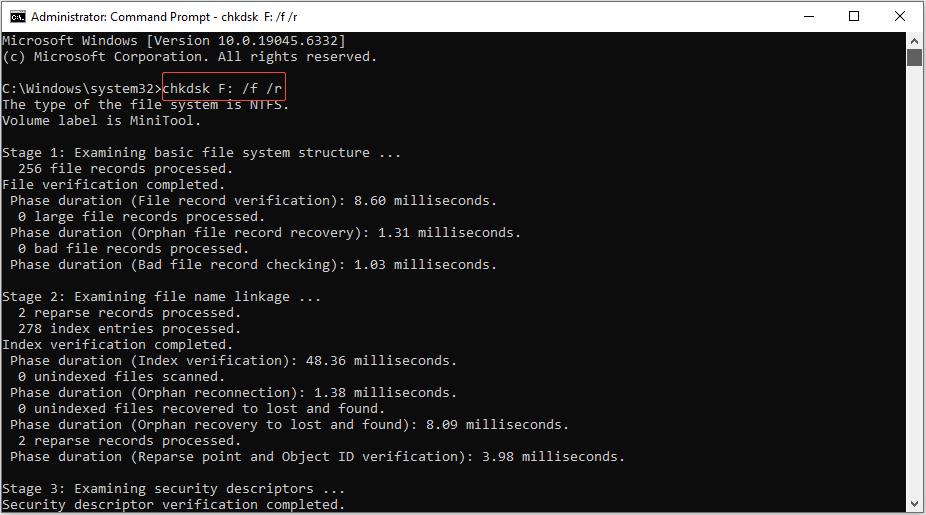
Step 1. Press Win + S to open the Windows Search bar, type cmd, right-click on Command Prompt, and select Run as administrator.
Step 2. In the command window, type chkdsk X: /f /r. Replace X: with the appropriate drive letter for your Micro SD card.
Step 3. Press Enter to scan and repair the card. This process might take a few minutes.
Special Circumstances: The Micro SD Card Locked by Original Device Settings
Certain devices, such as Android smartphones, may lock the Micro SD card when it’s set up as internal storage, rendering it unreadable or unmodifiable on other devices.
To fix this issue, put the card back into the original device where it was configured as internal storage.
Utilize that device to format the corrupted SD card, which might remove the write protection.
As we mentioned above, formatting the SD card will delete all data stored on it. If you haven’t made a backup of your important files, you may ask for help to recover formatted SD card data.
Besides, if your corrupted SD card can’t be repaired, your best move is to recover lost files.
Read the next part to learn how to recover formatted or write-protected Micro SD card data.
How to Recover Data from a Write-Protected/Formatted/Corrupted Micro SD Card?
To recover files from a formatted/write-protected/corrupted Micro SD card, you will need to utilize robust data recovery software.
There are numerous data recovery applications available that can thoroughly scan your storage device and retrieve lost files, even after formatting or under other complex situations.
Now, I will introduce a professional and free data recovery tool – MiniTool Power Data Recovery – and provide a detailed guide on how to recover your files.
Does MiniTool Power Data Recovery support Micro SD cards?
Absolutely, it is capable of scanning various types of file storage devices, including SD cards, HDDs, SSDs, USB flash drives, and more.
Can MiniTool Power Data Recovery recover data from a corrupted, formatted, or write-protected SD card?
Yes, this file recovery software can help restore files lost due to multiple reasons, such as disk formatting, unintended deletion, drive corruption, virus infections, or even system failures.
What file types can MiniTool Power Data Recovery recover?
This tool is capable of recovering a wide range of file types, including videos, audio files, photos, documents, etc.
Is MiniTool Power Data Recovery available for free?
The software offers several versions, and the free edition allows you to recover up to 1 GB of data without any charges.
Now, click the button below to download the free edition of this data recovery software.
MiniTool Power Data Recovery FreeClick to Download100%Clean & Safe
Here is the breakdown for formatted/write-protected SD card data recovery using MiniTool Power Data Recovery.
Step 1. Scan the Micro SD Card
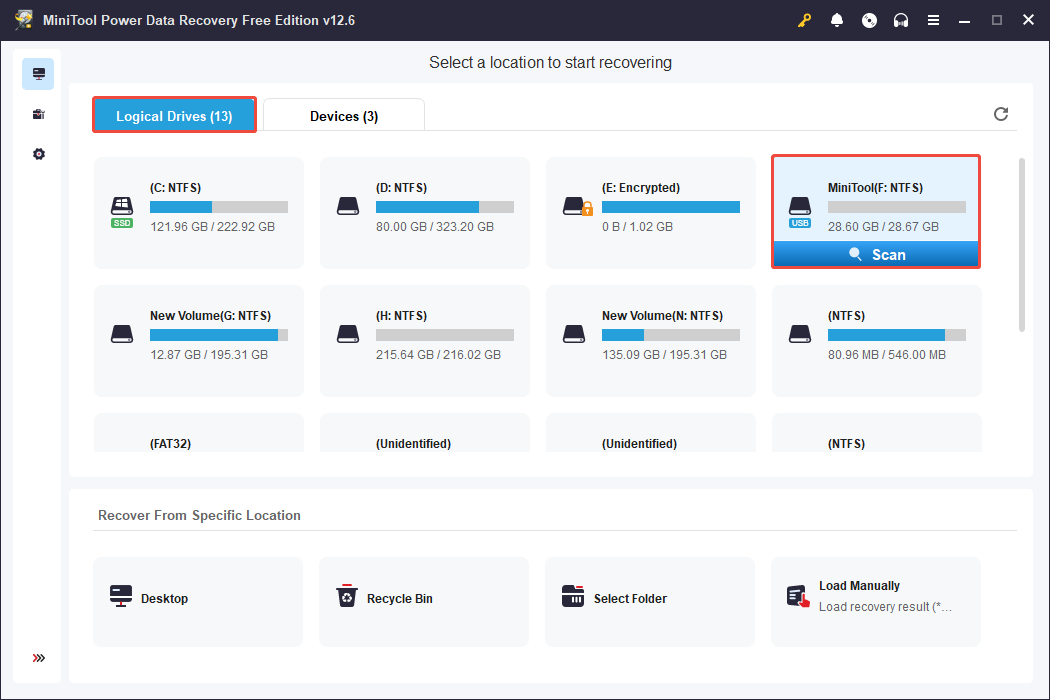
Connect your Micro SD card to your PC using an SD card reader, and then open MiniTool Power Data Recovery.
By default, it will display with a USB icon under the Logical Drives tab. If it doesn’t show up, click the Refresh button to update the disk information or try reconnecting the card.
Hover your cursor over the SD card and click the Scan button.
Once the scan starts, found files will be listed gradually, while the scan percentage and an estimated time remaining will appear in the lower left corner.
It is advisable to wait until the scan is complete to obtain thorough results.
Step 2. Use Path, Type, Filter, or Search to Locate Wanted Files
After completion, you can expand the folders within the Path section to locate files in their original arrangement. The Type section organizes files by type, making it easier to find specific formats like photos or videos.
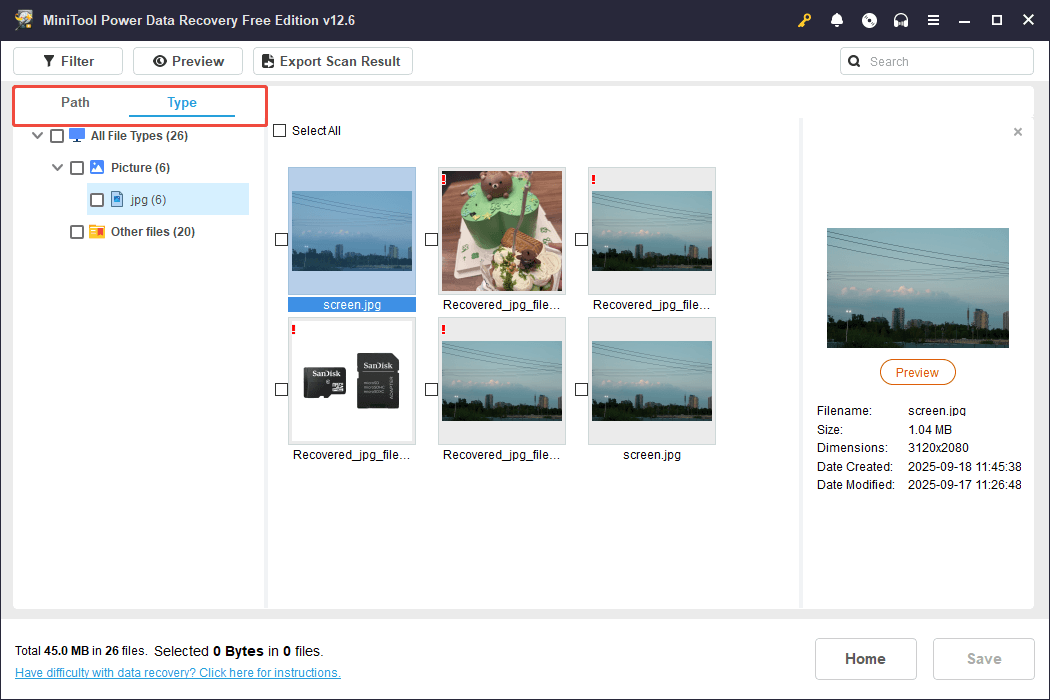
In addition, you can use the Filter or Search features to find desired files:
- Use the Filter feature to refine results based on criteria like file type, modification date, or file size, making it easier to find specific files.
- The Search function allows you to find files by typing file name keywords or extensions.

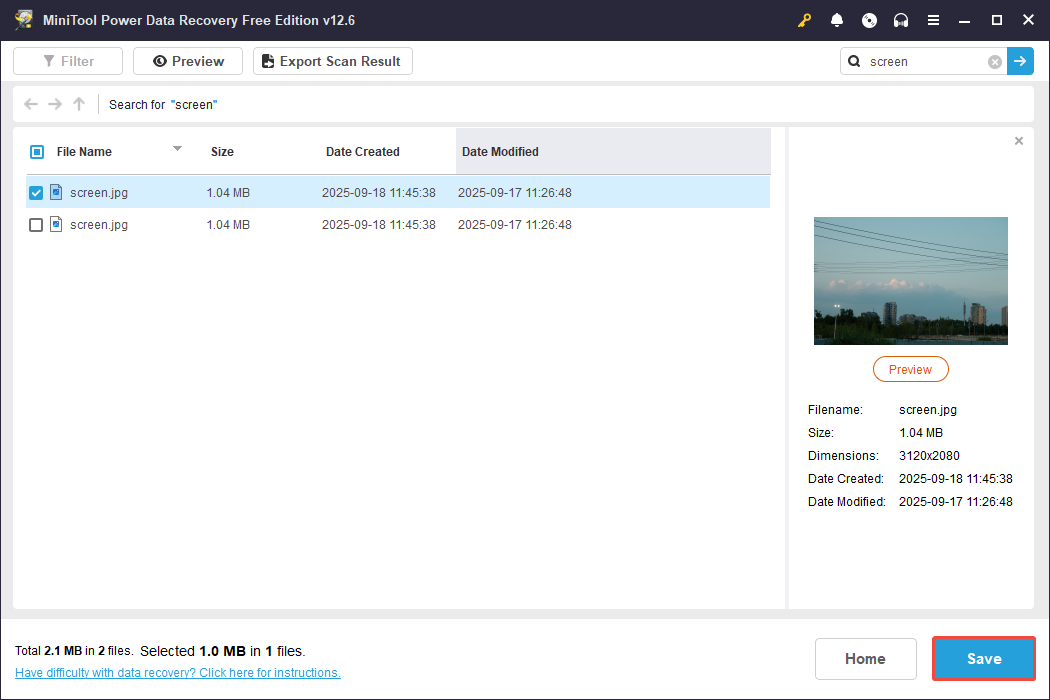
Step 3. Preview and Save Needed Files
MiniTool file recovery tool also provides a Preview feature. With it, you can ensure files are needed before recovery, helping you use your free recovery capacity wisely. Most data types can be previewed, with a limit of 100 MB for some files.
To preview, double-click the file.

Select the desired files, click Save, and choose a directory other than the original Micro SD card for recovery.
Precautions and Tips: Preventing Write Protection Issues on a Micro SD Card
To prevent experiencing write protection problems in the future, keep the following suggestions in mind:
- Handle Carefully: Handle your Micro SD card gently to prevent any physical harm.
- Regular Backups: Consistently back up files to avoid losing data in the event of card damage.
- Don’t Use Untrusted Software: Exercise caution when using third-party applications that may change the settings of your storage device.
- Regularly Scan for Corruption: Frequently checking for corruption can help catch minor issues before they escalate into significant problems, potentially preventing write protection troubles.
Final Thoughts
To sum up, we explained what write protection is, why it occurs, and provided several methods to remove write protection on an SD card.
We also showed how to recover data from a write-protected Micro SD card if it is corrupted.
What’s more, you must follow the precautions carefully to avoid the Micro SD card write protection issue again.
If you encounter any issues or have any questions when using MiniTool’s products, please do not hesitate to send an email to the support team via [email protected].
About The Author

Position: Columnist
Sandy became an English editor after graduation. She is devoted to finding effective solutions for diverse IT problems and provides articles on data recovery, data backup, and computer partitions and drives. In her spare time, she likes listening to music and playing games.
User Comments :