You press the Power button to start your computer for work or entertainment. But instead of loading Windows, a blue screen appears with the error code 0xc000000e.
You restart the computer, hoping it was just a glitch, but the same error shows up again, and you cannot access your system or any of your files.

This is a problem many Windows 10/11 users run into.
What causes this error? Let’s take a closer look.
Why Does the Blue Screen Error Code 0xc000000e Occur
The BSOD error code 0xc000000e typically indicates that Windows cannot load essential boot files.
This error can be triggered by various reasons, such as an incorrect boot disk, damaged boot configuration data (BCD), improper BIOS settings, and more.
More specifically, the causes include:
Connection or hardware issues.
A loose or faulty connection between your hard drive, memory stick, or other components can prevent the system from booting normally.
Corrupted/missing boot configuration data.
The BCD stores critical information required to boot Windows. If the BCD is damaged or missing, Windows won’t know how to start properly.
Hard drive issues.
Problems with the system drive, such as bad sectors, can lead to boot failures.
Improper BIOS settings.
Incorrect boot order or certain BIOS settings can prevent the system from booting from the correct drive.
How to Fix the Error Code 0xc000000e on Windows 10/11
Now that you know the possible causes, let’s focus on how to fix the error.
To resolve 0xc000000e, start with some basic troubleshooting steps:
Disconnect any unnecessary external devices from your computer. And, check the physical connections of your disk and RAM.
If that does not work, try the following methods:
Change the boot order, clear the CMOS, run Startup Repair, repair system drive errors, or repair system files.
If the BSOD persists, you can move on to more advanced solutions:
Rebuild the BCD, set the active partition, perform a system restore, reset the BIOS, or reinstall Windows.
Let’s break down these solutions in detail.
Solution 1. Check Physical Connections
To rule out physical connection issues, remove all unnecessary external devices such as USB flash drives, SD cards, game controllers, scanners, and more.
If possible, open the case and check whether your hard drive and RAM are properly seated. If not, try reseating them carefully.
Solution 2. Change the Boot Disk
Many users reported that the error code 0xc000000e appears because the wrong drive is set as the boot device.
To fix it, access the BIOS interface and change the boot order to boot from the correct drive. Try that and see if it works.
Step 1. Enter BIOS.
Restart your computer. During the startup process, press the BIOS key, usually F2, F12, Esc, Del, etc., to enter BIOS.
Step 2. Locate the Boot Order.
In the BIOS window, use the arrow keys to navigate to the Boot, Boot Options, or Boot Order section.
Step 3. Change the Boot Disk.
Use the arrow keys or other specified keys to select the correct drive you want to boot from.
Then, move it to the top of the list.
Step 4. Save and Exit.
Save your changes and exit the BIOS window. Finally, restart your computer and check if the error code 0xc000000e disappears.
Solution 3. Restore BIOS to Defaults/Clear CMOS
Restoring BIOS to defaults resets all wrong configurations to factory settings. It sometimes fixes the 0xc000000e error.
To restore BIOS to default settings, enter BIOS and select Load Optimized Defaults. Then save and exit.
Step 1. Access BIOS.
During Windows startup, press the specific BIOS key to enter BIOS.
Step 2. Load Default Settings.
Navigate to the appropriate menu and select the “Load Optimized Defaults” or “Load Defaults” option.
Confirm your choice to restore BIOS settings.
Step 3. Save and Exit.
Save the changes and restart your computer.
Alternative Method: Clear the CMOS
Clearing CMOS is an alternative method of resetting the BIOS.
Here is how to clear the CMOS by reseating the CMOS battery.
Step 1. Turn off Your Computer.
- Turn off your computer.
- Disconnect the power cable from the computer. If you are using a laptop, open the case and disconnect the battery from your device (if possible).
Step 2. Remove the CMOS Battery.
- Remove the computer cover.
- Locate the CMOS battery. It usually looks like a coin.
- Disconnect the CMOS battery carefully from your motherboard.
- Press the Power button for 10 ~ 20 seconds to drain residual power.
Step 3. Restart the Computer.
- Reconnect the CMOS battery to your computer and close the cover.
- Then, connect the power cable (and battery) to your computer.
- Finally, turn on the computer and check if it boots normally.
Solution 4. Run Startup Repair
Startup Repair is a Windows built-in tool. It is used to automatically diagnose and fix issues that prevent Windows from starting correctly.
Here is how to run Startup Repair:
Step 1. Access Windows Recovery Environment (WinRE).
- Press and hold the Power button for 10 seconds to turn off your computer.
- Press the Power button again to turn on the computer. When you see the manufacturer’s logo, press and hold the Power button for 10 seconds to turn it off again.
- Repeat this process 3 times, and your computer should enter WinRE.
Alternatively, you can use the bootable media to enter WinRE.
- On a working computer, insert a blank USB drive and use it to create a Windows installation media.
- Insert the installation media into the problematic computer and restart the device. During boot, press the BIOS key, such as F2, F12, Del, or Esc, to access BIOS.
- Set your problematic computer to boot from the installation media.
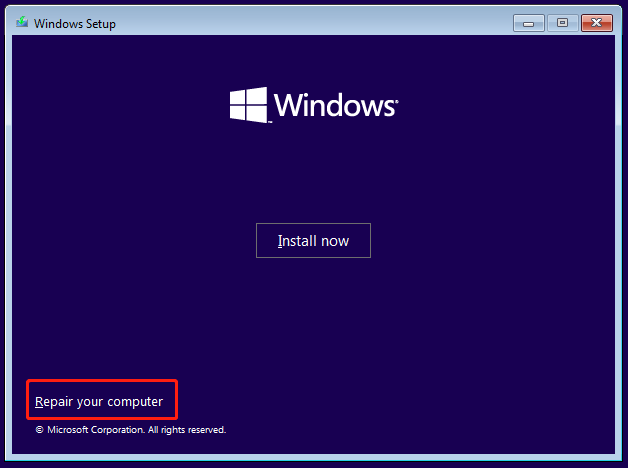
- In the Windows Setup page, select your language and click Next.
- In the new window, click Repair your computer to enter WinRE.
Step 2. Run Startup Repair.
In the next window, select Troubleshoot > Advanced options > Startup Repair.

The system will start to scan boot files, boot configuration data, registry settings, and other related components.
If any issues are found, it will attempt to repair them automatically. Once done, the system will restart.
If Startup Repair fails, you may need to try other recovery options.

Solution 5. Check the C Drive for Errors
Sometimes, the error code 0xc000000e shows up because Windows cannot access critical files on the C drive. This often happens if the system drive has file system errors or bad sectors.
You can use the CHKDSK tool to do a quick disk check to scan and repair issues on the C drive.
Follow the steps below to run CHKDSK.
Step 1. Open Command Prompt.
Access WinRE, and then navigate to Troubleshoot > Advanced options > Command Prompt.

Step 2. Run the CHKDSK Command.
Type chkdsk C: /f /r and press Enter to start scanning the C drive for file system errors.
- C: The drive letter of your system drive.
- /f: Fixes errors on the target drive.
- /r: Locates bad sectors on your drive and recovers readable information.

Solution 6. Run SFC to Repair System Files
When the error code 0xc000000e is triggered by corrupted or missing system files, you can use the built-in System File Checker (SFC) to scan and fix those files automatically.
Here is how to run the SFC scan using the Command Prompt:
Step 1. Open Command Prompt.
Boot into WinRE and open Command Prompt.
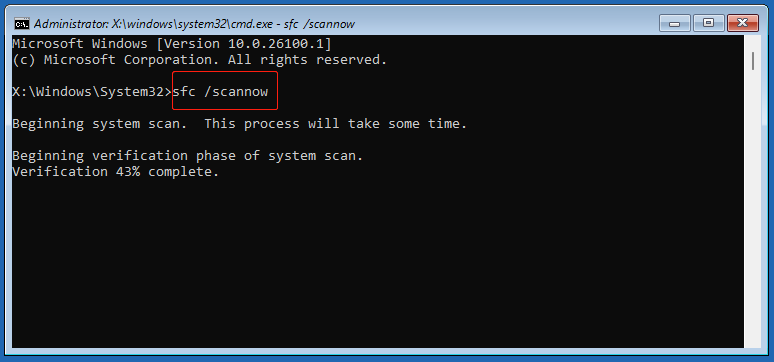
Step 2. Run the SFC Command.
Type sfc /scannow and press Enter to execute it.
The scan will begin. If issues are found, SFC will attempt to repair them using cached copies of system files.
Solution 7. Rebuild the BCD and Set the Active Partition (MBR Only)
If some boot files are broken or the wrong partition is set as active, the error 0xc000000e may appear.
In this case, try rebuilding BCD and setting the right partition to start Windows.
2. Make sure you know the correct system disk and partition because you will need them below. If you set the wrong partition as active, Windows may not boot at all.
Here is how to rebuild BCD and set the active partition:
Step 1. Access Command Prompt.
In WinRE, navigate to and open Command Prompt.
Step 2. Set Active Partition and Rebuild BCD.
In the command line window, type the following commands and press Enter after each one.
- diskpart
- list disk
- select disk # (replace # with the actual disk number where Windows is installed)
- list partition
- select partition # (replace # with the actual volume number of the system partition)
- active
- exit
- bcdboot c:\windows
Solution 8. Perform a System Restore
If you created a system restore point before the 0xc000000e error appeared, you can use it to restore your system to a working state.
Here is how to do a system restore.
Step 1. Go to WinRE.
Shut down and boot your computer three times or use the installation media to enter WinRE.
Step 2. Select System Restore.
Select Troubleshoot > Advanced options > System Restore.
Step 3. Follow the On-Screen Instructions to Restore the System.
When you see the following window, click Next.

Then, follow the instructions on your screen to choose a desired restore point from the list.
Finally, review the restore point and confirm the action.

Important: Recover Files From Your Computer Before Reinstalling Windows
If none of the above methods work, reinstalling Windows may be your only option. But keep in mind: a clean installation will delete all files on the system drive.
That is why I recommend you recover your files before reinstalling.
But you may wonder: How can I recover files if Windows won’t boot?
MiniTool Power Data Recovery can help. Its Bootable Edition offers a Bootable Media Builder feature. It lets you create a bootable USB drive. You can then start your computer from this USB drive and recover files to a safe location.
How to use MiniTool Power Data Recovery Bootable to rescue your files?
- Create a bootable media and use it to boot your computer.
- Launch the software and select the target drive to scan.
- Find, preview, and save the desired files.
Here is a detailed breakdown:
Process 1. Create a Bootable Media.
Step 1. On the working computer, download the free edition of this MiniTool recovery software.
MiniTool Power Data Recovery FreeClick to Download100%Clean & Safe
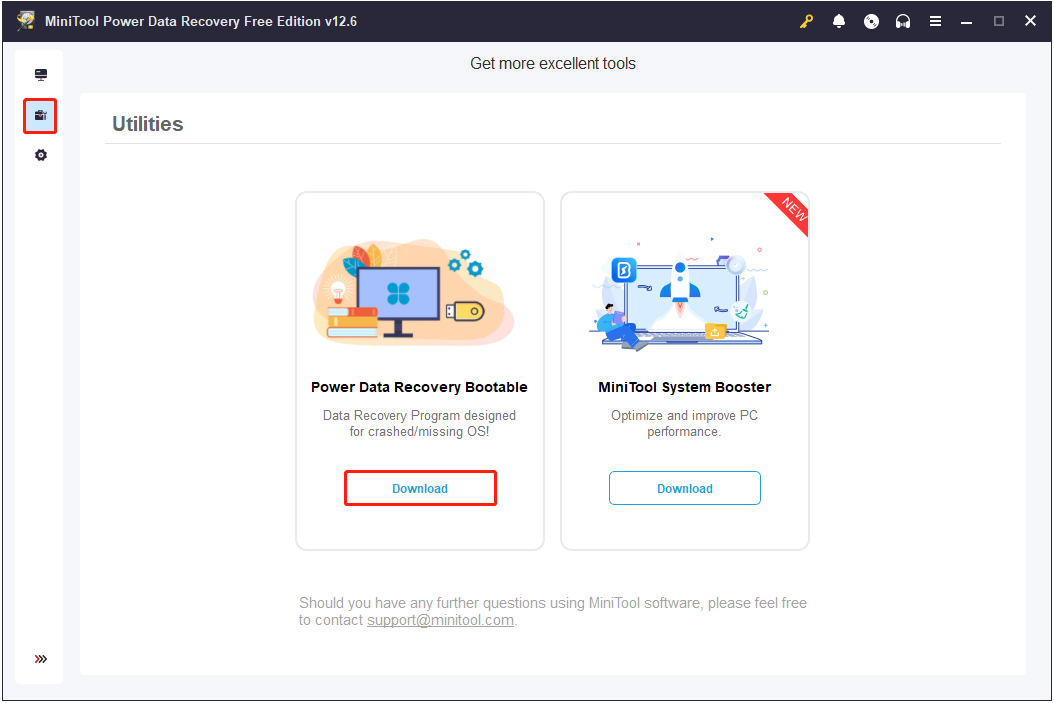
Step 2. Go to the Utilities tab, and then click the Download button to get MiniTool Power Data Recovery Bootable.
Step 3. Insert the blank USB drive into your computer. Then, launch the registered software, and click the Bootable Media Builder icon.
Step 4. Click WinPE-based media with MiniTool plug-in.

Step 5. Select the option to create a bootable USB disk and wait for the process to complete.
Process 2. Boot From the Bootable Drive and Launch MiniTool Power Data Recovery.
Step 1. Insert the bootable USB drive into the problematic computer.
Step 2. Start the computer. During boot, press the specific key, such as F2, F12, Esc, or Del, to enter BIOS.
Step 3. Go to the Boot section and change the boot order to boot from the USB drive.
Step 4. Follow the instructions on your screen to launch MiniTool Power Data Recovery.
Process 3. Scan the Drive and Recover Files.
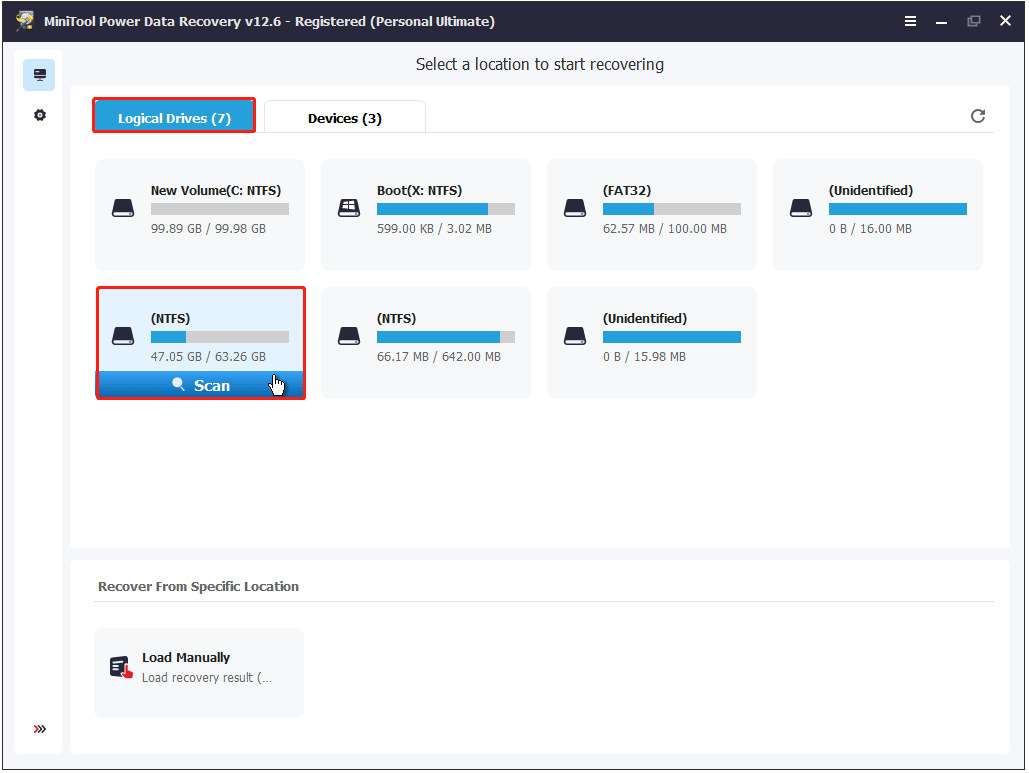
Step 1. On the main interface of this recovery tool, you will see all disk partitions under Logical Drives.
Select a partition and click Scan to scan for files on it.
Since a Windows reinstall usually affects files on the C drive, I recommend you scan the system drive.
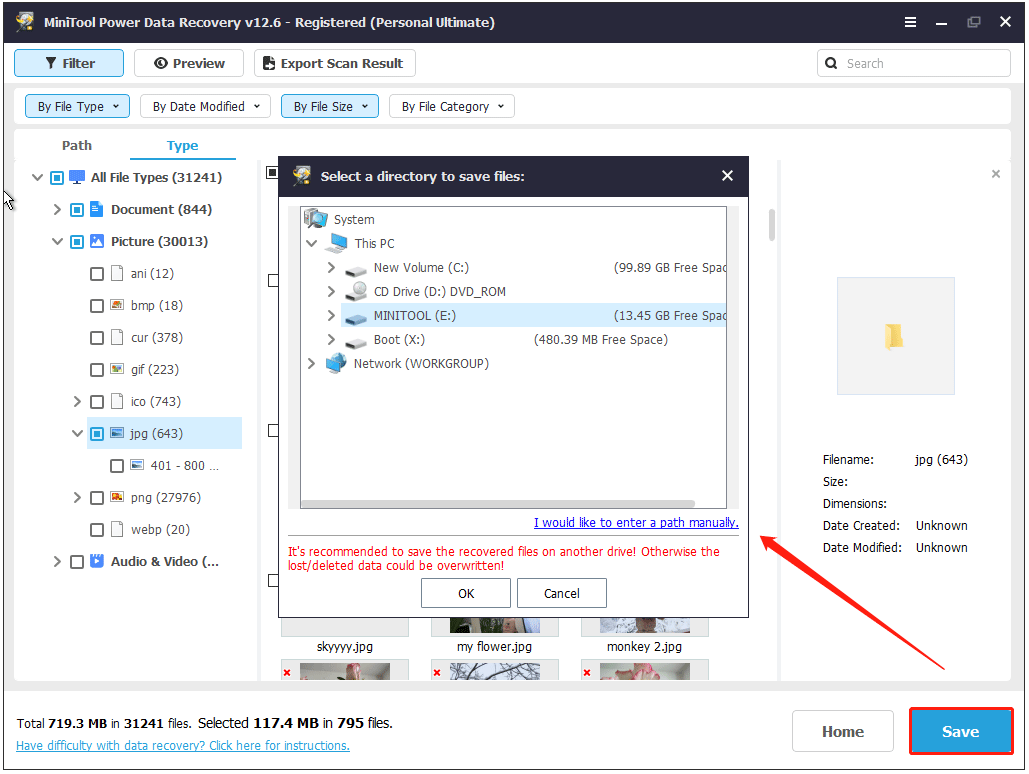
Step 2. Once the scan is complete, browse the found files and tick the ones you need under Path or Type.
- Path: Organizes files by the original folder structure.
- Type: Classifies files by file type and format.
This tool offers two more features to help you find desired files faster.
- Filter: Filters files by file type, file modification date, file size, and file category.
- Search: Searches for a certain file by using a partial or complete file name.

Step 3. Not sure if the ticked files are the right ones? Just double-click on each of them to preview.
Finally, click the Save button in the scan results window and choose an external drive to store the recovered files.
Solution 9. Reinstall Windows
Once your files are rescued, it is time to reinstall Windows without worrying about data loss.
A clean install completely formats your system drive and installs Windows from scratch. This removes the old system entirely, including any glitches, unwanted software, or stubborn problems.
To do a clean install, you should do the following things:
- Create a Windows installation media.
- Boot from the created installation drive.
- Follow the installation wizard to install Windows.
Here is a breakdown of the process, and I will take Windows 10 for example:
Process 1. Create a Windows Installation Media.
Step 1. On a working computer, visit the Windows 10 download page.
Step 2. Under Create Windows 10 installation media, click Download Now to download the MediaCreationTool.exe tool.
Step 3. Run the MediaCreationTool.exe tool and use it to create an installation USB media.
Process 2. Boot From the Installation Media.
Step 1. Insert the USB drive into the computer where you want to perform the clean install.
Step 2. Restart the computer. During startup, press a specific key like F2, F12, or Delete to access the boot menu.
Step 3. Use the arrow keys to set the USB drive as the first boot option in the boot menu, then boot from it.
Process 3. Install Windows.
Step 1. The Windows Setup page will appear. Select the language, time format, and input method, and then click Next.
Step 2. Click Install now.

Step 3. Select I don’t have a product key. Then choose the operating system edition you want to install and click Next.
Step 4. Accept the license terms and hit Next.
Step 5. Select the Custom: Install Windows only (advanced) option.
Step 6. Select the drive you would like to install Windows 10 on and click Next. Wait for the installation to complete.
Pro Tip: Don’t Forget to Back Up Your Files or System During Daily Use
After troubleshooting the blue screen error code 0xc000000e, recovering inaccessible data, and even performing a clean system install, everything is back to normal.
But to prevent future headaches, make sure to back up your important files and the system regularly.
Tools like MiniTool ShadowMaker (free for 30 days) make it easy to schedule automatic file or system backup. It helps create a file or system image and enables you to restore files or the system when there is a need.
How to use MiniTool ShadowMaker to back up Windows or files? Only three steps.
- Select the files or system you want to back up.
- Choose a location to save the backup image.
- Configure the backup type and schedule, and then start the backup.
MiniTool ShadowMaker TrialClick to Download100%Clean & Safe
Check the full step-by-step guide with screenshots below:
Step 1. Choose Backup Source.
Launch the trial edition of this Windows backup software and click Keep Trial to continue.
On the main interface of this software, go to the Backup tab from the left sidebar.
In the SOURCE section, the system-related partitions are selected by default as the source. You can click on it to choose files or other partitions instead.
Step 2. Choose Backup Destination.
Click DESTINATION and select a drive or folder to store the backup image.
Step 3. Customize Backup Settings and Start Backup.
Click the Options button, and you will see Backup Scheme and Schedule Settings.
These two options are disabled by default, but you can turn them on if you need to.
- Backup Scheme: Choose from Full, Incremental, or Differential backups.
- Schedule Settings: Set the backup to run daily, weekly, monthly, or even when you log on or log off.
Once everything is configured, click Back Up Now to start the backup process.

How to restore a backup?
To restore your system or files, launch MiniTool ShadowMaker and go to the Restore tab.
The available backup images should be listed.
Find the one you need to restore, and then click the Restore button next to it. Follow the instructions on your computer to complete the restoration process.

Bottom Line
The error code 0xc000000e usually indicates that your PC needs to be repaired. Fortunately, you can try fixing it by rebuilding BCD, repairing disk file system errors, resetting BIOS, or even performing a clean installation.
Just remember, before you attempt to reinstall Windows, use MiniTool Power Data Recovery Bootable to recover your files first.
During daily use, I recommend you use MiniTool ShadowMaker or other backup tools to back up important data or the system. So, you won’t lose anything when something unexpected happens.
If you need any help when using MiniTool products, please send an email to our support team via [email protected].
About The Author

Position: Columnist
Shirley holds a bachelor’s degree in English and has been an editor at the MiniTool Team for many years. She specializes in IT-related content, with a focus on data recovery, file backup, disk management, and other technical topics. She is committed to delivering clear, accurate, and practical solutions to help users resolve common computer issues.
User Comments :