I was transferring some files from my SD card to my laptop via a data cable. I cut the files and pasted them into a folder on the desktop. And then suddenly, after some time, I couldn’t see the folder. I still can’t believe it happened, but it has. Even when the cut-and-paste operation was over, I checked the number of files and everything. Can this data be recovered in any way?www.reddit.com
About Files Lost After Cut and Paste
In daily computer use, we often need to move files, and “Cut and Paste” is a common way. However, sometimes you may encounter unexpected situations, and files are not successfully pasted after cutting, or they are lost in the process. This situation can be anxious, especially when the files are important.
Fortunately, lost files are not necessarily gone forever. With the right methods and tools, they can still be recovered. If you don’t know how to get them back, it is best to continue reading the following section.
How to Copy, Cut, and Paste Files or Folders
First, I would like to introduce you to two simple ways to cut and paste files on Windows. If you are familiar with the cut-and-paste method of transferring files, you can skip this part.
Way 1: Use shortcut keys
- Copy: After selecting the target file, press Ctrl + C.
- Cut: After selecting the target file, press Ctrl + X.
- Paste: At the target location, press Ctrl + V.
Way 2: Use the mouse
Copy a file:
Step 1: Right-click the file or folder and select Copy.
Step 2: In the target folder, right-click an empty area and select Paste.
Cut a file:
Step 1: Right-click a file or folder and select Cut.
Step 2: In the target folder, right-click an empty area and select Paste.
In a word, cutting is used to move a file or text from one location to another, while copying is used to create a duplicate and retain the original content in its place.
Why Files Are Lost After Cut and Paste
Before performing a recovery, you need to know some common causes of file loss during cut and paste operations, which will help to retrieve the file.
- Operational Errors. If the file is not pasted successfully after cutting, the file may not be moved correctly and may be lost directly, especially if the target folder is closed before pasting.
- Storage Device Problems. Disk damage or errors: If the disk where the file is located has a fault, such as a bad sector, it may cause data loss. Improper connection of USB drive or external hard drive: If the cut file is moved from an external device, the file may not be pasted correctly due to connection problems.
- Operating System or Software Failures. Windows Explorer crash: If File Explorer crashes after cutting but not pasting, the file may get lost. System error or sudden shutdown: If the system crashes after cutting but before pasting, the file may be lost.
- File Permissions or Security Software. Permission issues: If the target folder requires administrator privileges but is not authorized, it may cause the paste to fail. Antivirus software mistakenly intercepts: Some security software may block the write operation of the file, resulting in the loss of the file.

Can you Recover Files Lost in Cut and Paste
It is still possible to recover files after they are lost during cut and paste. This is mainly because when you cut a file, the system only marks the file to be moved from its original location and does not immediately delete its data. If the paste is not completed, the file may still exist on the disk at the original location, but it cannot be accessed in the normal way. The file will be completely deleted unless new data overwrites these storage units. Let’s start recovering files lost after cut and paste.
There are two recovery methods here: one is to use built-in Windows tools, and the other is to use free data recovery software. Given the diversity of file loss reasons, in order to ensure that the lost files can be successfully recovered, you can try these methods one by one.
Option 1: Windows Recover Files Lost During Cut and Paste Using Built-in Utilities
Method 1: Check Your Backups
More and more people are aware of backing up files, and storing data in cloud storage, such as OneDrive, or Google Drive, can be a popular choice, which provides remote access to prevent data loss due to hardware damage.
Restoring the lost files from the backup is the fastest way to recover them. If you have backed up the lost files, then you can check your backup first. Log in to your cloud storage account to view historical versions. Once the files are found, copy them to a new location.
If you don’t have cloud backup, there are two other methods you can refer to.
Method 2: Recover Files Lost After Cut and Paste With File History
On Windows, if you have enabled File History ahead of time, it can be an effective way to recover data lost during cut-paste operation. It periodically saves copies of your files, so even if the file disappears during the process, you may still be able to find the previous version.
Step 1: Type Control Panel in the Windows search box and press Enter.
Step 2: Change the view to Large icons or Small icons from the View by drop-down box.
Step 3: Click on Restore personal files, and then select the files you want to restore and click on the green button.

If your Windows does not have this feature enabled, you may need to try other recovery methods.
Method 3: Recover Files Lost After Cut and Paste Using CMD
If a disk anomaly or file system error causes the file to suddenly disappear during the cutting process, you can consider using the CMD to repair the file system and check whether the file has been accidentally hidden.
Step 1: Type Command Prompt in the Windows search box, and press the Shift + Ctrl + Enter keys to open this utility as an administrator.
Step 2: When the UAC window pops up, click on Yes to continue.
Step 3: Type chkdsk G: /f in the window and press Enter to check the file system. G should be replaced by the drive letter of your drive.

Step 4: When the process ends, type attrib -h -r -s /s /d G:\*.* and press Enter. Likewise, replace G with your actual drive letter.
When the process is completed, go check if lost files are recovered. If not, you need to try the following resort.

Option 2: Recover Files Lost After Cut and Paste With Data Recovery Software
If Windows tools cannot help you recover lost files, then you need to use professional data recovery software. Not sure which one to choose? Here is a recommended option.
MiniTool Power Data Recovery is a good choice to recover files lost during the cut and paste process, mainly because it can deeply scan the disk and recover deleted or lost files even if they are not visible in ordinary file managers.
Whether files are lost during cut-and-paste due to human error or disk or File Explorer issues, you can use this MiniTool recovery tool to restore them. It is good at SD card recovery, hard drive recovery, USB flash recovery, etc.
This free file recovery software has a simple interface, and you can quickly find lost files without complicated operations. It supports recovering 1 GB of files for free. Now, download and install it on your computer to do a data recovery.
MiniTool Power Data Recovery FreeClick to Download100%Clean & Safe
Step 1: Launch the MiniTool Power Data Recovery software and enter the main interface. Under the Logical Drives section, all the lost partitions, deleted partitions, and existing partitions are listed. You need to find the target drive and click on Scan. Furthermore, you can go to the Devices tab, which displays all the devices that connect to your computer. Click on Scan on the target device to start scanning.

Step 2: How long the scan takes depends on many factors. For better scanning results, you need to wait patiently for the process to complete. When it ends, you should locate the target files. How to find them? This tool provides several features. You can choose which one to use according to your needs.
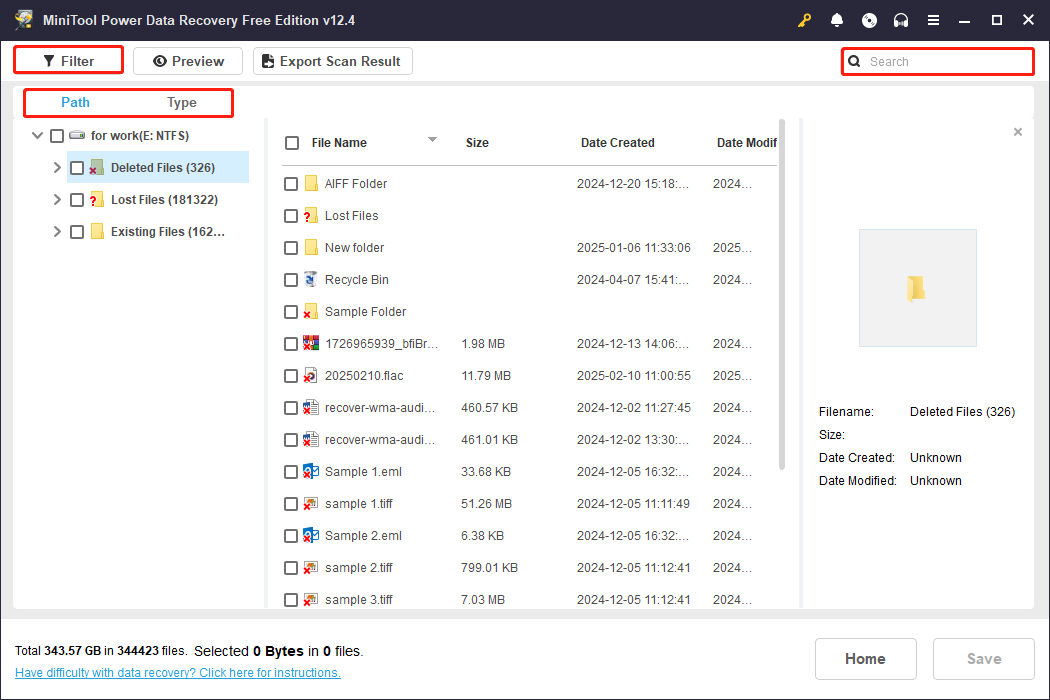
- Path: At the end of the scan, the files will be arranged by their paths under the Path tab. It helps you find and recover data according to the original storage path of the file.
- Type: It can sort scan results by file type, making it easier for you to find specific types of files. To be specific, the scan results are classified by categories such as documents, pictures, videos, audio, etc.
- Filter: This feature is capable of classifying files according to file type, file size, modified date, and file category. You can set all filter criteria at once.
- Search: The Search feature is designed to help you quickly find specific files. If you remember the name of the file or some keywords, you can search for it directly by typing the name and pressing Enter.
Step 3: This tool provides a Preview feature that allows you to check the file content before saving. This practice can improve the recovery accuracy, avoiding the recovery of the wrong files. Select the file you need to check and click on the Preview button, or just double-click on the target file to confirm it.
Step 4: After confirming, you have to tick all the files you need and click on Save. The last thing is to choose a new location to store the recovered files and then click on OK to start the recovery process.


Tips to Protect Important Files
After recovering lost files, you still have one thing to do: take some measures to prevent your files from being lost in the future. Here are some specific suggestions you can refer to.
- Use “Copy” instead of “Cut”: Avoid cutting files directly. It is recommended to copy (Ctrl + C) the file to the target location first, confirm that the paste is successful, and then delete the original file. This can keep the file safe.
- Ensure that the target storage device is in good condition: If the paste target is an external storage device, such as a USB flash drive or mobile storage media, check the device status and whether the connection is stable to avoid interruption of file transfer.
- Turn off unnecessary background processes when transferring. In Task Manager, temporarily turn off processes that affect system stability. Sometimes, software or antivirus software running in the background may interfere with the cut and paste operation, resulting in file loss.
- Back up files regularly: Enable File History to let Windows automatically save historical versions of files. Use cloud storage, such as OneDrive or Google Drive, to ensure that files are synchronized. Alternatively, you can use MiniTool ShadowMaker to automatically back up your data on a regular basis, eliminating the need for manual backups.
MiniTool ShadowMaker TrialClick to Download100%Clean & Safe
To Sum Up
Although it may be frustrating to lose files during the cut and paste process, it does not mean that they cannot be recovered. With the help of MiniTool Power Data Recovery, the success rate of recovering files can be increased.
However, you should know that prevention is more important than recovery. Preferring copy and paste over cut and paste, or backing up files before performing any important cut-and-paste operations, are effective protective measures.
If you encounter any problems with MiniTool products, please contact us via [email protected].
About The Author

Position: Columnist
Chelsea graduated from university with a major in English. She has a strong interest in English writing. It is this passion for writing that led her to become an English editor. Her articles mainly foucus on data recovery and other computer industry news. As an energetic and outgoing girl, Chelsea enjoys listening to music, singing, riding bikes, and eating in her spare time.
User Comments :