Scenario: HDD/SSD Shows Up in BIOS but Not Windows
Hello, I have a hard drive that is only showing up in BIOS, and is nowhere to be found in Windows, not in Disk Management and not in Device Manager. I have it plugged into the first SATA port on my Asus ROG Strix B-560 A Gaming WiFi Motherboard if that matters. If anyone who might know how to fix this please do.www.reddit.com
A hard drive, also known as a hard disk drive (HDD), is a physical data storage device that can be used to store various types of data, including operating systems, applications, documents, music, videos, and photos. However, sometimes you may find that the HDD/SSD shows up in BIOS but not Windows. This problem prevents you from accessing and managing data on it. Here are several ways to help you fix the issue.

Common Causes of HDD/SSD Not Showing Up in Windows
When you discover that HDD is detected in BIOS but not Windows, you may want to know the possible causes. Here are some factors you can refer to.
- The hard disk may not be initialized, allocated, or assigned a drive letter.
- The hard disk driver may be damaged or not installed correctly.
- The file system is damaged or incompatible, causing Windows to not recognize it.
- The hard disk mode setting in the BIOS may be incorrect.
Recover Data From Unrecognized Hard Drive in Advance
Before fixing the problem of “hard drive shows up in BIOS but not Windows”, it is recommended to recover data from the unrecognized disk first if the files inside are important. Data recovery should be familiar to you nowadays. However, there may be some confusion and entanglement in choosing recovery tools. Now that you’ve read this far, I would like to recommend you a powerful, easy-to-use and affordable hard drive recovery software, MiniTool Power Data Recovery Free.
MiniTool Power Data Recovery is not only able to recover deleted and lost files, but also can recover existing files from unrecognized hard drives. Moreover, as a highly compatible recovery tool, it is compatible with multiple file systems such as NTFS, FAT32, exFAT, etc., and supports restoring data from inaccessible SD cards, USB flash drives, and more. It also offers a new user benefit of restoring 1 GB of files for free. After learning about this tool, it’s time to recover data from unrecognized hard drive.
Step 1: Connect the disk to your computer and click on the following button to download MiniTool Power Data Recovery software.
MiniTool Power Data Recovery FreeClick to Download100%Clean & Safe
Step 2: Launch the software and scan the partition or disk in the main interface.
The Logical Drives tab comes into your sight by default. This section includes all the existing, lost, and deleted partitions. Next to it, the Devices tab contains all the disks connected to your computer. There are two options you can choose.
- The first is to scan the partition where the important data are stored. To do so, you are expected to move your cursor to the targeted partition under the Logical Drives tab and click on Scan to scan for data.
- The other is to scan the whole disk one time. To do so, you are supposed to put your cursor to your disk under the Devices tab and click on Scan in the end to start scanning.

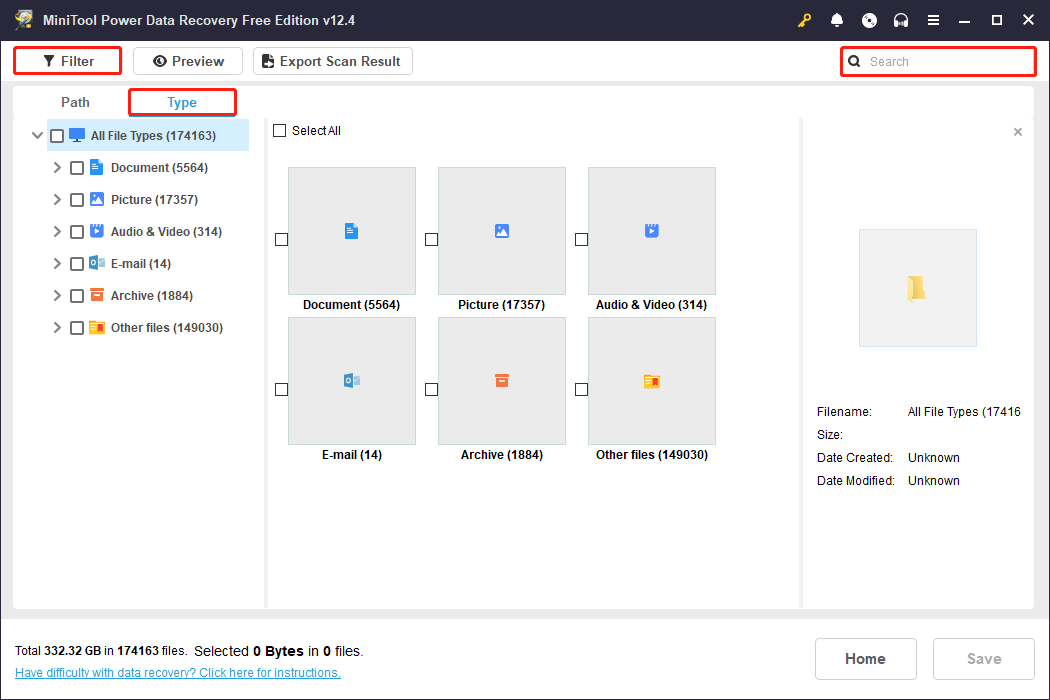
Step 3: Find the required files using various features.
The scanning process will take some time. To obtain the best outcomes, it is best to wait patiently for it to complete. Once it ends, all the files are listed by their paths under the Path tab, which may take some time to navigate to desired files. To enhance user experience, the recovery tool provides several features on the scan results page to help locate specific files more efficiently.
- Type: As you can tell from the name of this feature, it classifies files into types including documents, audio, videos, pictures, and more.
- Filter: Compared with Type, it can further narrow down the file scope. With four classification criteria – file type, file size, file category, and file modification date – this feature allows you to set filter conditions based on your needs.
- Search: Compared with the first two features, this one is more targeted. What you need to do is type the keywords of the file name in the search box and press Enter to filter out unnecessary files.
Step 4: Preview the file to check its accuracy using the Preview feature.
After all the target files are displayed, you can preview them before saving them to avoid wasting free recovery capacity. Double-click on the file or select it and click on the Preview button.
Step 5: Save the selected files to a new location.
After confirming the files, select them all and click on the Save button. In the directory window, you have to choose a new place for the recovered files. Finally, click on the OK button to get started.
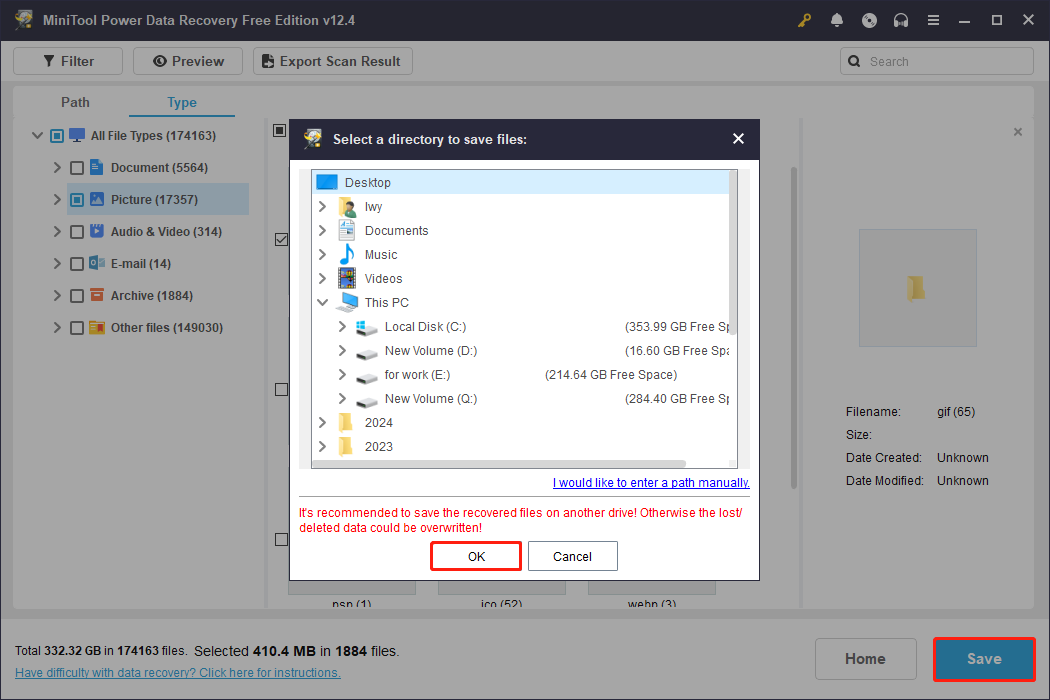
When the Recovery Completes window shows up, you can close the window and go to the selected directory to check if files are here.
How to Fix Hard Drive Shows Up in BIOS but Not Windows
When the data is recovered successfully, let me show you how to fix the problem of “hard drive shows up in BIOS but not Windows”.
Way 1: Switch the BIOS Mode to AHCI (For M.2 SSD)
If this issue occurs with an M.2 SSD that uses the SATA protocol and the BIOS is set to IDE or RAID mode, switching to AHCI may allow Windows to recognize the SSD.
MiniTool ShadowMaker TrialClick to Download100%Clean & Safe
Step 1: Right-click on the Start icon and choose Run to open the Run dialog.
Step 2: Type msconfig in the box and press Enter.
Step 3: Go to the Boot tab, tick the Safe boot option, and click on OK > Restart.
Step 4: Press the F2 key during boot to enter the system BIOS.
Step 5: Under the Main tab, select SATA Mode and switch to AHCI.
Step 6: Finally, hit the F10 key to save and exit.
Way 2: Check if the Drive Is Enabled
The disk is not showing up on Windows, probably because it has been disabled in Device Manager. In this case, you need to enable it to make it accessible again.
Step 1: Right-click on the Start icon and choose Device Manager.
Step 2: Click on the small arrow in front of Disk drives to expand it.
Step 3: Find and right-click on the drive to see if it is disabled. If it is, click on Enable device to enable it.
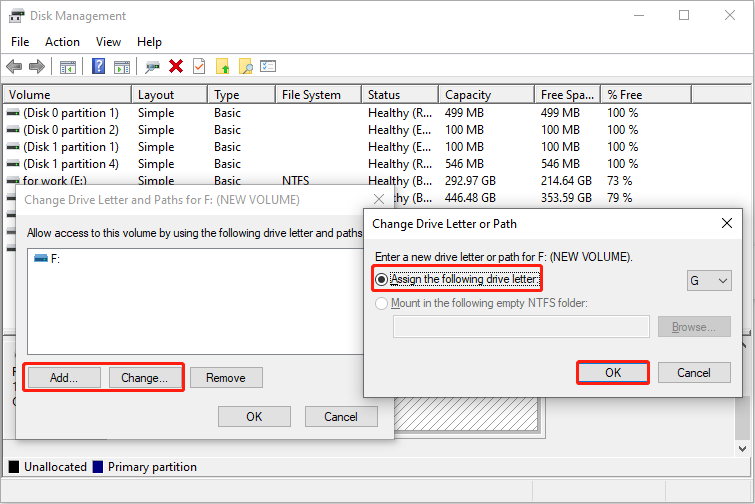
Way 3: Assign or Change Drive Letter
If the hard drive is not assigned a drive letter or the drive letter is the same as another partition, Windows will not be able to recognize the drive and eventually cannot display it. The drive letter is an identifier used by the system to identify and manage the drive. Therefore, you need to assign or change the drive letter of the hard drive.
Step 1: Right-click on the Start button and choose Disk Management.
Step 2: Find and right-click on the hard drive to choose Change Drive Letter and Paths.
Step 3: There are two options you can choose based on your situation:
- If the hard drive has no drive letter, click on Add to add one.
- If the hard drive has one drive letter that is the same as another partition, click on Change to change one.
Step 4: Select Assign the following drive letter and choose a letter from the drop-down menu.
Step 5: Finally, click on OK > Yes to confirm the change.
Way 4: Initialize and Partition the Hard Drive
If the hard drive has no partition table, this problem will occur. The drive needs to be initialized before use to determine the partition table type (MBR or GPT) so that Windows can recognize the disk structure. After initialization, the disk space needs to be allocated as partitions and formatted to determine the file system and drive letter so that it can be recognized by Windows. Here is how you can do it.
Step 1: Press the Win + X keys and choose Disk Management.
Step 2: Right-click on the drive and select Initialize Disk.

Step 3: In the new window, you will see two partition styles: MBR and GPT. Choose one according to your needs and click on OK.
After initializing, you need to partition the drive.
Step 1: Right-click on the unallocated space and choose New Simple Volume.
Step 2: Click on Next to choose a drive letter and then click on Next to go to the next page.
Step 3: Under the Format with this volume with the following settings section, choose the file system, allocation unit size, and volume label. Then click on Next > Finish.
Way 5: Rebuild MBR of the Hard Drive
When the hard drive shows up in BIOS but not Windows, it may be because the Master Boot Record (MBR) is damaged or missing. The MBR is a critical data structure on the hard drive that contains partition information and boot code. When the Disk Operating System reads the hard drive, the MBR will help check whether the partition is legal and locate the partition boot information. When the MBR is damaged, follow the steps below to rebuild it to fix the problem of “hard drive shows up in BIOS but not Windows”.
Step 1: Type Command Prompt in the Windows search bar and press the Ctrl + Shift + Enter keys to open the utility with administrator privileges.
Step 2: Input the command bootrec /fixmbr and press Enter to repair MBR.
Step 3: Input the following commands and press Enter after each one to repair the boot record:
- bootrec /fixboot
- bootrec /scanos
- bootrec /rebuildbcd
Way 6: Update the Disk Driver
The disk driver affects the status of the disk. If it has problems, the disk will also be affected. You can update the disk driver to maintain optimal system performance, fix errors, and improve the disk’s compatibility with Windows. Work with the following steps.
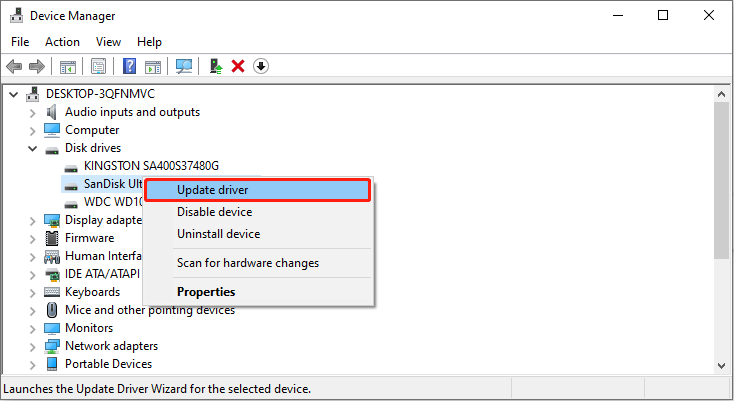
Step 1: Type Device Manager in the Windows search box and press Enter.
Step 2: Find and double-click on the Disk drives to expand it.
Step 3: Right-click on your drive and choose Update driver.
Step 4: In the new window, click on Search automatically for drivers to detect the new updates.
When the process ends, follow the on-screen instructions to complete the driver update.
Way 7: Format the Hard Drive
If the problem still exists, formatting the hard drive can be your last straw, which can resolve persistent problems or errors that cannot be resolved by other methods. Formatting creates the necessary file system structures that the operating system needs to manage and access the data on the drive.
Use Disk Management
Step 1: Open the Disk Management and right-click on the drive to choose Format.
Step 2: Type a new volume label, and choose the file system and allocation unit size.
Step 3: Check the Perform a quick format option and click on OK to start formatting.
Use MiniTool Partition Wizard
If Disk Management fails to format the drive, you may need a professional tool to complete the task. MiniTool Partition Wizard has the ability to manage disks and perform various disk management tasks, including formatting drives. Here are the steps.
Step 1: Download MiniTool Partition Wizard software by clicking on the green button.
MiniTool Partition Wizard FreeClick to Download100%Clean & Safe
Step 2: Launch the software, select the drive, and click on Format Partition under Partition Management.
Step 3: Fill in the partition label and choose the file system and cluster size.
Step 4: Click on OK to return to the main interface. Click on Apply > Yes to apply the formatting.
Final Thoughts
When the problem of “hard drive shows up in BIOS but not Windows” occurs, following the above methods one by one can usually solve it. If it is still not solved, it’s recommended to contact a professional technician for further inspection.
It is worth mentioning that you need to do a recovery from unrecognized drive first. This practice can avoid subsequent data loss and ensure data security. Don’t forget to use MiniTool Power Data Recovery to help you achieve this effect easily.
MiniTool Power Data Recovery FreeClick to Download100%Clean & Safe
Please feel free to contact us for any MiniTool product questions via [email protected].
About The Author

Position: Columnist
Chelsea graduated from university with a major in English. She has a strong interest in English writing. It is this passion for writing that led her to become an English editor. Her articles mainly foucus on data recovery and other computer industry news. As an energetic and outgoing girl, Chelsea enjoys listening to music, singing, riding bikes, and eating in her spare time.
User Comments :