“D drive is not accessible” is an annoying issue that prevents you from accessing files stored on the D drive or transferring new files to that drive. Now this tutorial will walk you through the exact steps to recover files from the inaccessible D drive with MiniTool Power Data Recovery and disk repair solutions. Keep reading to get detailed instructions.
The first unassigned partition connected to the computer is usually assigned as the D drive. This drive is generally used to store personal files or install applications such as games and plays an important role in the use of your computer. However, sometimes the “D drive is not accessible” error message may pop up, indicating that you cannot access the D drive.
This error may appear in a variety of scenarios. For example, you may receive the pop-up message immediately after starting your computer, when attempting to access the files on the D drive, or when transferring new data to the D drive. Typically, the “D drive is not accessible” error doesn’t appear in isolation but comes with other related errors. Listed below are the common error messages.
D Drive Is Not Accessible: Common Error Messages & Reasons
D Drive Is Not Accessible Access Is Denied
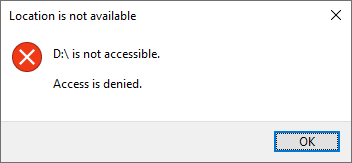
“D drive is not accessible access is denied” is the one that appears most frequently. There are many reasons for this error, ranging from disk permission issues, file system corruption, physical disk damage, etc. To be specific:
- When there are multiple user accounts on your computer, the currently used one does not have sufficient permissions to access files or folders on the D drive.
- The file system of the D drive is corrupted or damaged. This could stem from various causes, including incorrect disk formatting, virus infection, and so on.
- There are bad sectors in the D drive that prevent you from accessing the disk.
- The disk where the D drive is located is physically damaged.
- …
Other Errors
In addition to the access denied error, you may receive the following messages:
- D drive is not accessible. The parameter is incorrect.
- D drive is not accessible. The device is not ready.
- D drive is not accessible. The disk structure is corrupted and unreadable.
- D drive is not accessible. The file or directory is corrupted and unreadable.
The causes of these errors are similar to those mentioned above, usually involving unstable disk connection, outdated or damaged disk driver, damaged disk partition table, damaged file system, bad sectors, damaged files or directories, insufficient user permissions, etc.
Faced with the inaccessible D drive, you can attempt the following methods to restore it to normal. These methods typically won’t lead to file loss or further disk damage.
Basic Troubleshooting Steps You Can Try
Way 1. Check the Connection
When the error is simply due to an incorrect connection, reconnecting the disk to your computer usually can solve the problem. Note that if you are not professional enough to complete this operation, it is recommended to seek professional help.
- Completely shut down the computer and disconnect the power supply.
- Open the computer case or the back cover of the laptop.
- Find the hard disk where the D partition is located and check whether the interfaces are firmly connected. You can try to remove the disk and then reconnect it firmly.
- Close the computer case or back cover and plug in the power supply. After that, turn on the computer and check if the D drive can be used normally.
Way 2. Get Disk Permission
If the current computer user does not have sufficient permissions to access files or folders on the D drive, you can obtain permissions by following the steps below.
Step 1. Open File Explorer, go to the This PC section, right-click the D drive, and choose Properties.
Step 2. Go to the Security tab, and then click Advanced.
Step 3. In the new window, click Change. When a small window pops up, type Everyone in the text box, and click OK.

Step 4. Save the changes in each window, and then check if you can access the D drive.
Watch the video below for a quick tutorial:
Way 3. Update the Disk Driver
Updating the disk driver is the best approach when the D drive access problem is related to an outdated or corrupted driver. Here are the operation steps.
Step 1. Right-click the Start button and choose Device Manager.
Step 2. Expand the Disk drives category.
Step 3. Right-click your disk where the D drive is located and choose Update driver. Then follow the instructions on your computer to complete the update process.

How to Recover Files From Inaccessible D Drive Immediately
If the above methods fail to restore the D drive to normal, I suggest you recover your data quickly and then apply advanced repair methods. How can you recover files from inaccessible D drive? MiniTool Power Data Recovery, the best free data recovery software, can play a huge role.
Why Should You Choose MiniTool Power Data Recovery?
MiniTool Power Data Recovery is superior to other secure data recovery services mainly for the following reasons:
- It excels at dealing with various disk inaccessible or file loss situations, including hard drive not accessible, disk showing as RAW, hard drive partitions lost, disk accidentally formatted, and so on. This file restore tool can easily find not only deleted or lost files but also existing files.
- It has strong compatibility with file systems and disk types. Specifically, it supports recovering files from HDDs, SSDs, external hard disks, USB flash drives, SD cards, CD/DVDs, etc. with the FAT12, FAT16, FAT32, exFAT, NTFS, and other file systems.
- It is capable of recovering all kinds of data, such as documents, photos, videos, emails, audio files, and more.
- It won’t bring any damage to the original inaccessible files and D drive during the disk scanning and file recovery process.
- It has clear interfaces and easy operations so that you can recover files effortlessly and quickly. Moreover, this tool can help you recover up to 1 GB of files for free.
Now, click the button below to download MiniTool Power Data Recovery. Then launch it and start file recovery.
MiniTool Power Data Recovery FreeClick to Download100%Clean & Safe
How to Recover Files From Inaccessible D Drive With MiniTool Power Data Recovery?
Step 1. Select the D drive to scan.
On the main interface of this MiniTool file restore tool, you can see all your disk partitions by default. Find the inaccessible D drive according to the drive letter and storage space. Then hover over your mouse cursor to the D drive and click Scan. After that, the disk scanning process will start immediately.

Step 2. Find and preview the files.
When the full scan finishes automatically, the deleted, lost, and existing files on the D drive are listed in a tree structure under Path by default. There is a high probability that you can expand the corresponding folder and directly restore an entire folder with the original file structure. Alternatively, you can switch to the Type category and view your files by file type or even file format.


Moreover, there are two other useful features you can use to simplify the file discovery process.
- Filter: This option is located in the top left corner. After clicking it, you will have options to filter out unwanted files by file type, file size, file modification date, and file category.
- Search: The search box is located in the upper right corner. You can search for a certain file/folder by typing its file name and pressing Enter. Be sure to save the required files directly from the search results window. If you go back to the scan results window, the search results will be cleared.

Step 3. Tick and save the wanted files.
Finally, make sure all the files are ticked, and then click the Save button. Afterward, you will be asked to select a location to store the recovered files. Just select a drive separate from the D drive and click OK to start recovering the ticked items.
When finished, you can go to the selected directory to view the recovered data or directly click the View Recovered button in the software interface to use the saved items.
How to Fix Inaccessible D Drive for Further Use
In the following part, I will guide you to repair the disk so that you can use it in the future.
Method 1. Repair Corrupted File System
Here are two ways you can use to check and repair file system errors that cause the problem of “D drive is not accessible”.
Way 1. Use CHKDSK
CHKDSK is a command line tool built into the Windows operating system that is used to check and repair file system errors on internal or external disks. Follow the steps below to complete this task.
Step 1. Type cmd in the Windows search box in the taskbar. When the Command Prompt option appears, click Run as administrator under it.
Step 2. In the UAC window, select the Yes option to continue.
Step 3. Type chkdsk /f /x D: in the command line window and press Enter. Then the CHKDSK tool will start to examine the file system structure and then repair it. Wait for the whole process to end, and then check if the D drive works great.
Way 2. Utilize MiniTool Partition Wizard
Suppose you encounter any errors or problems during the file system repair process with CHKDSK, you can use MiniTool Partition Wizard to do this job. This professional and free partition manager can help repair file system errors effectively.
Step 1. Click the button below to download MiniTool Partition Wizard. Then launch it to enter its home page.
MiniTool Partition Wizard FreeClick to Download100%Clean & Safe
Step 2. Select the D drive, scroll down the left menu bar, and then choose the Check File System option. In the pop-up window, choose the Check & fix detected errors option, and click Start.


Method 2. Format the D Drive
If the above two tools cannot repair the file system, it may mean that the file system is seriously damaged. In this case, formatting the partition may be the best option as it will remove all files on the disk, initialize the hard drive, and recreate a new file system.
You can format the D drive from File Explorer:
- In the This PC section, right-click the D drive and choose Format.
- Set up the volume label, file system, and other partition information, tick the Quick Format option, and click Start.
- Hit OK in the new window to confirm and wait until the process ends.
If any error occurs during this process, you can use MiniTool Partition Wizard to format the D drive for free.
MiniTool Partition Wizard FreeClick to Download100%Clean & Safe
On the main interface of this partition manager, select the D partition and choose the Format Partition feature from the left panel. Next, specify the partition label, file system, and cluster size for the D partition and click OK. Finally, preview the format effect, and click Apply in the lower left corner if you are satisfied.

Bonus Time: How to Back up D Drive/Files
When faced with disk errors such as “D drive is not accessible”, the repair process is complicated and time-consuming, and may even lead to deeper disk damage or data loss. In addition, if the disk is physically damaged, it is almost impossible to recover the data on it. Therefore, it is important to back up the disk or the important files on it regularly when the disk is running well.
Regarding file or partition backup, you can use MiniTool ShadowMaker, the best Windows backup software. It is good at backing up files, folders, partitions, disks, and Windows systems daily, weekly, monthly, or when you log on or log off. Moreover, it provides you with multiple backup schemes, including full backup, incremental backup, and differential backup, to meet different needs.
You can get its trial edition installed, and use it for free within 30 days.
MiniTool ShadowMaker TrialClick to Download100%Clean & Safe
Related Posts:
Bottom Line
Several easy and efficient solutions to “D drive is not accessible Windows 11/10” are outlined above. You can try them out to restore your D partition to normal use. It is worth emphasizing that before performing operations that may cause file loss, be sure to use MiniTool Power Data Recovery to recover your data first to avoid irreversible data loss.
If you encounter any problems with MiniTool software or have any questions about them, please feel free to contact [email protected] for help.
About The Author

Position: Columnist
Shirley holds a bachelor’s degree in English and has been an editor at the MiniTool Team for many years. She specializes in IT-related content, with a focus on data recovery, file backup, disk management, and other technical topics. She is committed to delivering clear, accurate, and practical solutions to help users resolve common computer issues.
User Comments :