The stop code bad pool caller is typically caused by corrupted drivers, damaged system files, or incompatible software. To fix it, try updating the device drivers, uninstalling incompatible programs, or repairing system files. To prevent data loss, use data recovery software to rescue your files without booting Windows.
The bad pool caller BSOD may appear when gaming or after restarting your computer, preventing the system from loading the desktop.
This BSOD error can occur frequently and significantly impact your computer’s normal operation. In the most severe cases, your PC may get stuck in a bad pool caller loop and fail to boot into Windows.
First, begin exploring why this blue screen error occurs on your computer.
Common Causes for the Bad Pool Caller BSOD
The bad pool caller stop code often appears due to the following reasons:
- Corrupted or incompatible drivers. Outdated or damaged device drivers, especially storage controller and network drivers, are the most common causes of the error.
- Damaged system files. Missing or corrupted critical system files or components can result in the blue screen error.
- Problematic system updates. Recent Windows updates, particularly those with faulty drivers, can trigger this stop code.
- Incompatible programs. Recently installed software, especially VPN software, may be the culprit of the problem.
- Overheating. Overheating hardware components can also cause the error.
No matter the cause, secure data recovery is the most important step when encountering a BSOD.
Before BSOD Repair: Rescue Files From Your Computer
If you can still access your files, back them up immediately to secure them. If you cannot boot into Windows, rescue your files from the Windows Recovery Environment (WinRE) or Windows Preinstallation Environment (WinPE).
Method 1. Employ MiniTool Power Data Recovery
To recover files without booting into Windows, use MiniTool Power Data Recovery.
MiniTool Power Data Recovery FreeClick to Download100%Clean & Safe
As a professional file recovery tool, it offers a Bootable Media Builder feature, which allows you to create a bootable recovery drive to access your files.
With the bootable disk, you can recover any type of file from your internal HDD or SSD without needing to load File Explorer.
Follow the steps below to recover your files:
Procedure 1. Create a boot drive.
Step 1. Make sure the USB drive is properly connected to the working computer.
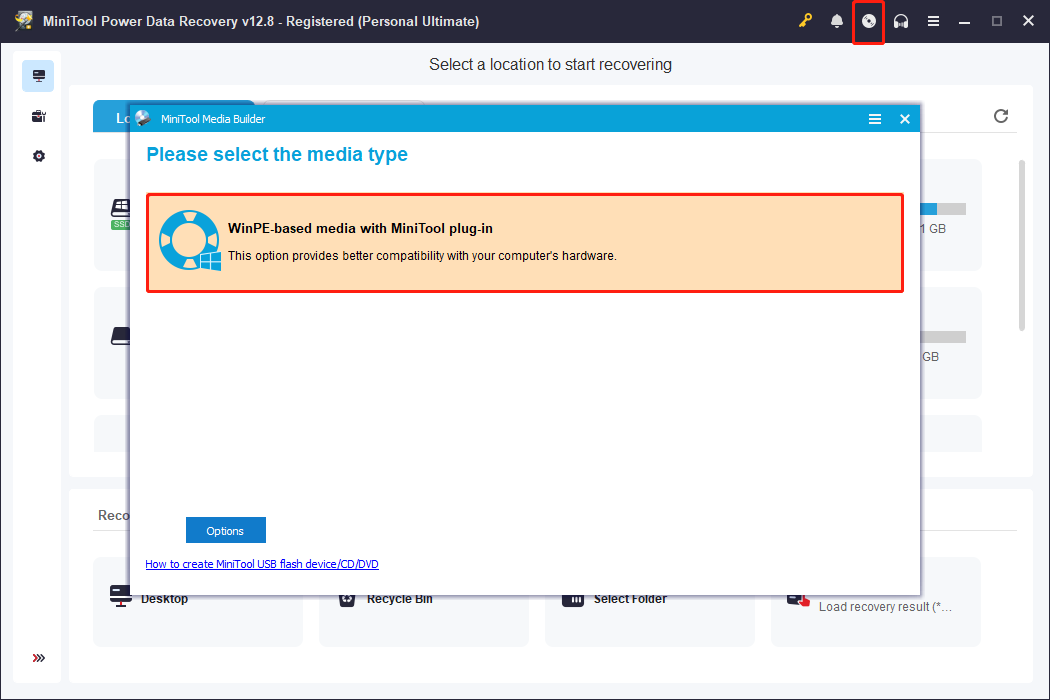
Step 2. Launch MiniTool Power Data Recovery Bootable to enter its main interface, then click Bootable Media Builder.
Step 3. In the new window, click WinPE-based media with MiniTool plug-in and follow the on-screen prompts to burn the USB drive.
Procedure 2. Boot from the burned drive.
Step 1. Plug the burned USB drive into the non-functioning computer.
Step 2. Restart the computer. During startup, press the designated key for BIOS, such as F8, F12, Del, or Esc, to enter the BIOS interface.
Step 3. Navigate to the Boot tab and select the USB drive as the primary boot option. Then press F10 to save the change and boot from the USB device.
Step 4. Follow the on-screen prompts to launch MiniTool Power Data Recovery.
Procedure 3. Recover files.
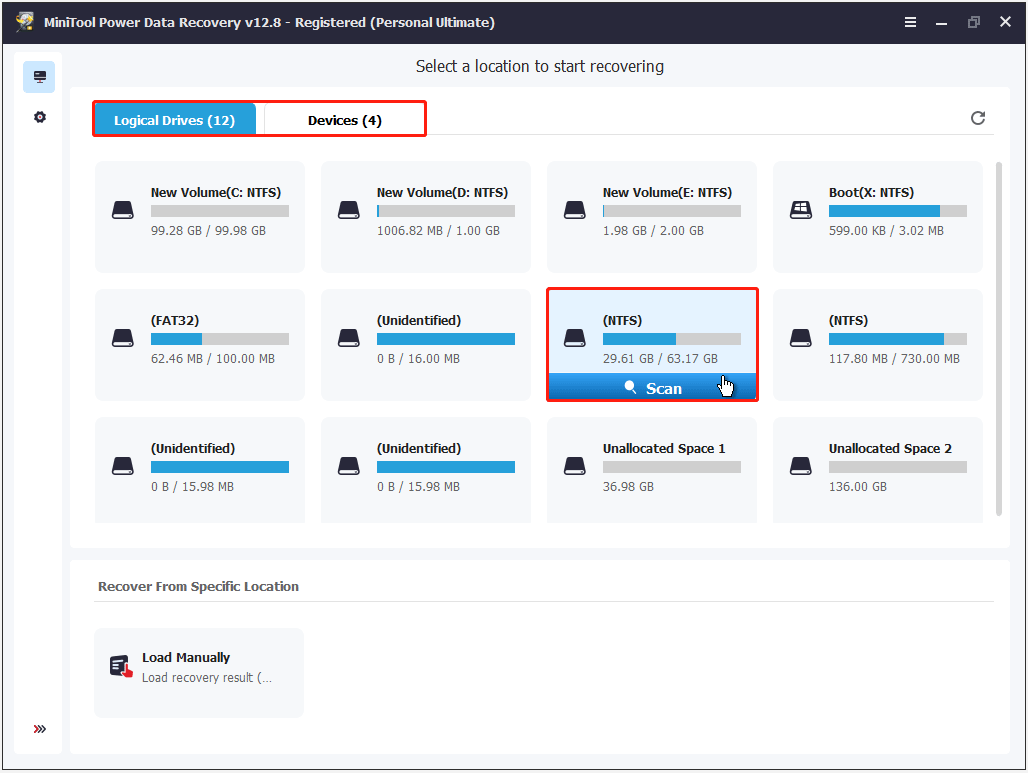
Step 1. On the main interface of the MiniTool recovery software, select the partition (under Logical Drives) or disk (under Devices) from which you need to recover files and click Scan.
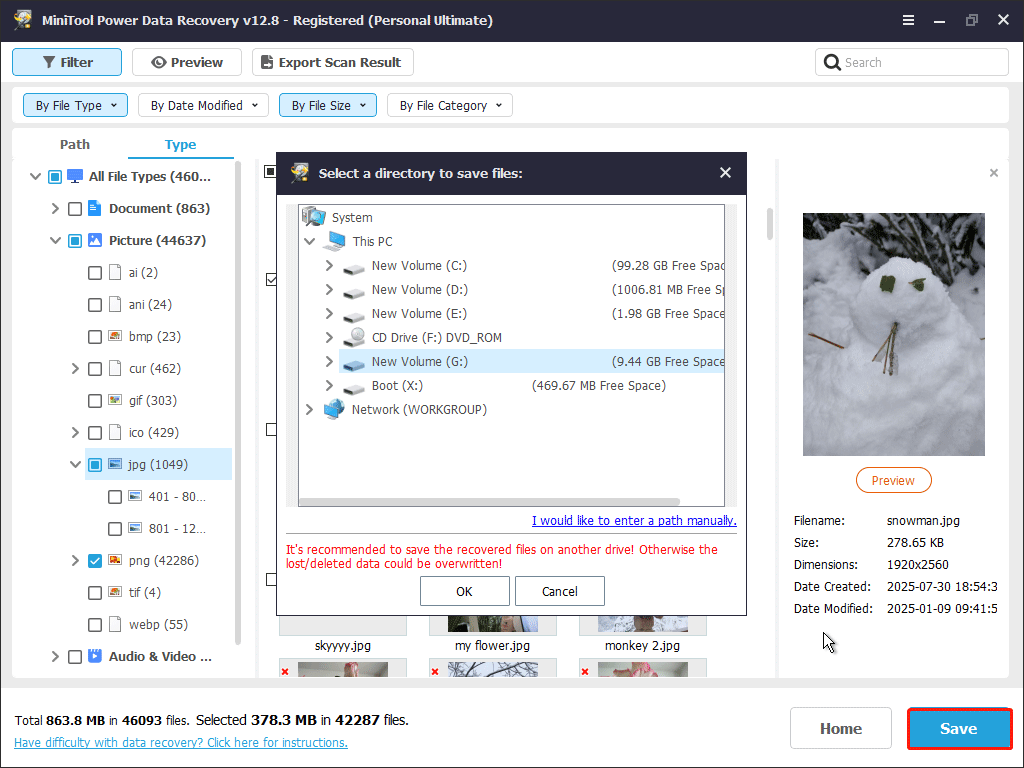
Step 2. Once the scan is completed, browse the found files by path or type and check the files you want to recover.
To locate the desired files faster, use the Filter or Search feature. Filter allows you to filter files based on file type, size, modification date, and category. Search enables you to search for a certain file by using a partial or complete file name.
Step 3. After confirming all the wanted files are selected, click Save and choose a removable drive to store the selected files.
Method 2. Use Notepad
If you do not want to install third-party software, try transferring your files from WinRE by using the Notepad tool.
Follow the steps below to perform free data recovery:
Step 1. Turn on your computer. When the Windows logo or manufacturer logo appears, press and hold the Power button to shut down the PC.
Repeat the steps twice. On the third restart, your computer should enter WinRE.
Step 2. Click Troubleshoot > Advanced options > Command Prompt.
Step 3. Type notepad and press Enter.
Step 4. When Notepad opens, click File > Open > This PC.
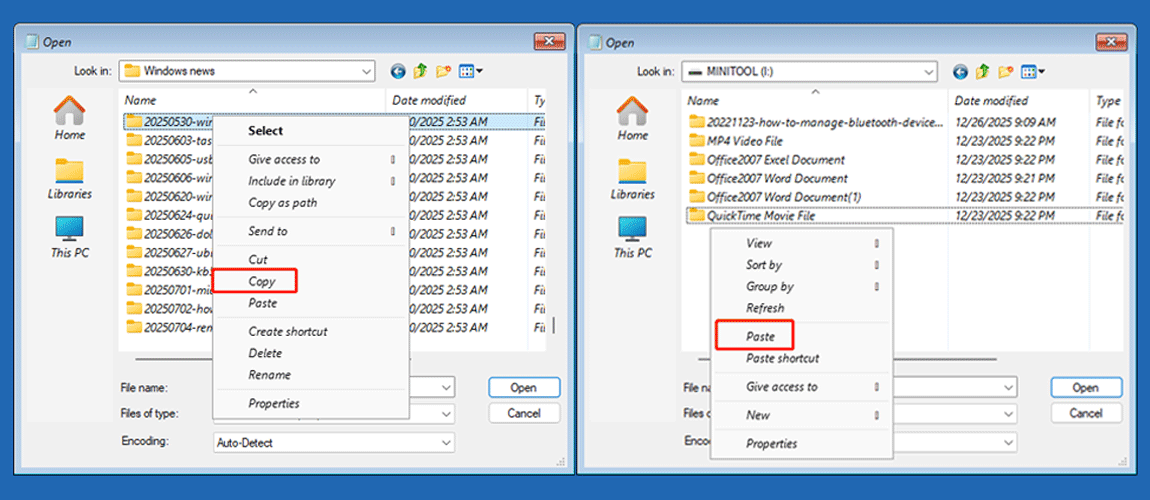
Step 5. Access the target drive and right-click the files you want to transfer and click Copy.
Step 6. Open the removable drive, right-click a blank area, and click Paste.
Once your files are safe, start troubleshooting the bad pool caller stop code to restore the normal function of your computer.

How to Fix Bad Pool Caller Windows 11/10
Resolving this BSOD error may involve cooling the computer, updating device drivers, or uninstalling problematic system updates.
In some cases, reseating the RAM sticks, performing a System Restore, or resetting the PC may also be necessary.
The detailed solutions are described below.
Method 1. Check for Hardware Overheating
High temperatures in computer hardware can cause performance issues and startup failures. To rule out this possibility, check whether the power supply is positioned improperly, which may lead to overheating.
In addition, verify that the cooling fans are functioning properly and that airflow is not obstructed. After the computer has cooled down, check whether the error persists.
Method 2. Run WinDbg
WinDbg is a powerful debugging tool developed by Microsoft. It can read and analyze dump files generated when Windows crashes and help identify which driver, software, or hardware may be causing the BSOD.
Based on the analysis results, you can determine whether a driver should be updated or whether certain software should be removed.
Follow the steps below to run WinDbg.
Step 1. Download and install WinDbg from the Microsoft Store, and then launch it as an administrator.
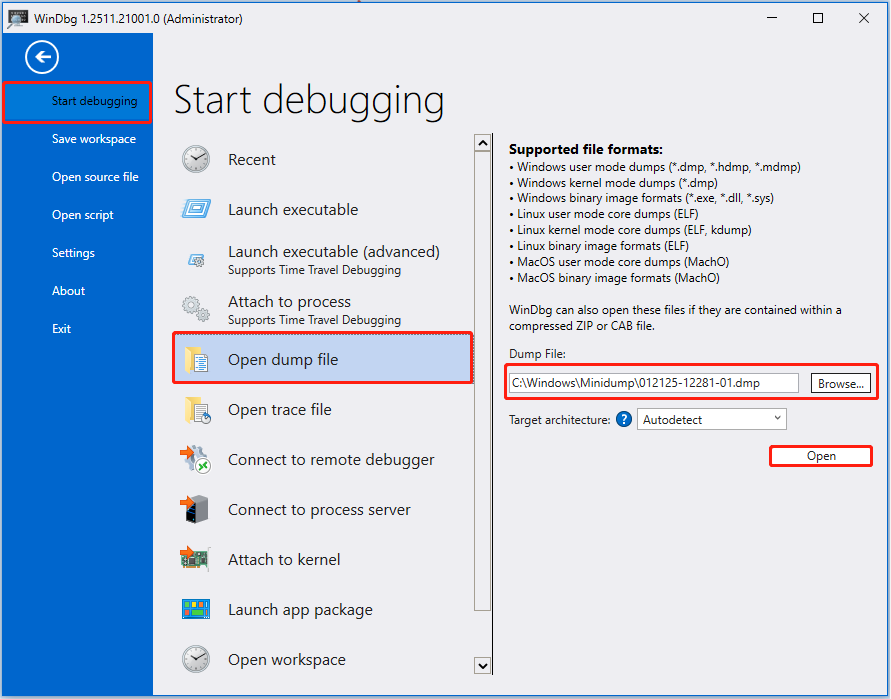
Step 2. In WinDbg, click File > Start debugging > Open dump file.
In the right panel, click Browse to select the dump file generated during the blue screen crash from the Minidump folder.
Step 3. Click Open to start debugging the selected crash dump file.
Step 4. After the process is completed, input !analyze -v in the command box and press Enter to obtain detailed analysis results.
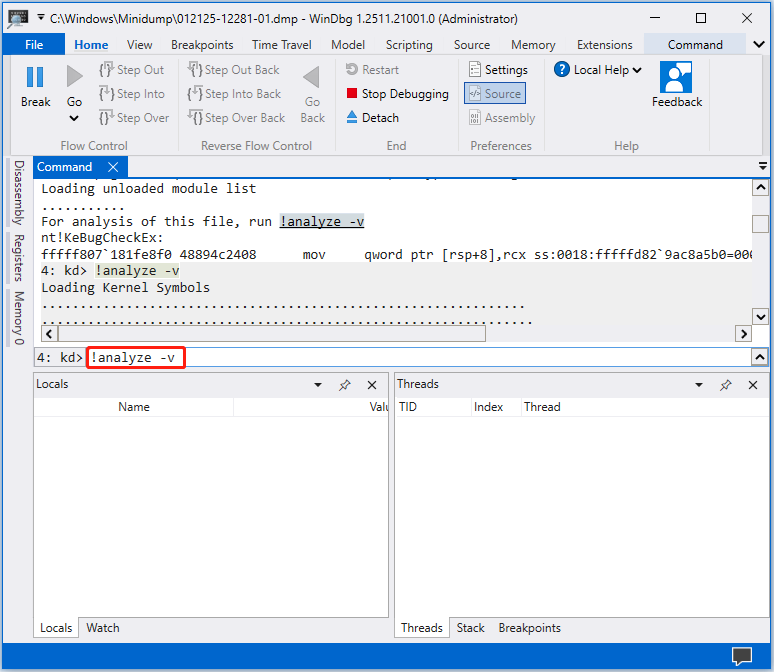
Step 5. Review the Bugcheck Analysis section to determine whether the tool identifies the cause of the BSOD.
If the root cause is clearly identified, take the appropriate action. For example, if the analysis indicates that the issue is related to rcbottom.sys, update the AMD StoreMI storage controller driver.
If the underlying reason cannot be determined, proceed with the following methods one by one to resolve the issue.

Method 3. Update the Storage Controller Driver
An incompatible or faulty AMD StoreMI storage controller driver is a common cause of the bad pool caller error. To resolve this issue, follow the steps below to update the driver.
Step 1. Right-click the Start button and choose Device Manager.
Step 2. Expand the Storage controller category.
Step 3. Look for StoreMI, RAID, or a similar option, right-click it, and choose Update driver.
Step 4. Select Browse my computer for drivers.
Step 5. Select Let me pick from a list of available drivers on my computer.
Step 6. Choose a driver with “Standard AHCI” in its name and click Next.
Step 7. Restart your PC and verify if the bad pool caller error disappears.
In addition, you can repeat the steps to update drivers of other computer devices.
Method 4. Uninstall Windows Updates
Sometimes, the error starts occurring after a Windows update is installed. This usually indicates that the update is the culprit. In this case, uninstalling that update can often resolve the error.
Follow the instructions below to uninstall Windows updates.
Uninstall an update in Windows 10:
Step 1. Press Windows + I to open Settings.
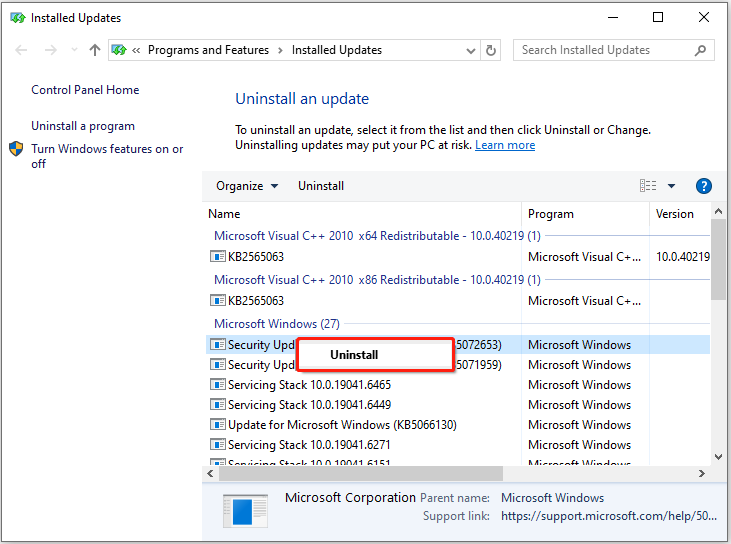
Step 2. Click Update & Security > View update history > Uninstall updates.
Step 3. Right-click the target update and click Uninstall.
Uninstall an update in Windows 11:
Step 1. Open Settings and click Windows Update > Update history > Uninstall updates.
Step 2. Click Uninstall next to the target update.
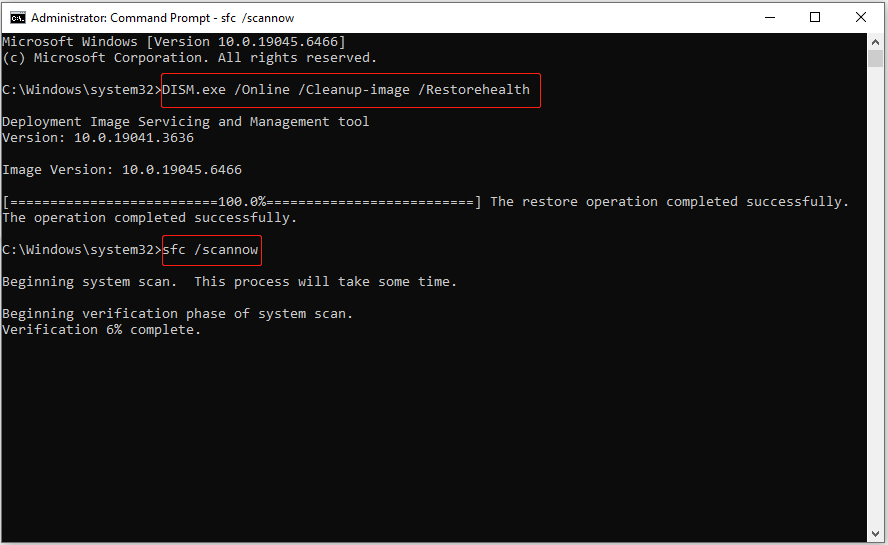
Method 5. Run DISM, SFC, and CHKDSK
When the blue screen error is caused by corrupted or missing system files, run the DISM and SFC tools to repair them and restore damaged Windows components.
Follow the steps below.
Step 1. Type cmd in the Windows search box. When the Command Prompt option appears, right-click it and choose Run as administrator.
Step 2. Type DISM.exe /Online /Cleanup-image /Restorehealth and press Enter.
Step 3. Once DISM has been completed, type sfc /scannow and press Enter.
Furthermore, in some cases, file system corruption on the C drive can cause the problem. To address this, use the CHKDSK command to repair file system integrity and isolate bad sectors.
Step 1. In the administrative Command Prompt window, type chkdsk C: /f /r and press Enter.
- /f: Fix any errors it finds in the file system.
- /r: Locate bad sectors on the disk and recover readable information.
Step 2. Windows will prompt that CHKDSK cannot run because the volume is in use and will ask if you want to schedule a scan for the next restart. Type Y and press Enter.
Step 3. Restart your PC, and CHKDSK will run automatically.
If the blue screen is not caused by damaged system files or disk file system, proceed with the following approaches.

Method 6. Reseat the RAM Stick
Loose or improperly seated RAM modules can lead to memory errors and trigger a blue screen of death. Reseating the RAM sticks may help resolve the issue.
If you have additional RAM modules, try replacing the current ones to check whether the problem persists.
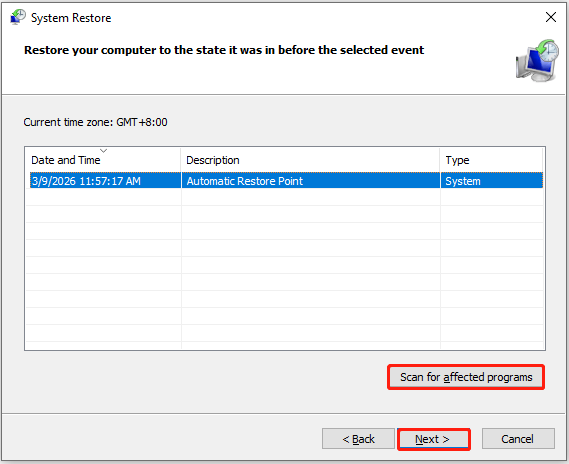
Method 7. Perform a System Restore
Sometimes, the bad pool caller error occurs after recent system changes, software updates, or driver installations. Performing a System Restore can revert the system to a previous restore point before these changes were made.
Step 1. Type Create a restore point in the Windows search box and press Enter.
Step 2. Click System Restore.
Step 3. Click Next.
Step 4. Select a restore point and click Next.
Step 5. Click Finish.
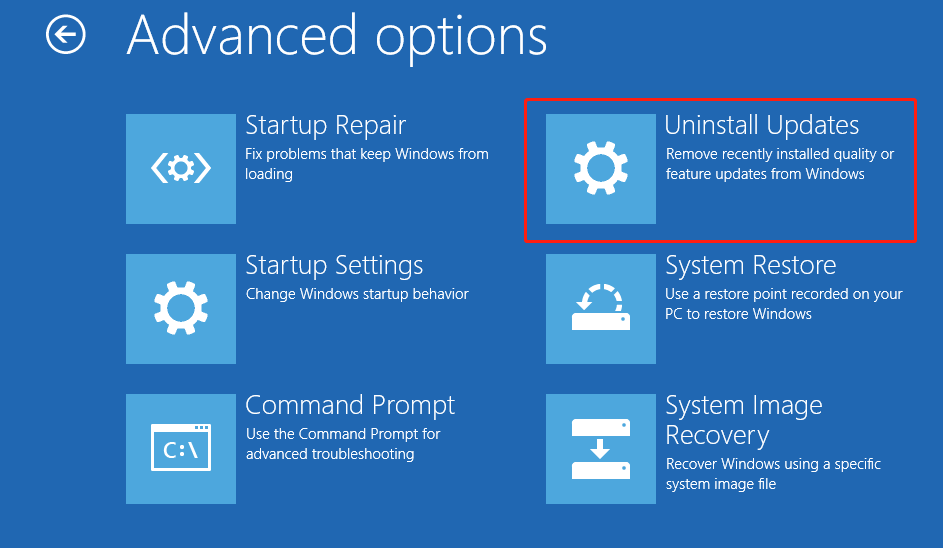
To perform a System Restore from WinRE, click Troubleshoot > Advanced options > System Restore.
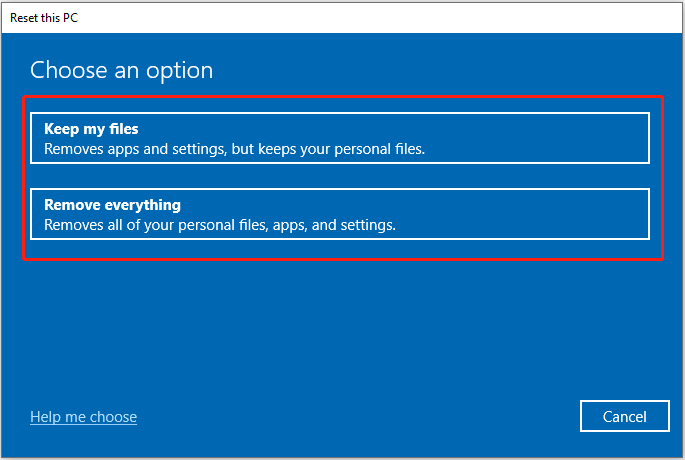
Method 8. Reset Windows
If none of the methods above resolve the bad pool caller stop code, consider performing a factory reset. This will restore your computer to its original state, either keeping or removing your personal files.
On Windows 10:
Step 1. Open Settings.
Step 2. Select Update & Security > Recovery. Under Reset this PC, click Get started.
Step 3. Select Keep my files or Remove everything, and follow the on-screen prompts to complete the reset.
On Windows 11:
Step 1. Open Settings.
Step 2. Select System > Recovery. Then click Reset PC next to Reset this PC.
Step 3. Choose to keep your files or remove everything on your computer. Then complete the reset process by following the instructions on your screen.
When Windows is not booting normally, enter WinRE and select Troubleshoot > Reset this PC.

Bottom Line
To sum up, if the bad pool caller blue screen occurs, check for overheating hardware, driver updates, or problematic system updates.
If none of these methods work, try repairing system files, reseating the RAM sticks, performing a System Restore, or resetting your PC.
To prevent data loss, use MiniTool Power Data Recovery or the Notepad tool to transfer files from the unbootable computer.
If you encounter any issues while using MiniTool products, please contact the support team at [email protected].
About The Author

Position: Columnist
Shirley holds a bachelor’s degree in English and has been an editor at the MiniTool Team for many years. She specializes in IT-related content, with a focus on data recovery, file backup, disk management, and other technical topics. She is committed to delivering clear, accurate, and practical solutions to help users resolve common computer issues.
User Comments :